Integrate Cincopa with Strapi
With the Cincopa Uploader plugin, editors can easily upload videos, images, and other media directly to Cincopa from within the Strapi interface and then associate these media files with their custom collection types.
For additional reference, you can also visit the Strapi Welcome Page.
- Prerequisites
- Install instructions for Strapi v5
- Authenticate Strapi with Strapi Cloud
- Install Cincopa Uploader Plugin
- Setup Configuration in Strapi
- Full Sync Mode
- Configure Webhook
- Understanding the Editor Layout
- What is the CIncopa Assest Collection?
- Upload Asset to Cincopa via Strapi
- How to Get Content using API
- Create an API Token
- Next Steps
Prerequisites
✅ A Cincopa API Token with "Full Access" permissions. Refer to the heading Create an API Token for the steps.
✅ Configure a Webhook within the Cincopa Dashboard to allow Strapi to receive notifications about upload progress.
✅ Node.js: Ensure you have Node.js installed on your system.
✅ npm: This comes with Node.js, so no need to install it separately.
✅ Yarn (optional but recommended): Yarn is an alternative package manager, and Strapi recommends it for faster performance. You can install it via npm by running:
npm install -g yarn
Install instructions for Strapi v5
This plugin is compatible with Strapi v5. Integrate Cincopa with Strapi using these steps:
Step 1. Create a new folder for your project. Open your terminal or command prompt and run the following commands to navigate to the folder:
For this demonstration, we are using Visual Studio Code, but you are free to use any code editor of your choice.
mkdir my-folder cd my-folder
Step 2. Run the following command to create a new Strapi project:
npx create-strapi@latest my-project
Replace my-project with the name you want to give your Strapi project. This command will automatically install Strapi and create a new project using the default settings.
Authenticate Strapi with Strapi Cloud
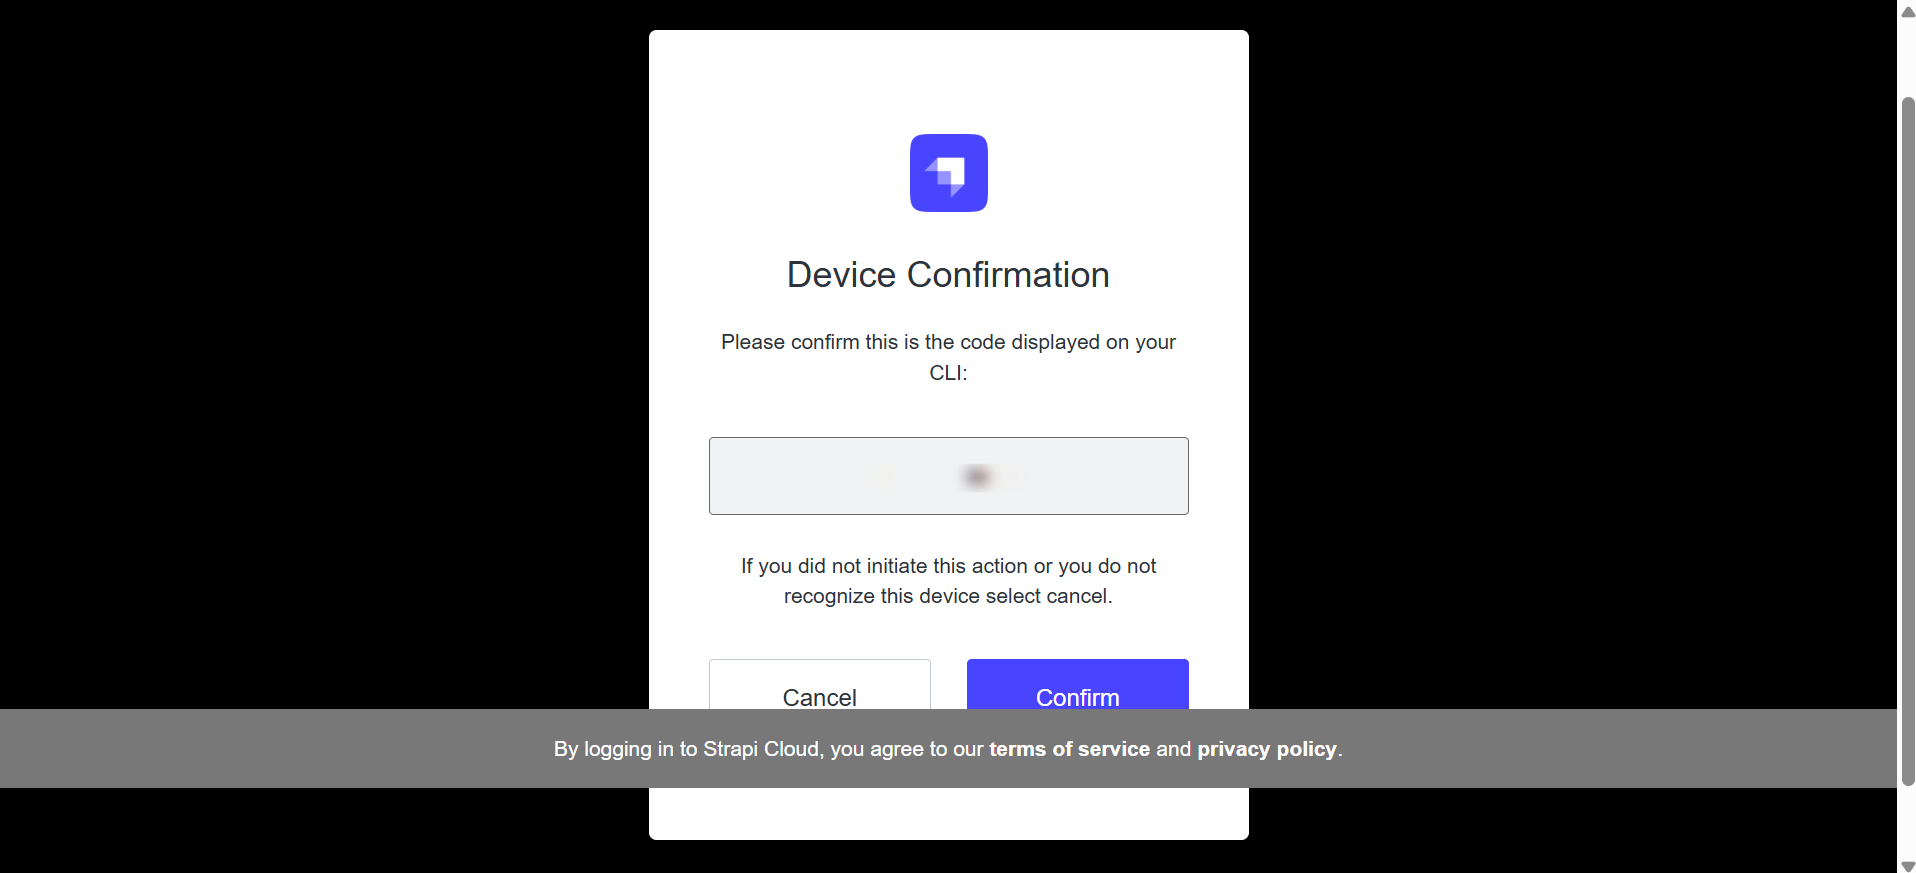
Step 1. Once the project is created, you'll be asked to confirm your device. Strapi will provide a unique code and a URL (e.g., https://auth.cloud.strapi.io/activate?user_code=XXXX-XXXX). Open this URL in your browser to Confirm your device.
Step 2. Now, the terminal will ask you whether you want to log Login or sign up to Strapi Cloud (and start using your free 14-day trial projects) or skip this step. Use the arrow keys and press Enter to make your choice. If you choose to skip this step, you will need to host the project yourself.
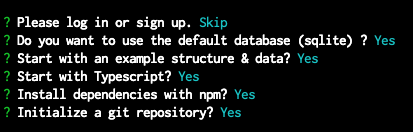
Step 3. The terminal will ask you a few questions. For each of them, if you press Enter instead of typing something, the default answer (Yes) will be used:
Log in or sign up: If you want to use Strapi Cloud for easy project management, log in or sign up. You can skip this if you don’t want to use Strapi Cloud.
Use default database (sqlite)?: This question asks whether you want to use SQLite as the default database. If you choose Yes, SQLite will be used. If you prefer a different database, choose No and specify the database you want to use.
Start with example data?: This option asks if you want to start with sample data and structure. If you choose Yes, Strapi will provide some pre-defined content types and data to help you get started. If you choose No, you will start with a blank Strapi project.
Start with TypeScript?: This question asks if you want to use TypeScript for your project. If you select Yes, your project will use TypeScript; if you prefer JavaScript, select No.
Install dependencies with npm?: This asks whether you want to install the project dependencies using npm. Choosing Yes is the standard option, as it ensures all required packages are installed for your project to run.
Initialize a git repository?: If you select Yes, Strapi will initialize a Git repository in your project directory. This is useful for version control and collaboration, allowing you to manage your project changes with Git.
After you choose the options, Strapi will finish the setup, install the required dependencies, and initialize the project. Once Strapi is set up, navigate to your project directory by running the following command in your terminal:
cd my-project
Replace my-project with the name of your project.
Install Cincopa Uploader Plugin
Now, install the Cincopa Uploader plugin by running the following command:
npm install strapi-plugin-cincopa-uploader@latest
Set up Configuration in Strapi
After installing the Cincopa Uploader Plugin in Strapi, configure it based on whether you selected TypeScript or JavaScript during Strapi installation. Edit the plugins.js (for JavaScript) or plugins.ts (for TypeScript) files, along with the .env file, to add your Cincopa API token and configure the plugin settings.
Step 1: Configure the Plugin
Once the Cincopa Uploader Plugin is installed, open the appropriate configuration file based on your setup:
For JavaScript, edit /config/plugins.js.
For TypeScript, edit /config/plugins.ts.
Step 2: Add the Configuration
In the selected configuration file, add the following code to configure the Cincopa Uploader plugin:
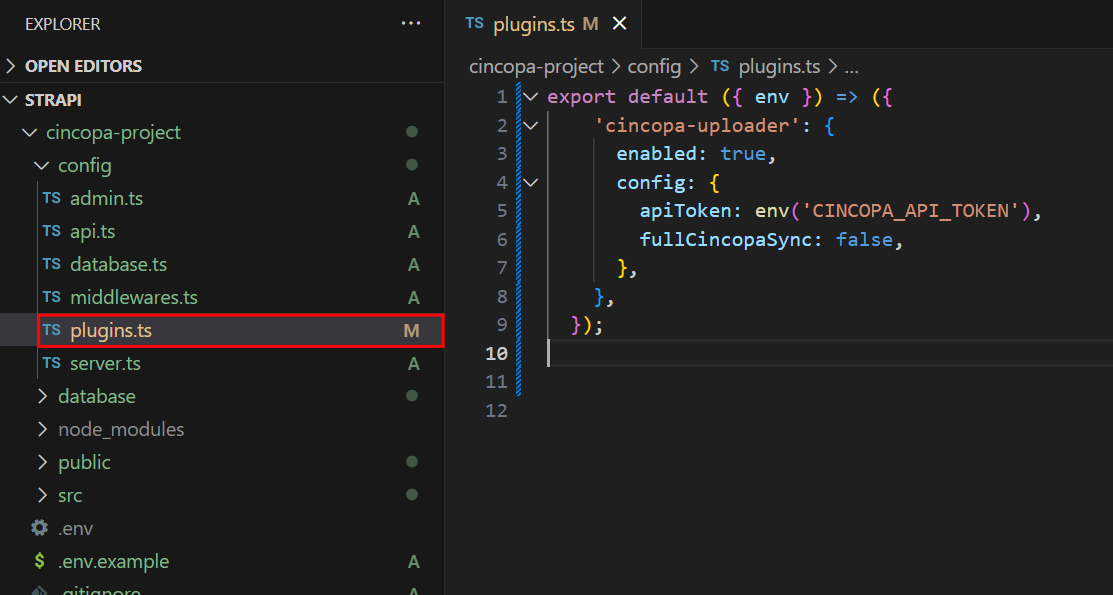
For TypeScript:
export default ({ env }) => ({
  'cincopa-uploader': {
    enabled: true,
    config: {
      apiToken: env('CINCOPA_API_TOKEN'),
      fullCincopaSync: false,
    },
  },
});
For JavaScript:
module.exports = ({ env }) => ({
  'cincopa-uploader': {
    enabled: true,
    config: {
      apiToken: env('CINCOPA_API_TOKEN'),
      fullCincopaSync: false,
    },
  },
});
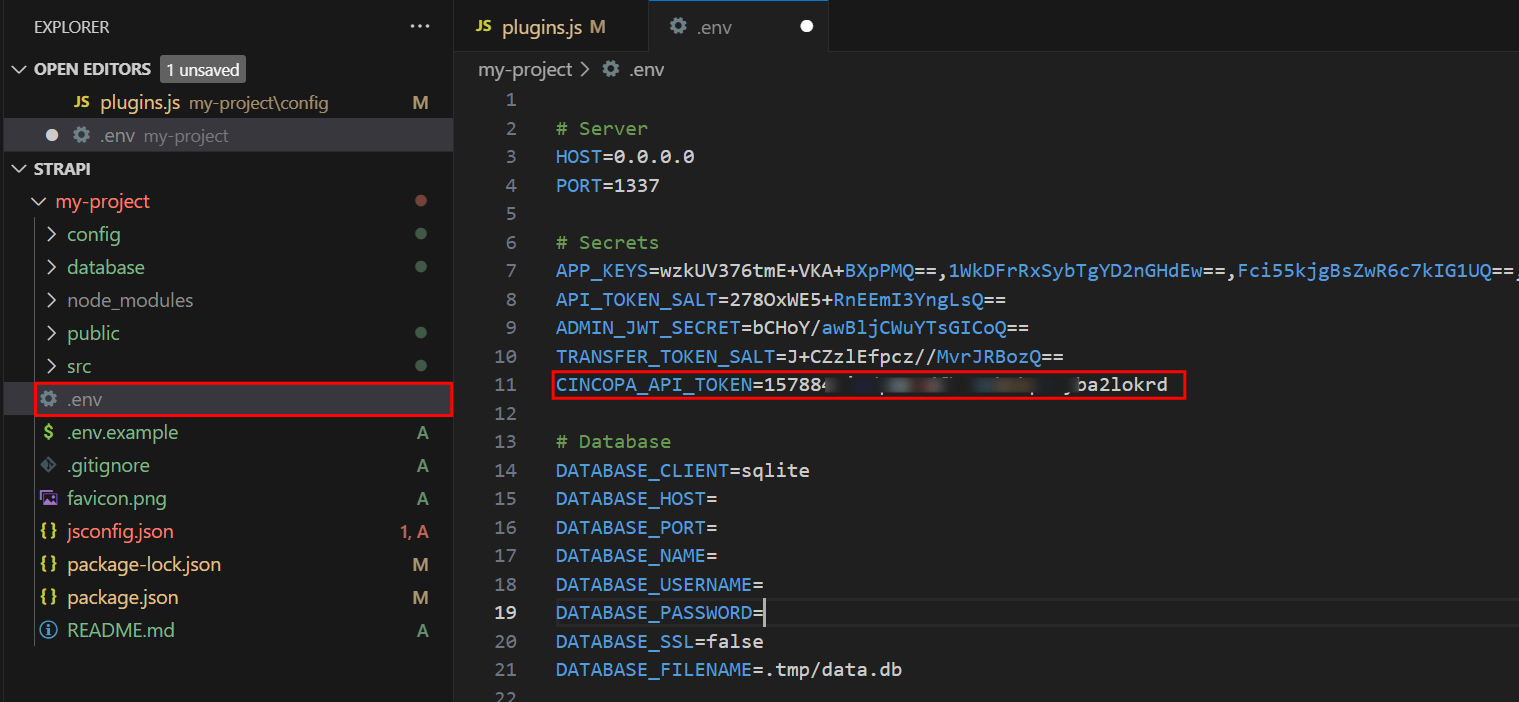
Step 3: Add your Cincopa API token to the .env file located in the root directory of your project and save it.
CINCOPA_API_TOKEN=your_actual_api_token_here
Replace your_actual_api_token_here with the real token you get from your Cincopa account.
For more information on how to generate an API Token, refer to the section “Create an API Token”.
Step 4: Save all your files, then restart the Strapi development server to apply the changes.
npm run develop
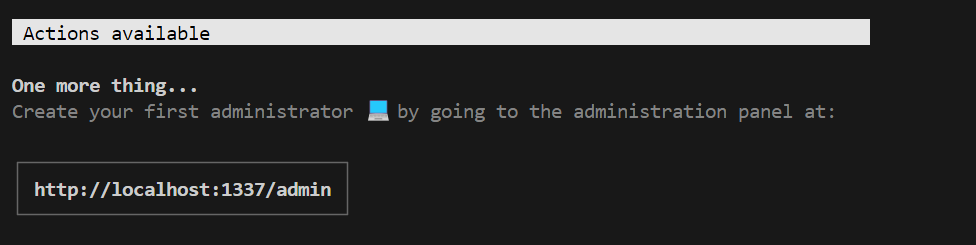
Once the server starts, access the admin panel by the provided link in your terminal to create your first administrator account and begin using Strapi. For example: “http://localhost:1337/admin”
Step 5: Fill out the form to create your admin account and access the Strapi Admin Panel for managing content and settings.

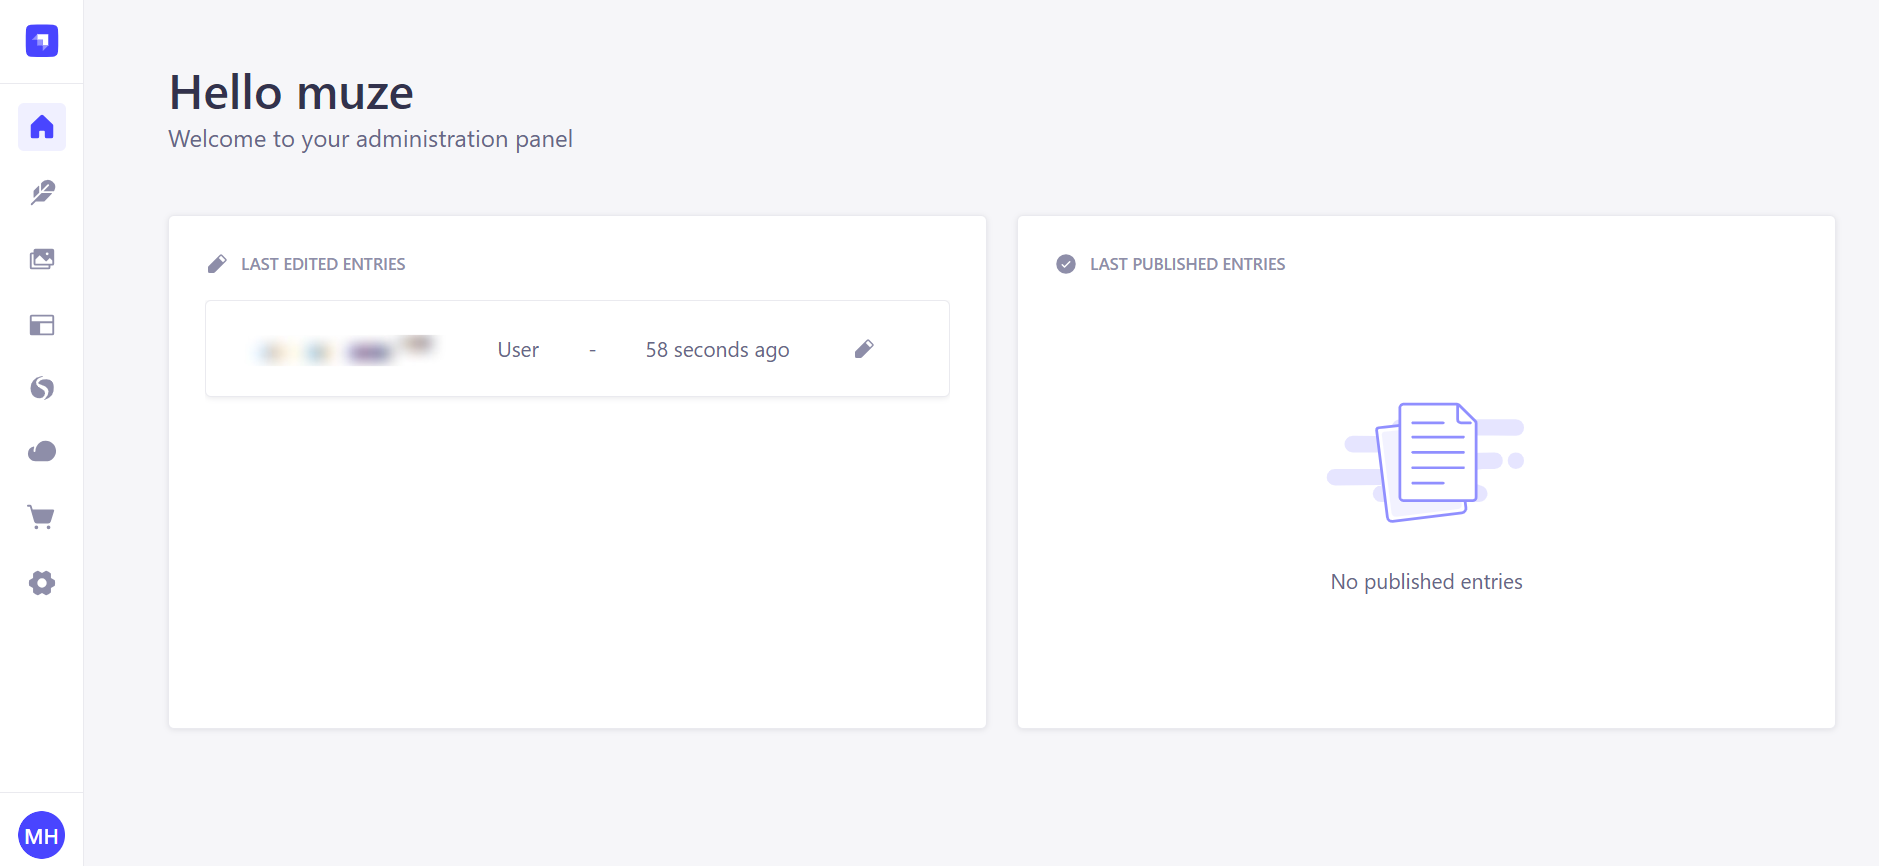
After creating your account, you'll be redirected to the homepage, confirming that your setup was successful.
Here, you'll be able to start managing your content, configure settings, and work with the media assets you’ve uploaded.
On the main page, you'll see an overview of your Strapi project and available content types, such as articles, posts, and media.
If you see the Dashboard page with no errors, it means the server is running successfully and you’re ready to begin working with your content and settings.
Full Sync Mode
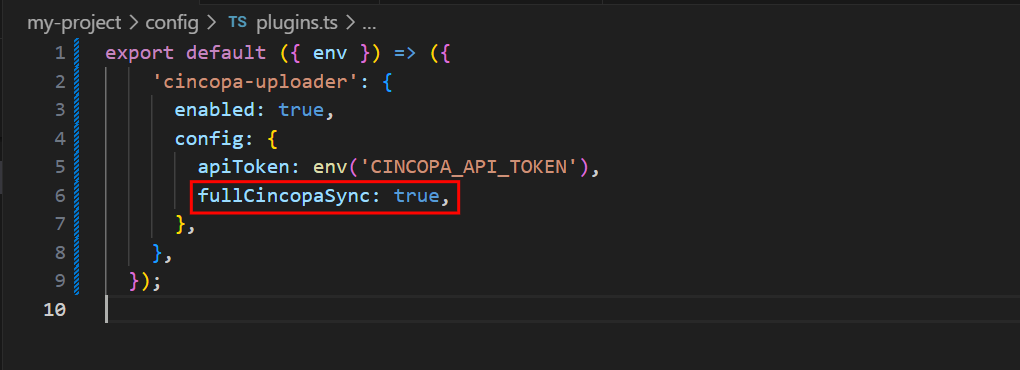
The Cincopa Uploader plugin provides a Full Sync Mode, which ensures that all assets from Cincopa are synced to Strapi. This mode is useful when you want to synchronize your Cincopa assets across multiple environments, ensuring everything is up-to-date.
To enable Full Sync Mode, modify the configuration in plugins.js or plugins.ts:
fullCincopaSync: true
This will synchronize all assets during upload, ensuring all metadata and related information are updated in Strapi.
Configure Webhook
To enable communication between Cincopa and Strapi, a Webhook needs to be configured to send events about the upload and processing completion. Follow these steps to set up the Webhook:
Webhook signature verification is currently disabled due to limitations in Koa (used by Strapi), which prevents access to the raw request body. This may be added in a future update.
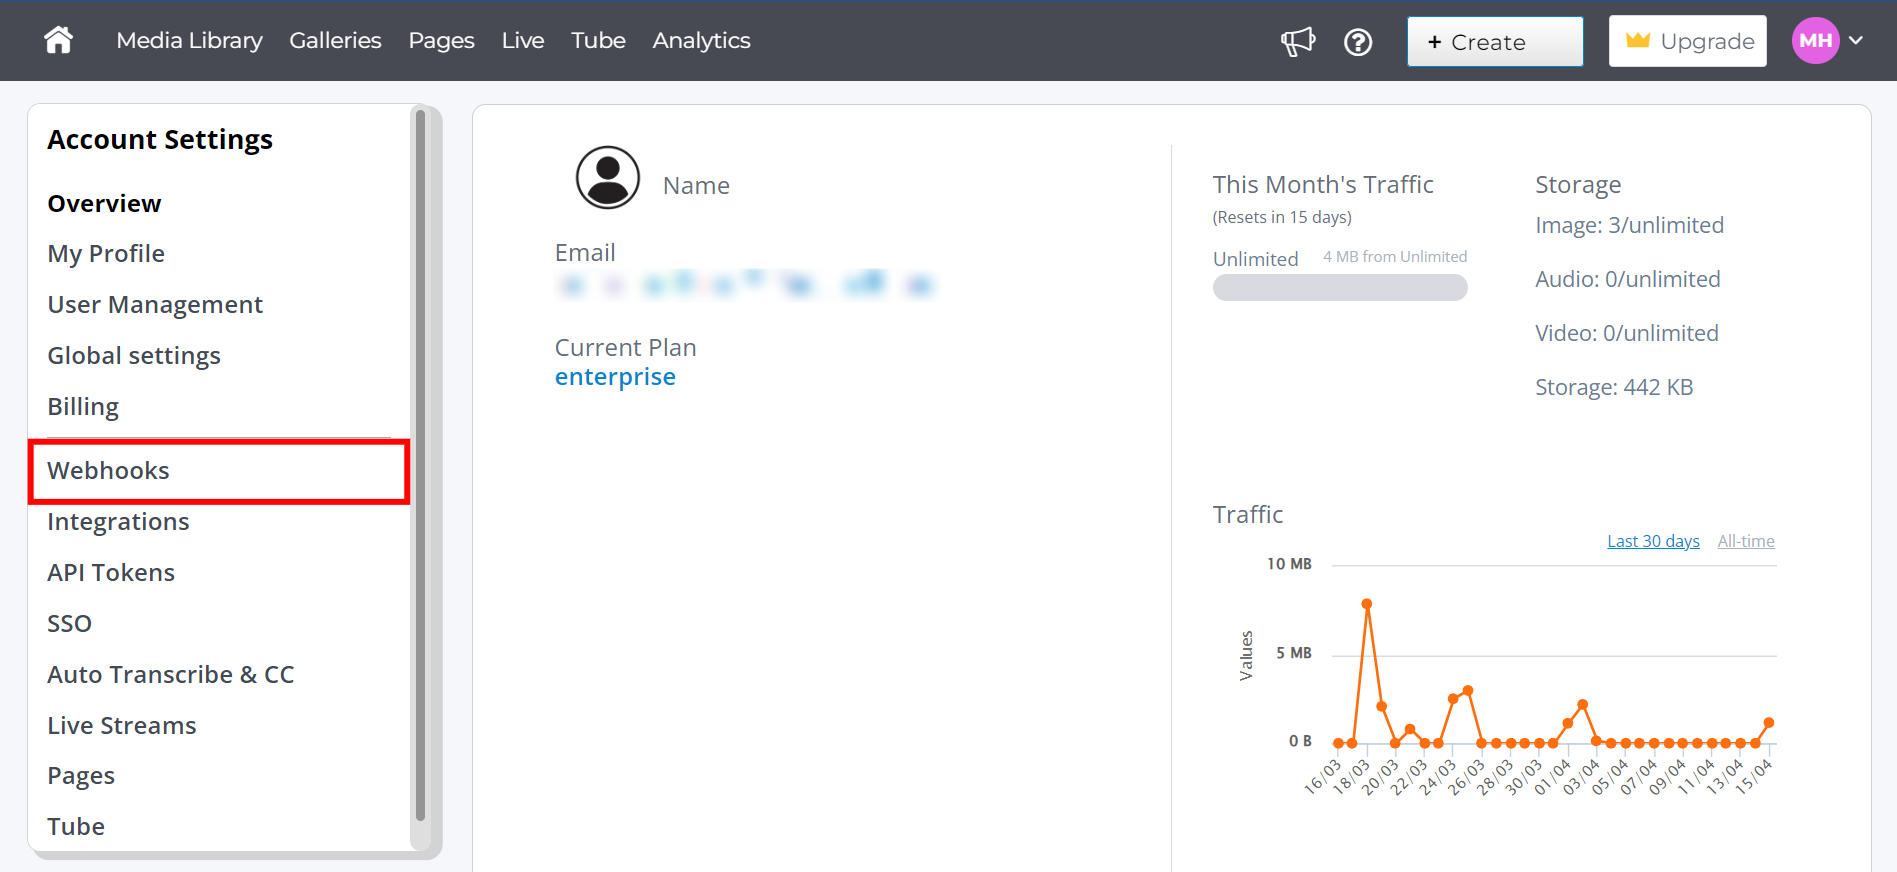
Step 1: Log in to your Cincopa account and navigate to the webhook section.
Step 2: Click on the “Create Webhook” button.
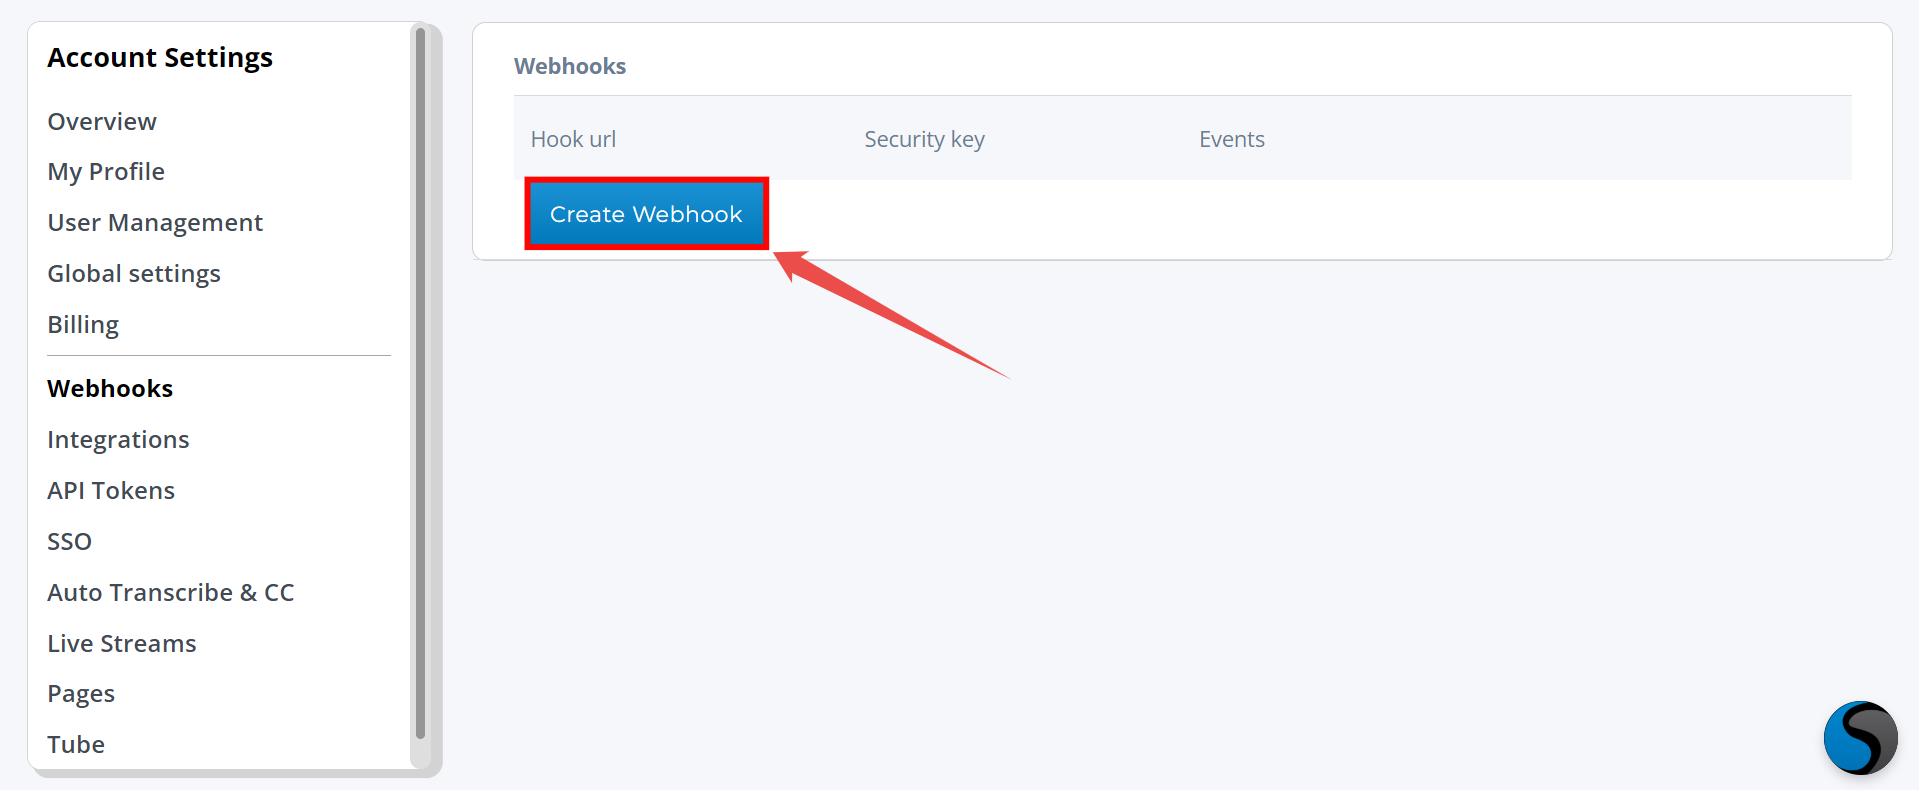
Step 3: When prompted, you'll be asked for the URL to notify. This URL should point to the endpoint where Cincopa will send updates about the upload and processing status. The format for the URL should be:
https://your-strapi-domain.com/api/cincopa-uploader/webhook
Replace your-strapi-domain.com with your actual, publicly accessible Strapi base URL.
After saving the configuration, copy the "Signing Secret," which will be used later for verification.
Testing Webhooks in Local Development
Webhooks won't work in local development because your environment doesn't have a publicly accessible URL. Without a webhook configured, the plugin will not function properly. To test the webhook while working locally, you can use a relay service to create a temporary public URL that Cincopa can communicate with.
To test the webhook while working locally, you can use a relay service like ngrok to create a temporary public URL that Cincopa can communicate with. Below are the steps to use ngrok for testing webhooks:
Step 1: Install ngrok
First, download and install ngrok from the official website. Follow the installation instructions based on your operating system.
Step 2: Start ngrok
Once installed, open your terminal and navigate to the directory where your Strapi project is located. Then, run the following command to create a secure tunnel to your local Strapi server (assuming it’s running on port 1337):
ngrok http 1337
This will generate a public URL, such as https://12345.ngrok.io, that forwards traffic to your local Strapi server.
Step 3: Configure the Cincopa Webhook
Log in to your Cincopa account and navigate to the Webhook Settings. In the webhook URL field, paste the ngrok-generated URL followed by the webhook endpoint path. The URL should look like this:
https://12345.ngrok.io/api/cincopa-uploader/webhook
Save the webhook configuration.
Step 4: Test the Webhook
With the ngrok tunnel running and the webhook URL configured in Cincopa, upload media to Cincopa. Cincopa will send webhook events to the ngrok URL, which will then forward them to your local Strapi server.
This will allow you to test and verify that the Cincopa plugin is functioning as expected in your local development environment.
Understanding the Editor Layout
In this section, we will explain the different areas of the editor interface. The editor consists of multiple sections that make content management intuitive and user-friendly.
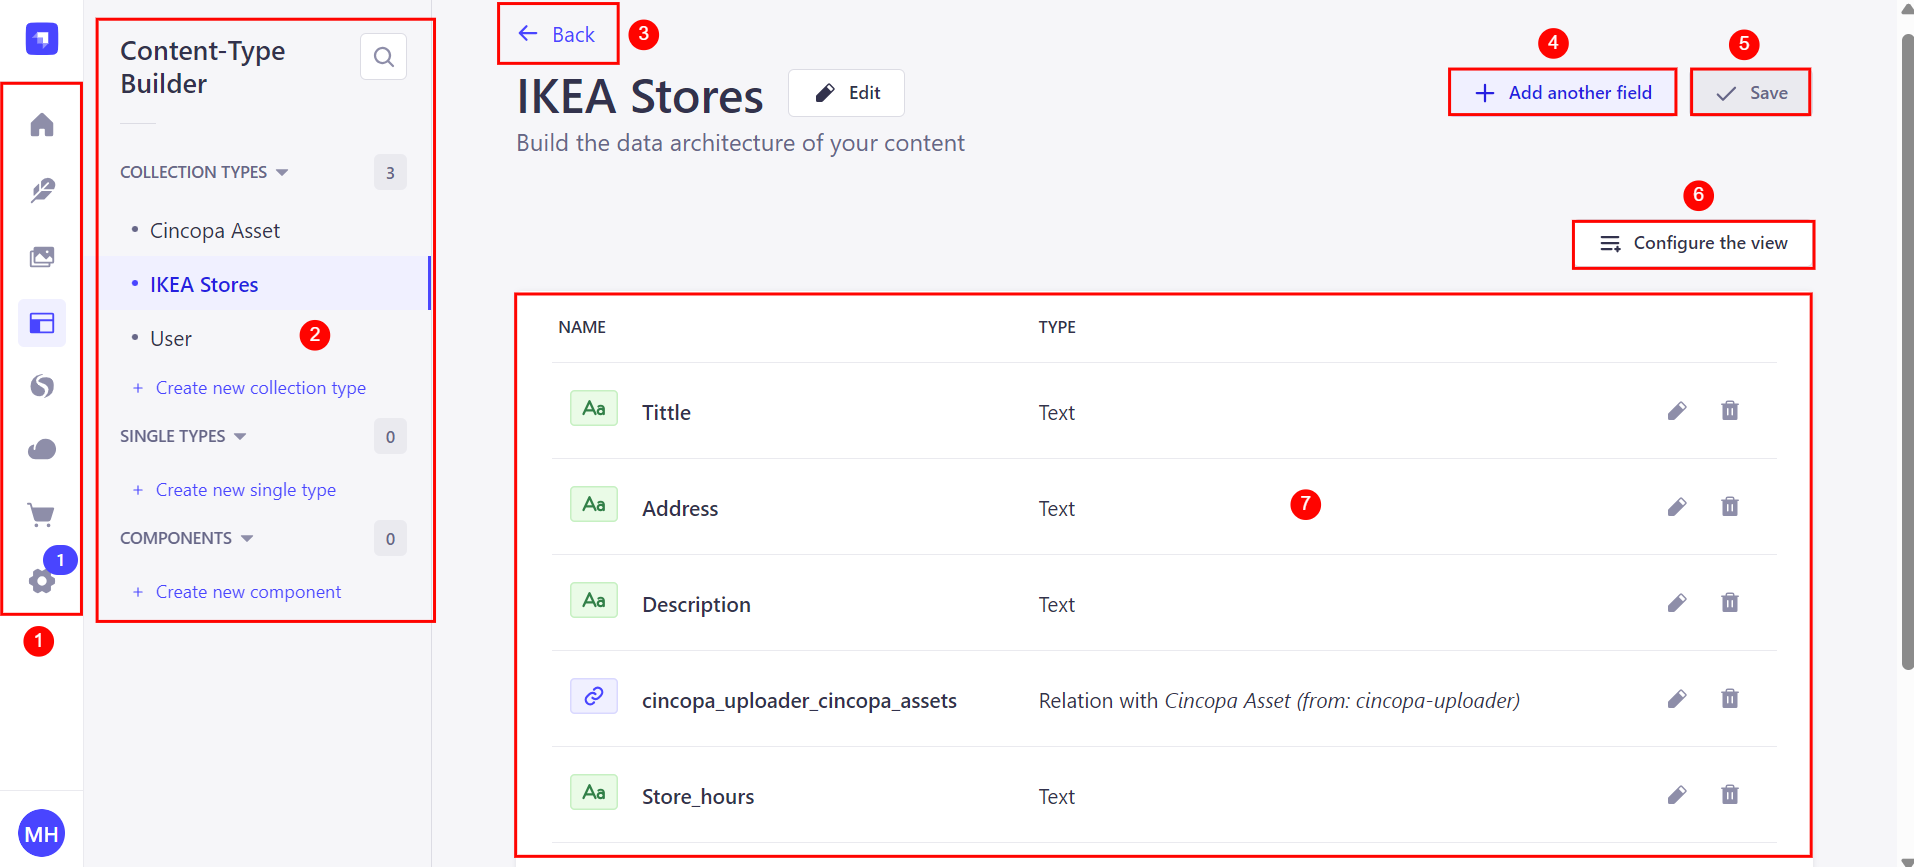
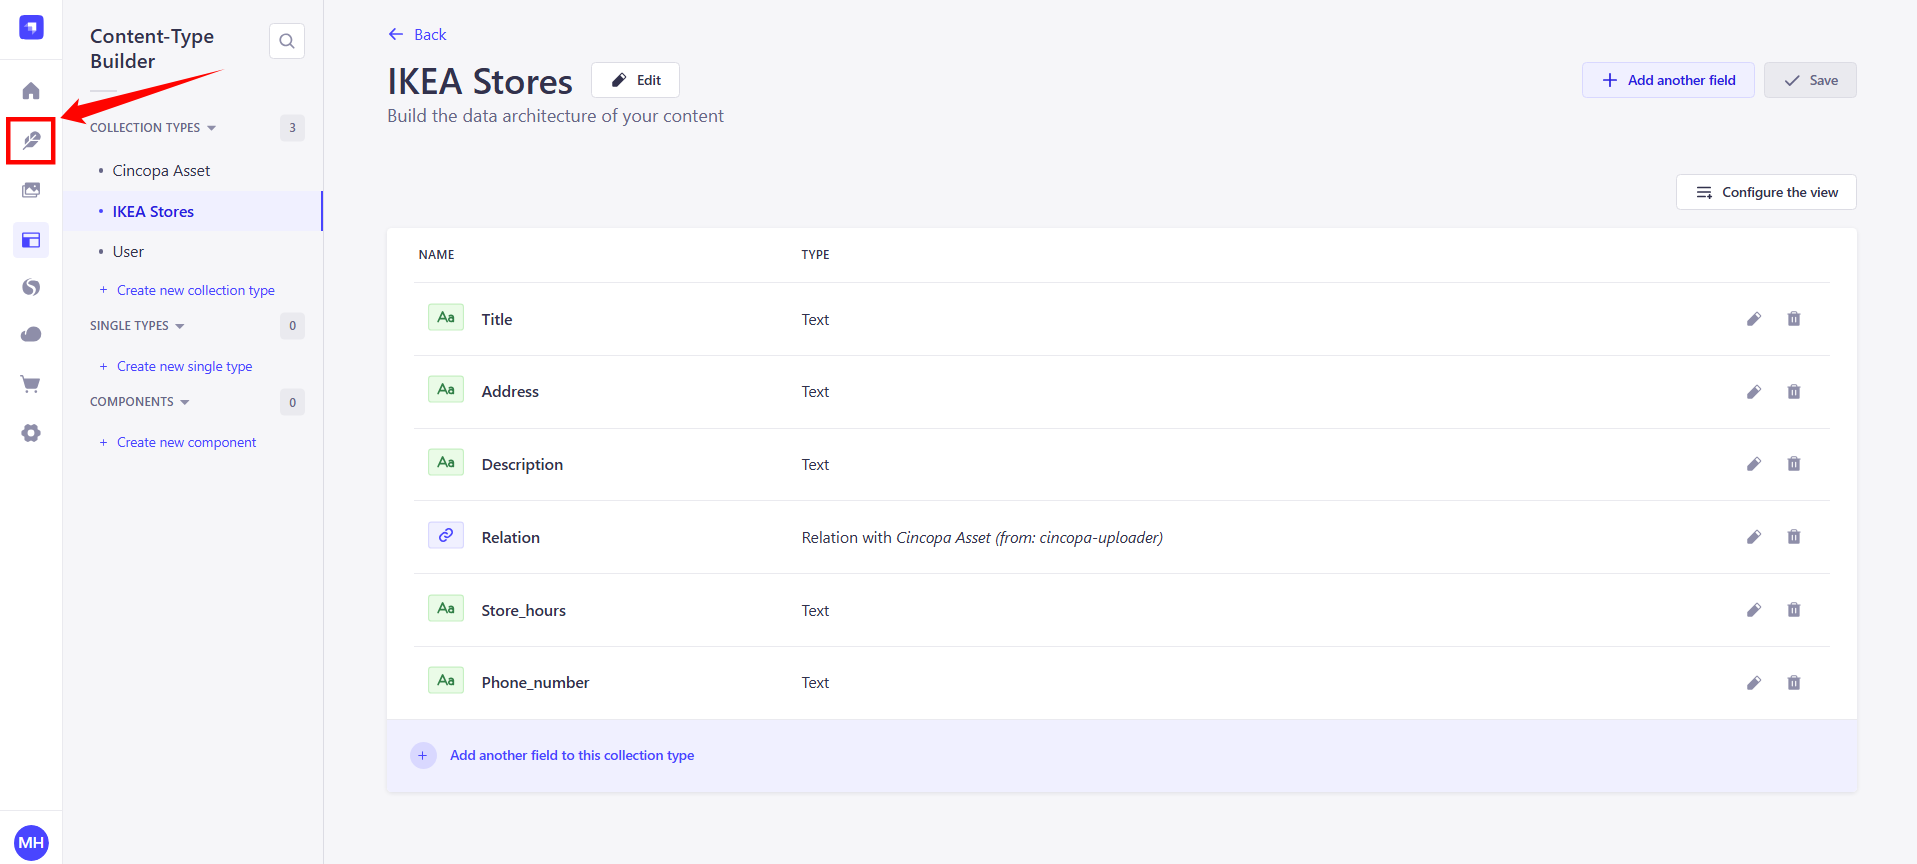
1. Sidebar (Left Side Navigation)
The sidebar is a navigational panel on the left side of the screen. It includes essential sections like Home, Content Manager, Media Library, Content Type Builder, Cincopa Asset Uploader, Deploy, Marketplace, and Settings that allow you to manage and access various features and configurations within Strapi.
2. Content-Type Selection (Collection Types)
In the Collection Types section, you can view and manage different content types in Strapi. Each content type, like IKEA Stores, defines a data structure where relevant information is stored, such as store details and media assets.
3. Back Button
The Back button allows you to navigate back to the previous page or screen in Strapi. It provides an easy way to return to your prior view without losing any changes made on the current page.
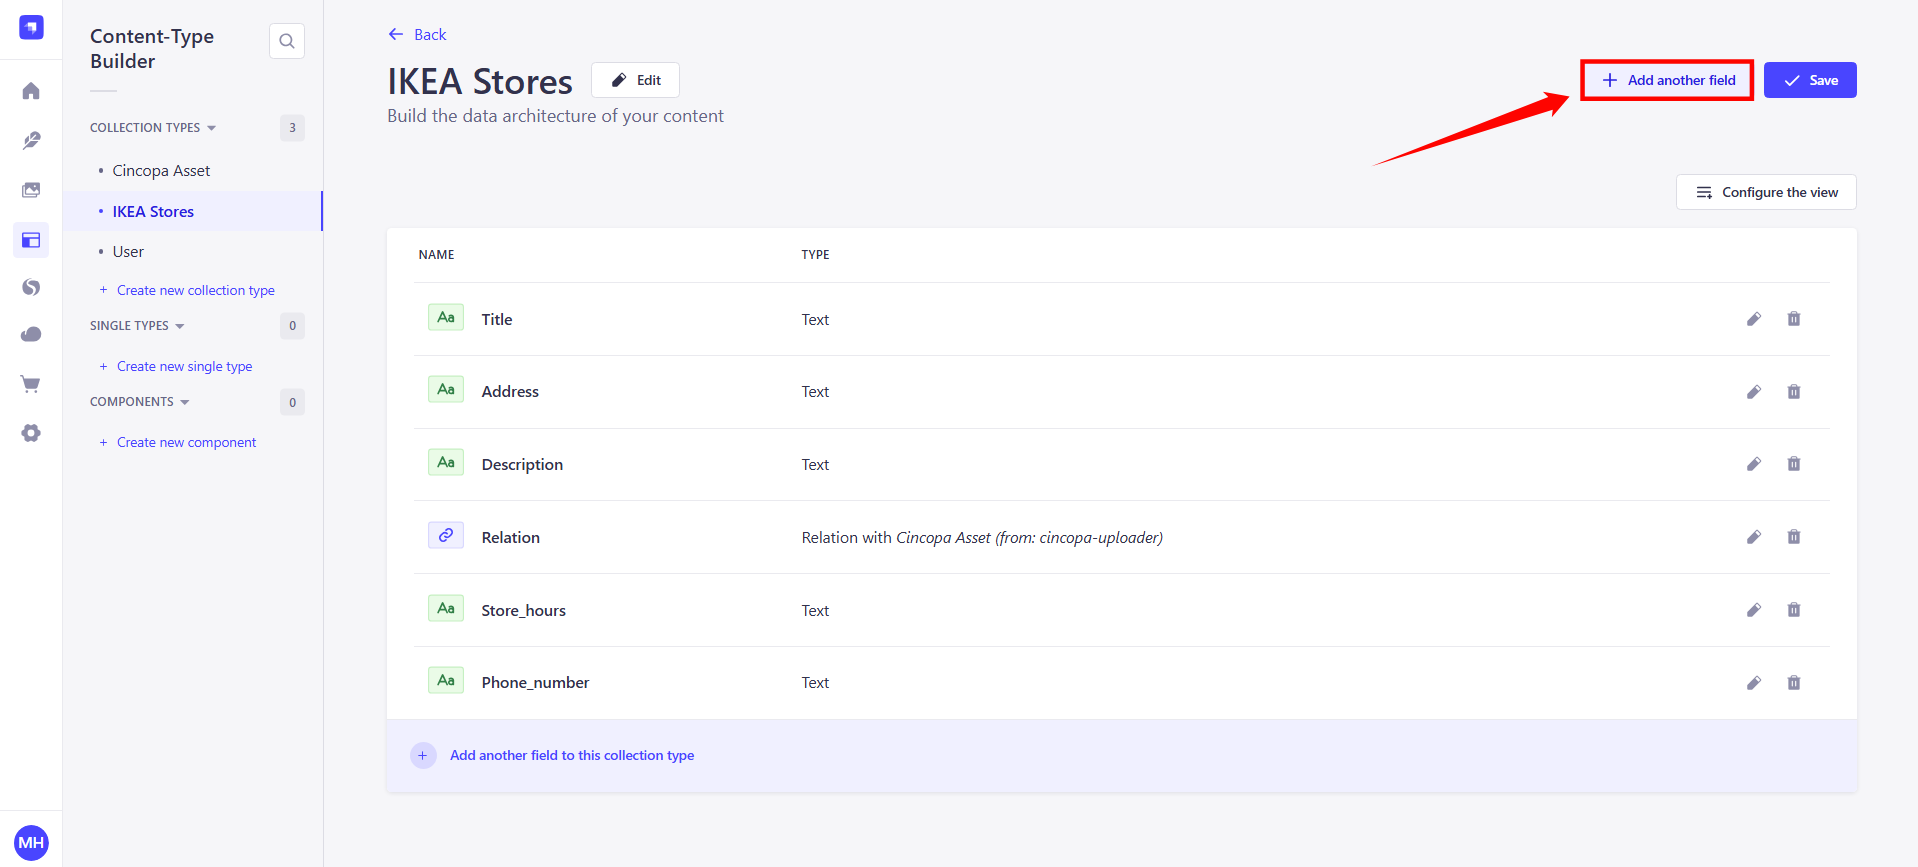
4. Add Another Field Button
The Add Another Field button enables you to add additional fields to your content type. You can use this option to expand the data captured for a content type, such as adding more information for each store in the IKEA Stores content type.
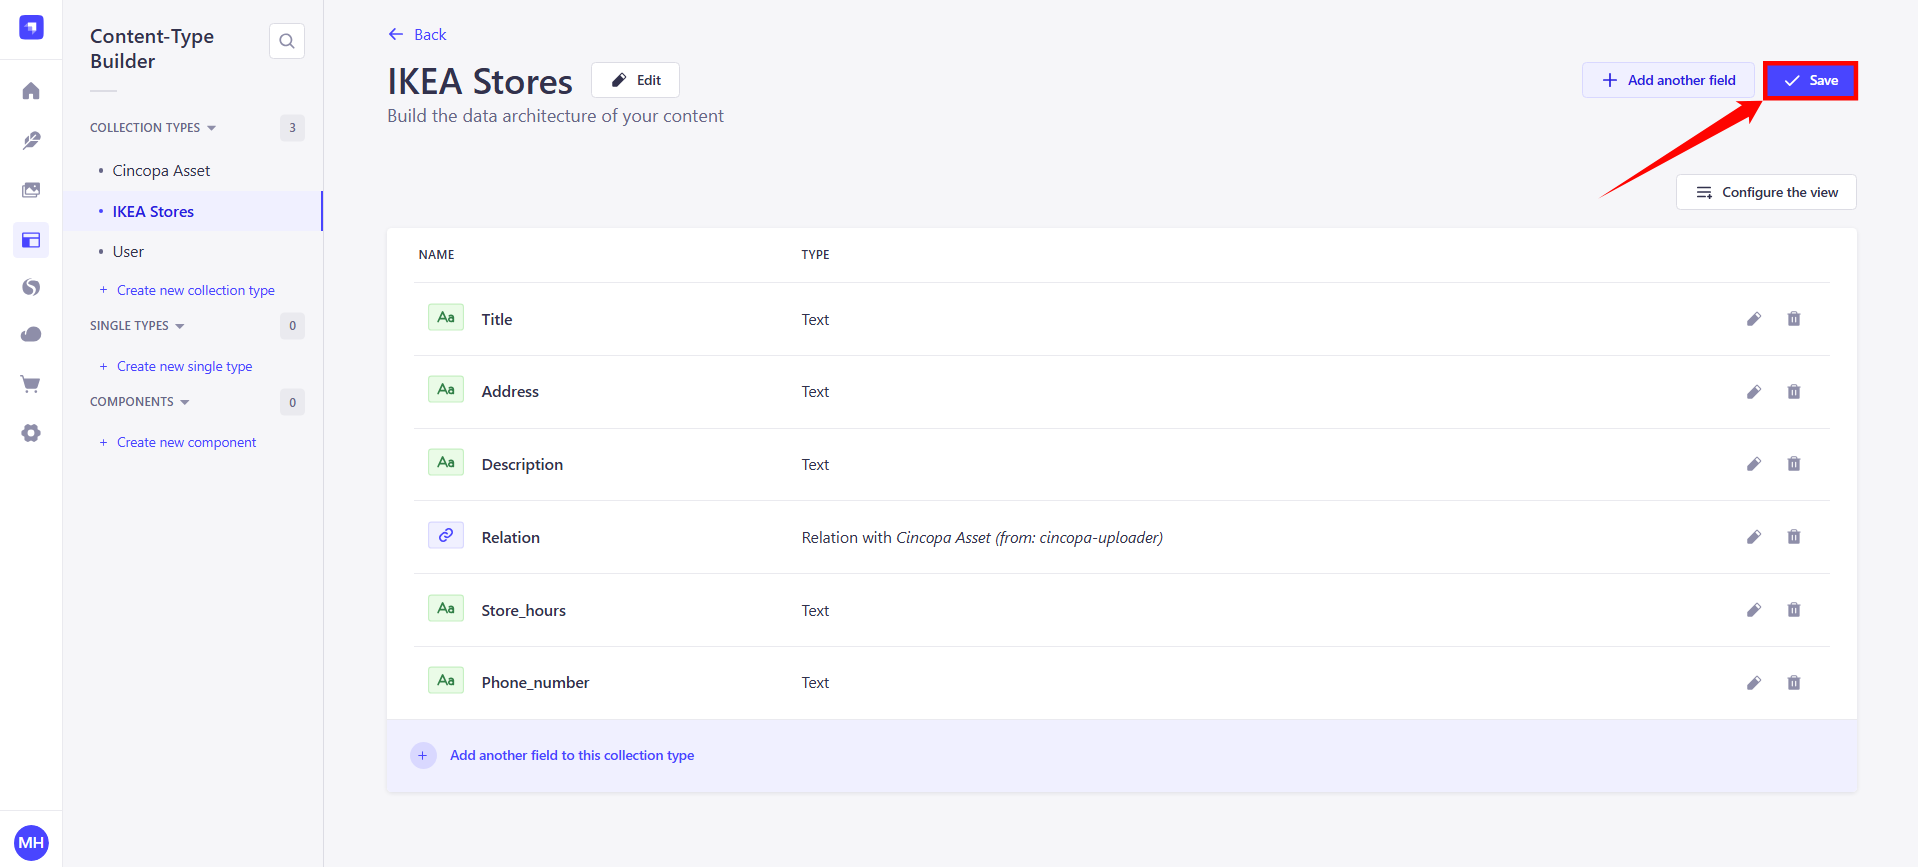
5. Save Button
The Save button is used to save any changes or updates made to a content type. It ensures that the modifications, such as adding new fields or updating existing ones, are securely stored in the system.
6. Configure the View Button
The Configure the View button lets you customize the display settings of your content type. This feature allows you to choose which fields to show or hide, ensuring a tailored experience in the Strapi admin panel.
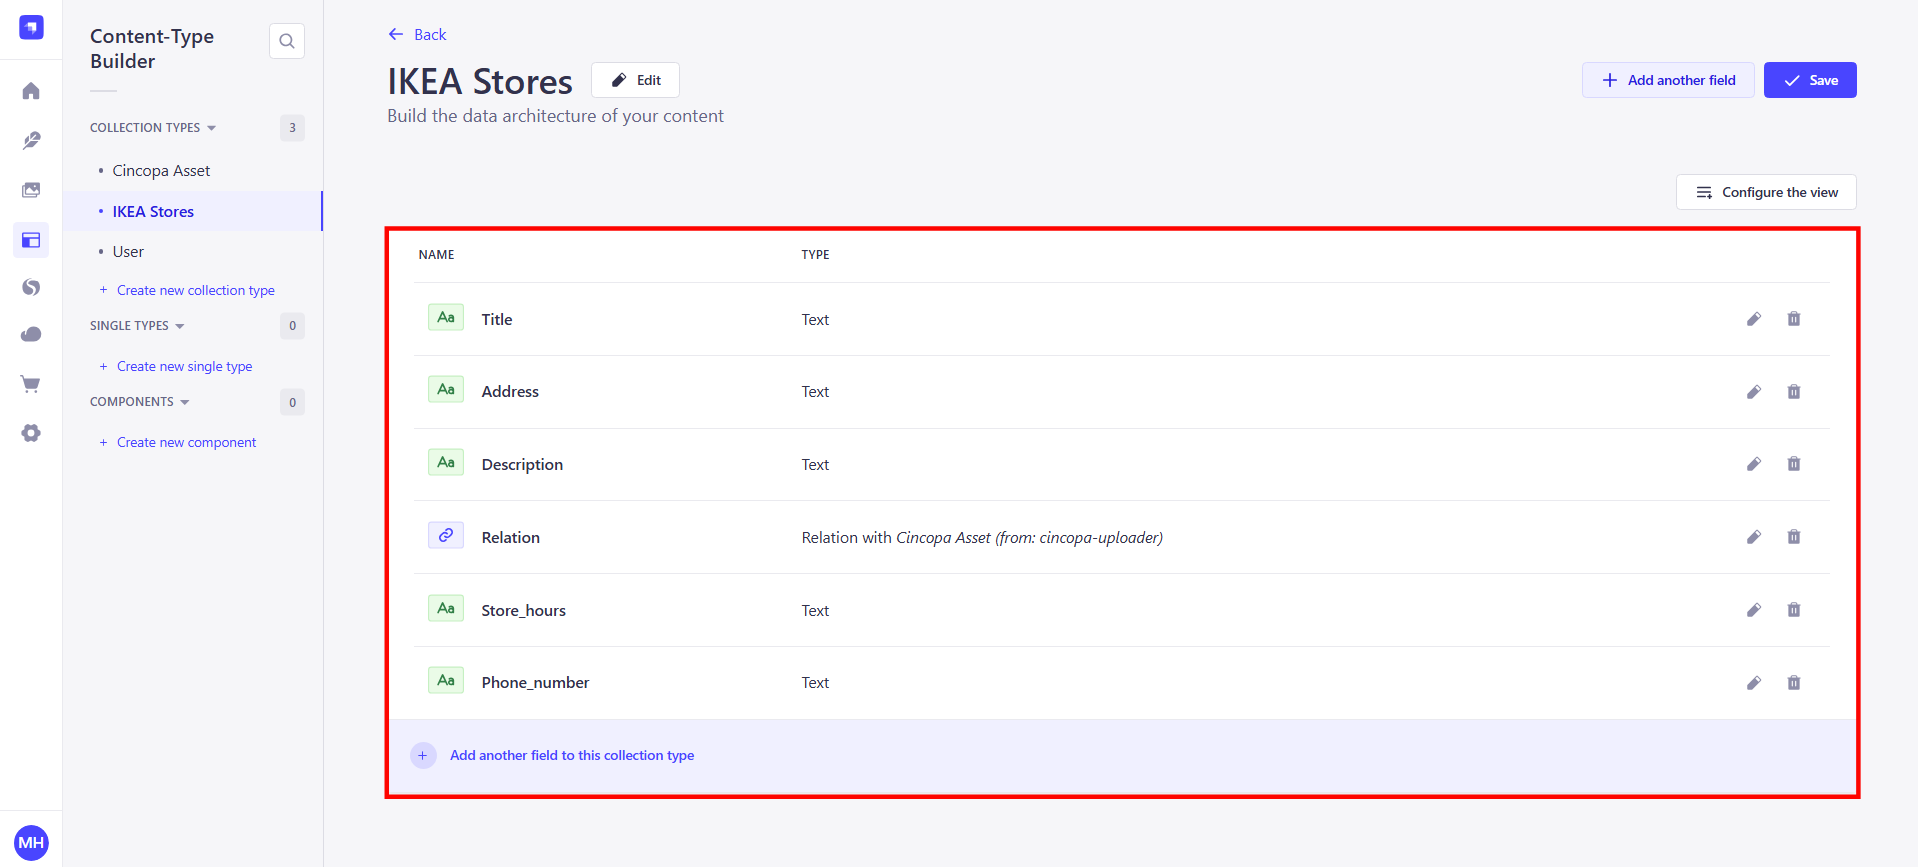
7. Main Area
The Main Area is where the actual content is displayed and edited. It shows all the fields that belong to the content type, such as Title, Address, and Description. You can directly add or update information here.
What is the Cincopa Asset Collection?
The Cincopa Asset collection in Strapi is a custom content type used to store and manage media assets that are uploaded to the Cincopa platform. This collection serves as a centralized location for storing metadata related to media files such as images, videos, and audio files, making them easily accessible and manageable within Strapi.
Why is the Cincopa Asset Collection Created?
The Cincopa Asset collection is created to facilitate the seamless integration of Cincopa’s media management capabilities with Strapi. By creating this collection, Strapi can store essential metadata (such as media URLs, thumbnails, and playback IDs) linked to the media files uploaded through the Cincopa platform. This ensures that all the media files are readily available within Strapi for use in various applications like blogs, websites, or other digital content platforms.
This collection allows for a smooth workflow between Cincopa and Strapi, ensuring that media files are properly organized and easily referenced without having to upload them multiple times.
How Webhooks Interact with the Cincopa Asset Collection
Webhooks are used to automate the process of updating Strapi with new media data from Cincopa. When media files are uploaded to Cincopa or when metadata like the title, description, tags, thumbnail, chapters, subtitles, or any other details are changed, a webhook notification is sent to Strapi.
This triggers the real-time update of the Cincopa Asset collection in Strapi, ensuring that all relevant media and their associated metadata are up-to-date.
These notifications typically include information about the newly uploaded media, such as
Media URL
Thumbnail URL
Playback ID
Other relevant metadata
By configuring webhooks, you ensure that Strapi always has the most up-to-date information about your media files, which helps maintain synchronization between Cincopa and Strapi.
Example: Creating an IKEA store locator page
In this example, we'll create a page similar to the IKEA store locator (https://www.ikea.com/us/en/stores/), where a content manager can add, remove, and edit a list of IKEA stores. This page would allow users to search for and find nearby stores. The collection will be linked to a Cincopa Asset collection for storing media such as videos (like store tours) and images (such as store photos), which will be associated with each store entry for easy access and management.
The goal here is to build a dynamic page where content managers can easily manage the list of stores and enrich each store’s entry with relevant multimedia content, providing an informative and engaging user experience.
Create a New Collection Type for IKEA Stores
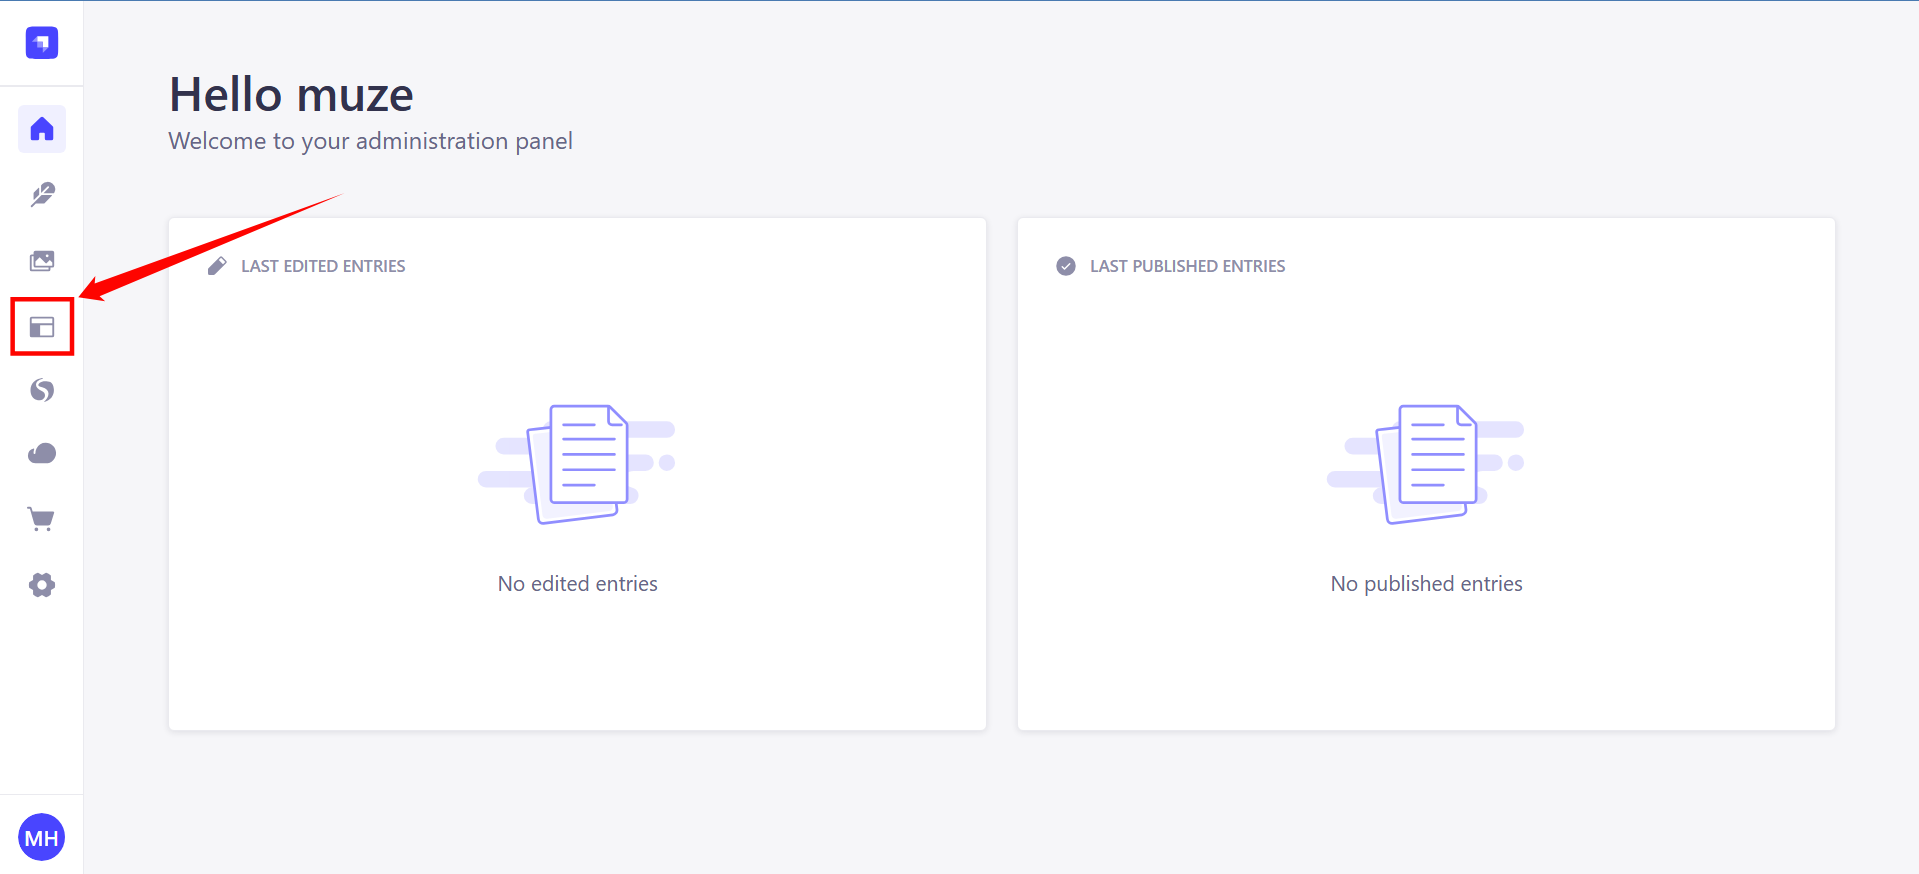
Step 1: Navigate to the Content Type Builder in your Strapi Admin Panel.
Step 2. Click on Create new collection type.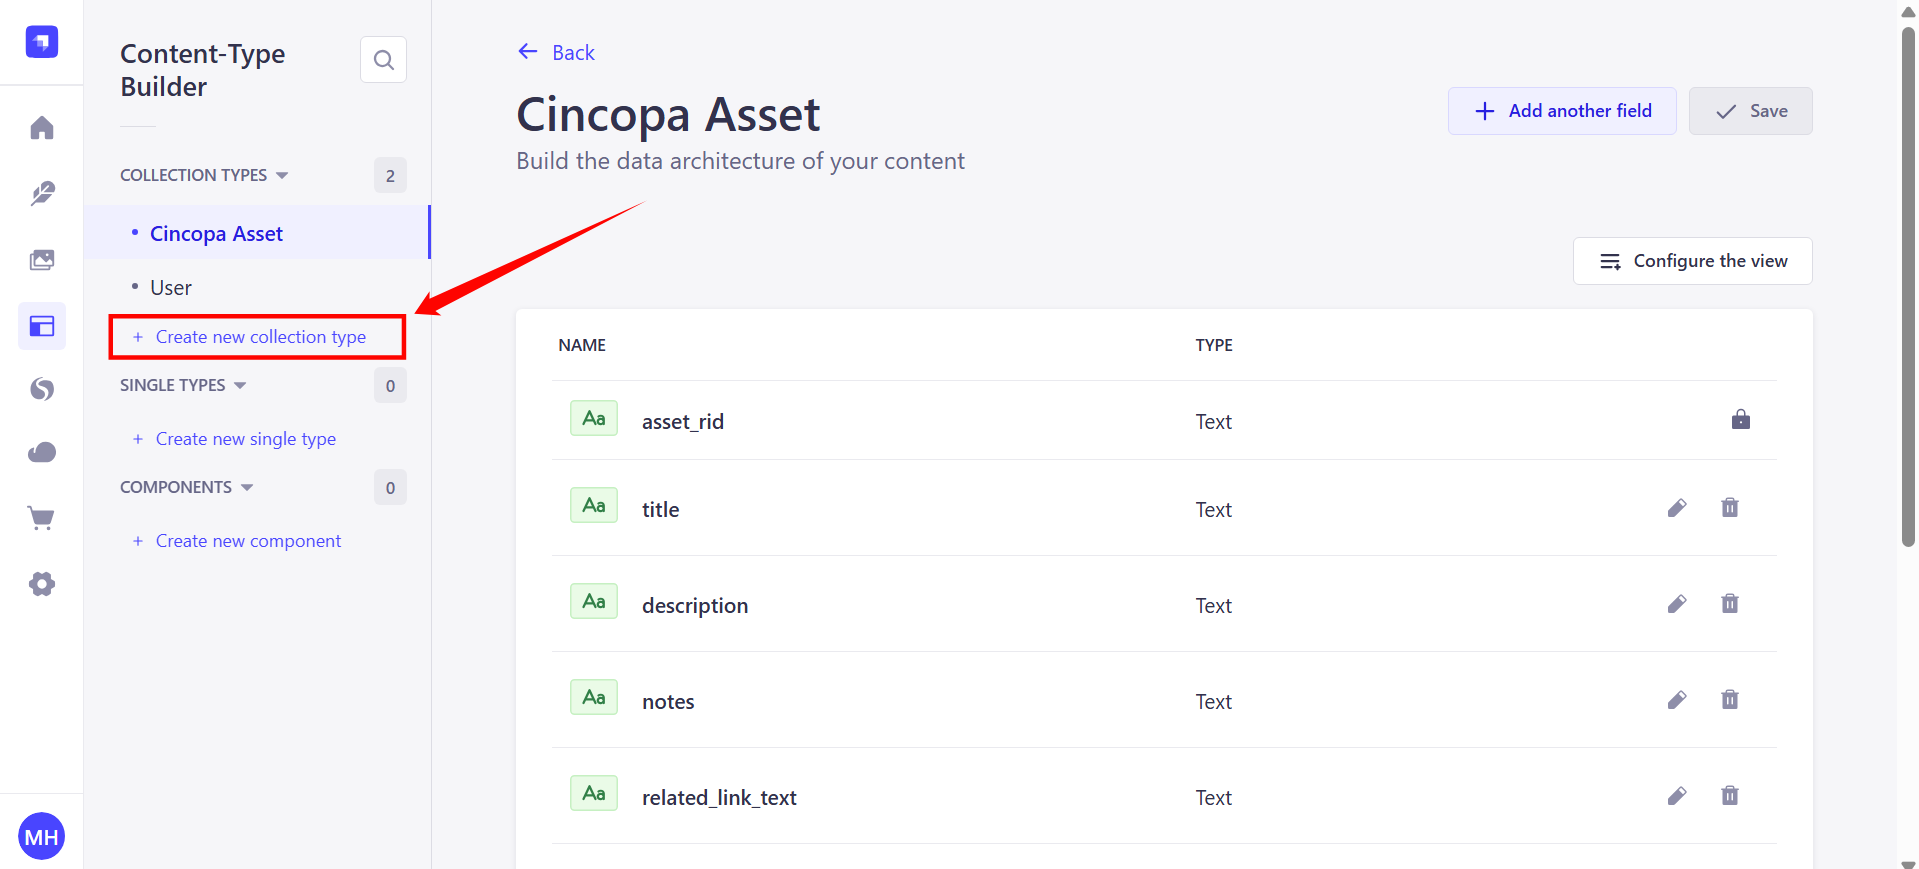
Step 3. Give it a display name like "IKEA Stores.
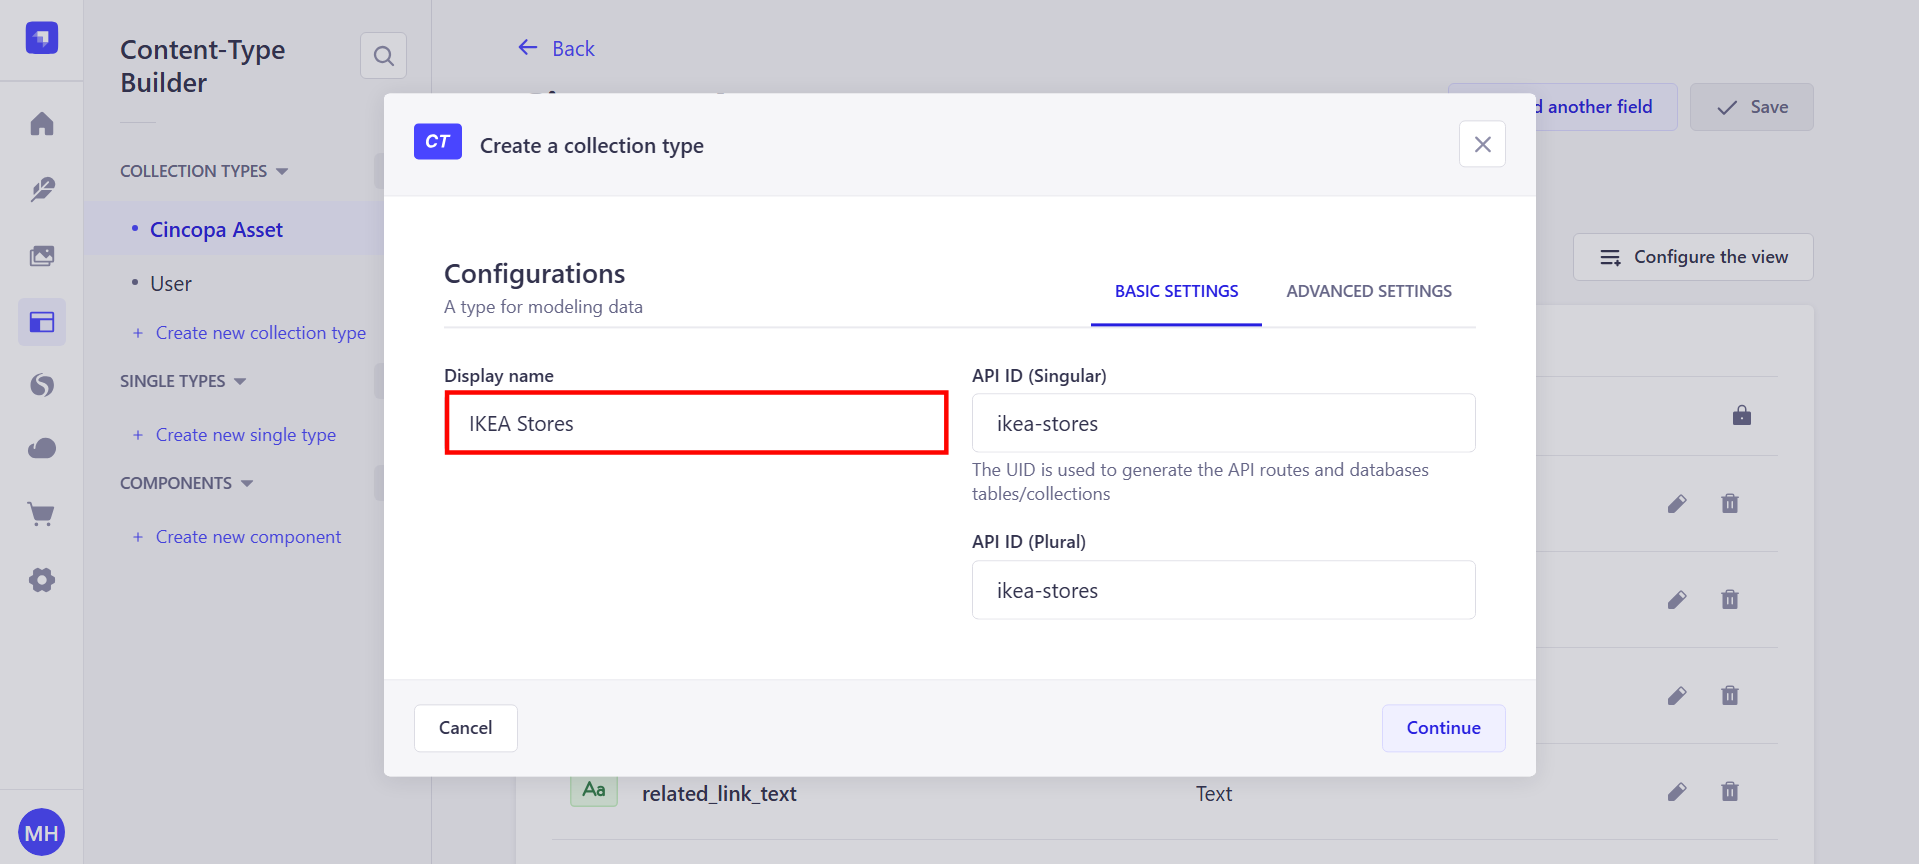
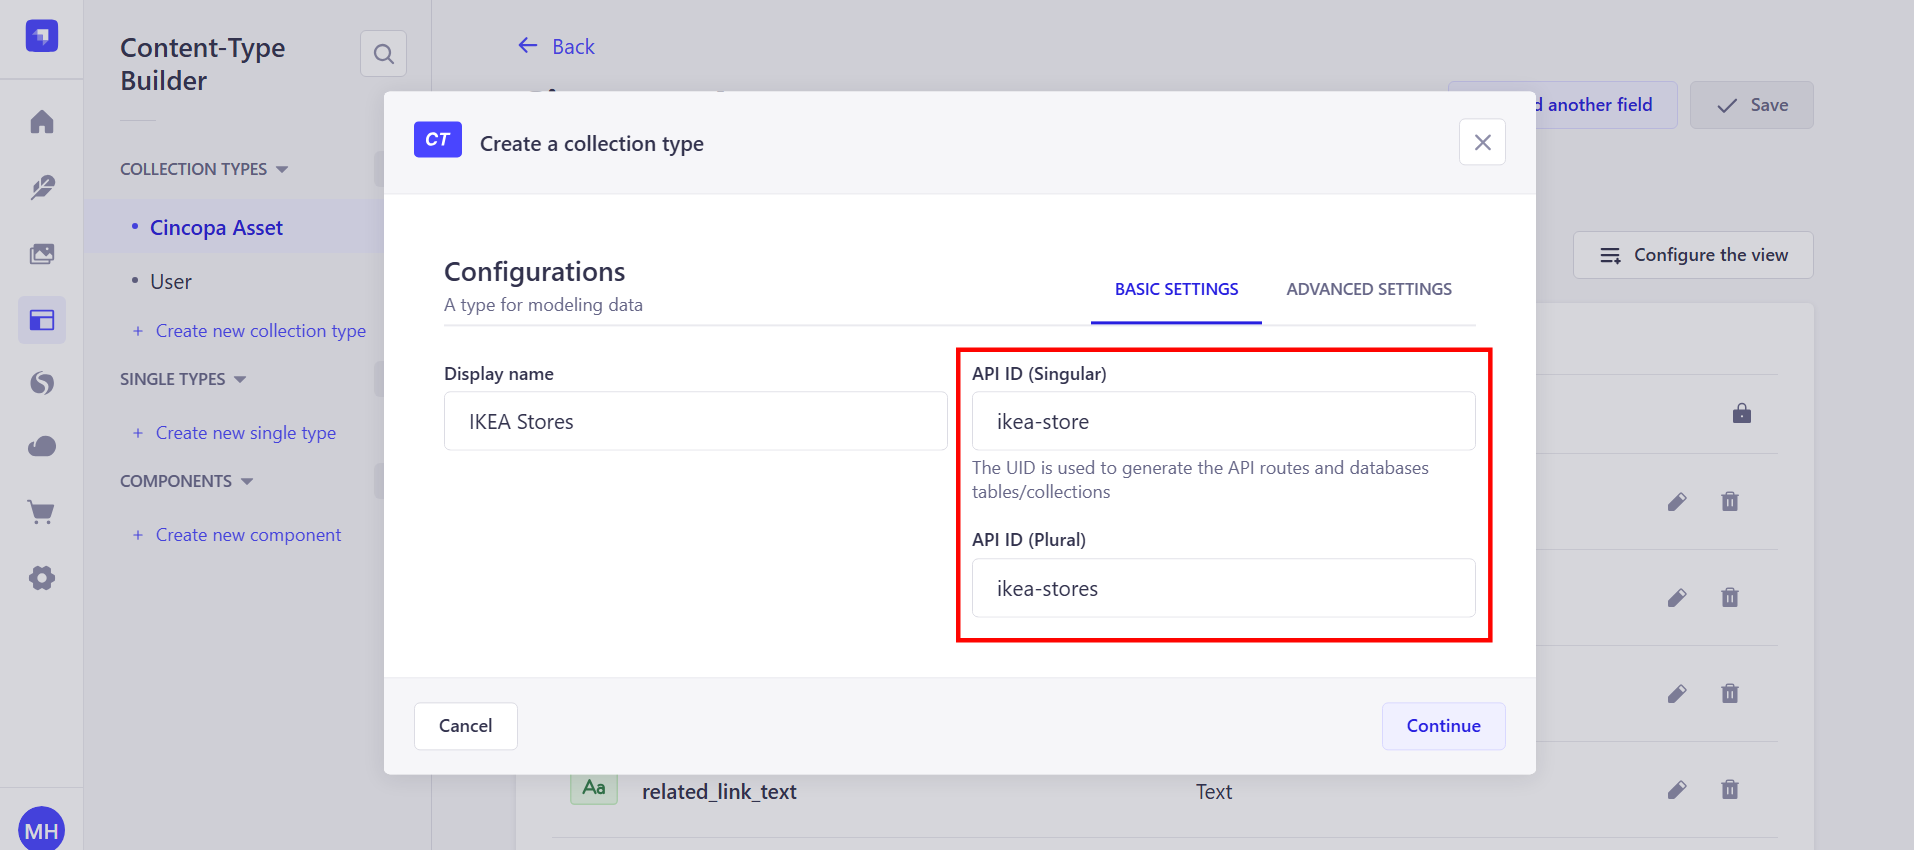
Step 4: When you create a new collection type in Strapi, the API ID (Singular) and API ID (Plural) fields are automatically populated based on the Display Name you enter for the collection.
API ID (Singular): This field is automatically populated with a singular version of the collection name. For example, if you name the collection "IKEA Stores", the API ID (Singular) will be automatically set as "ikea-store".
API ID (Plural): This field is automatically populated with a plural version of the collection name. In this example, "ikea-stores" will be the plural form, representing the collection of all IKEA stores.
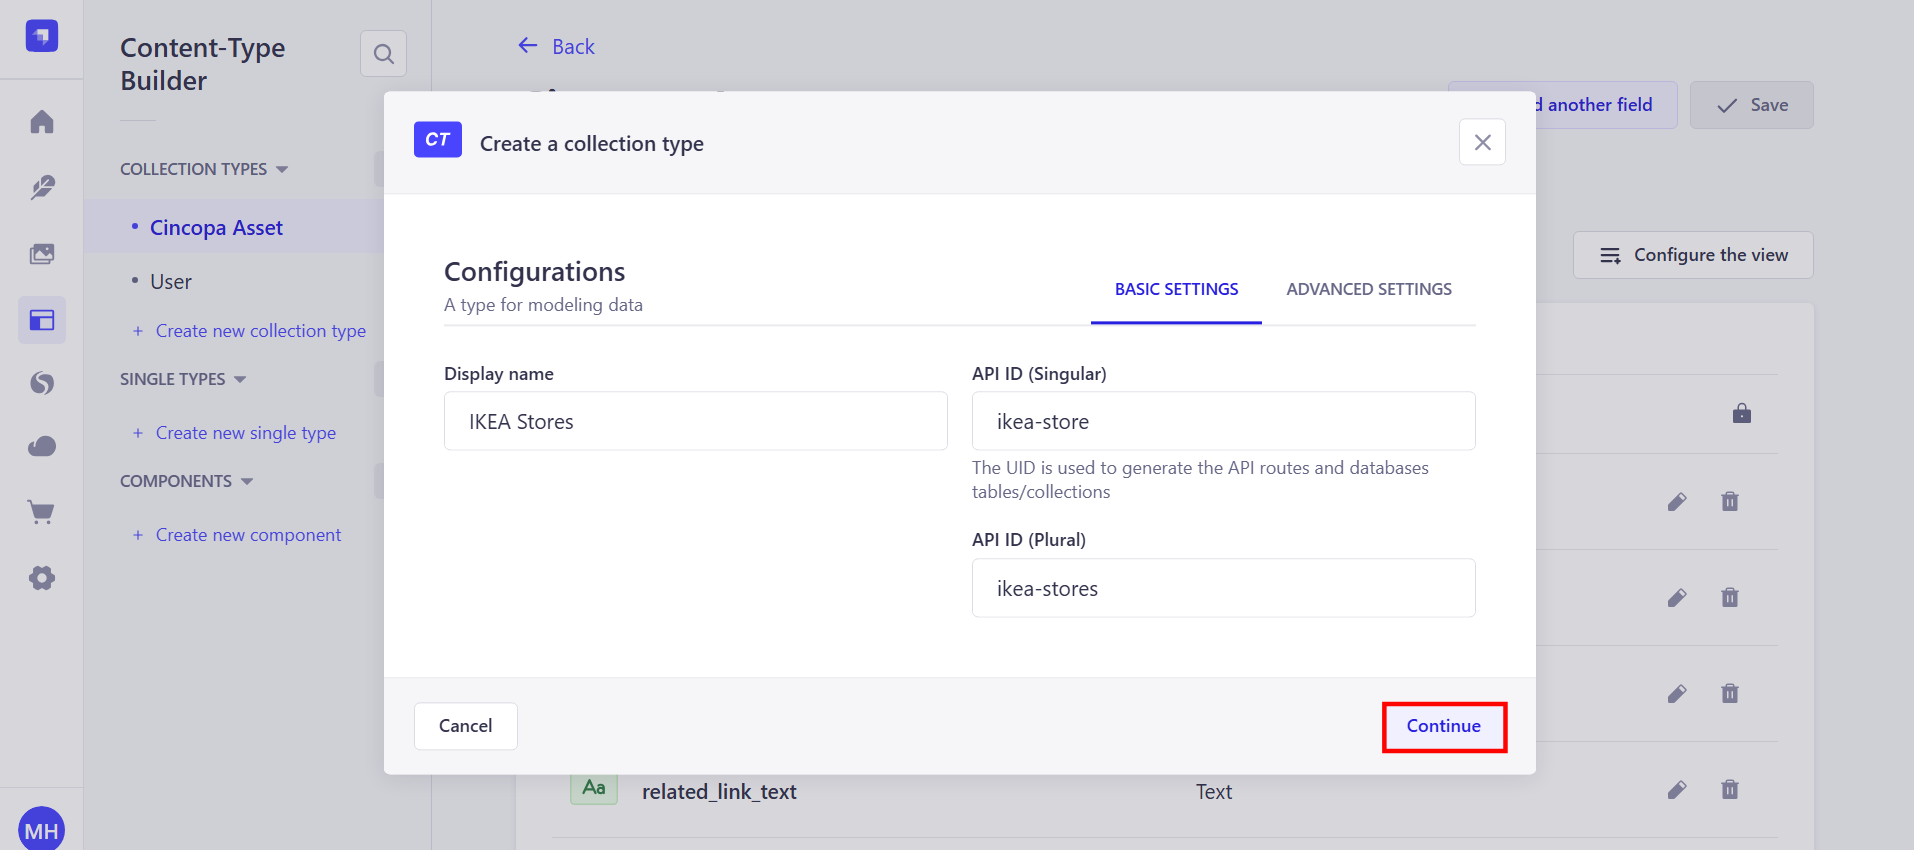
Step 5: After giving the display name, click on the “Continue” button.
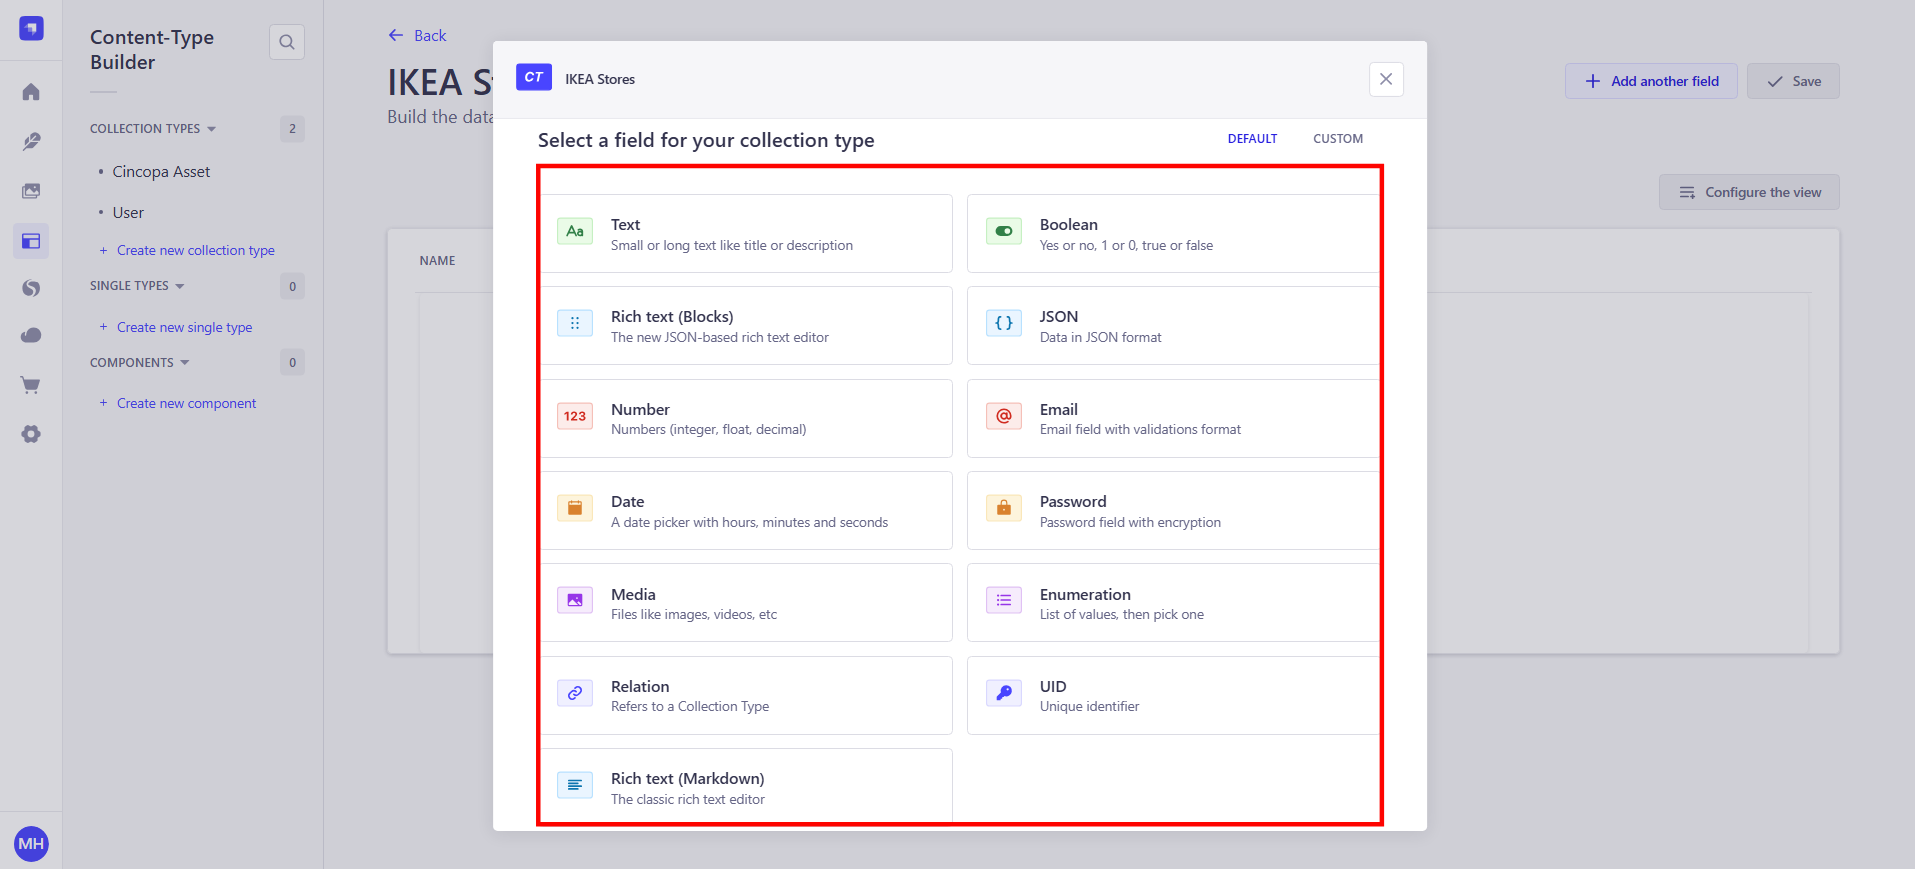
Add Fields to the IKEA Stores Collection Type
Strapi offers various field types for adding different kinds of data to your collection.
Text: For storing simple text, such as the name or description of the asset.
Media: To store media files like images, videos, or audio.
Relation: If you need to relate the Cincopa Assets to another content type (e.g., a "User" or "Category").
Number: To store any numerical data (e.g., views count, ratings).
Date: To store date- or time-related data.
Boolean: To store true/false values (e.g., to mark whether an asset is featured).
For this, we'll add the following fields:
Title (Text): Name of the store (e.g., IKEA Miami).
Address (Text): Full store address (e.g., 1234 IKEA St, Miami, FL).
Description (Text): A short description of the store (e.g., A large furniture store with a wide range of home goods).
Phone (Text): Store phone number (e.g., +1 123 456 7890).
Store Hours (Text): Operating hours (e.g., Mon–Fri: 9 AM – 9 PM).
Cincopa Asset Relation (Relation): Connects each store to its Cincopa media (e.g., a video tour). You can set the relation as One to Many, Many to One, or Many to Many, depending on the structure. In this case, a Many-to-Many relationship might be more appropriate, as each video can appear on more than one page, and each page can have more than one video.
To add more fields to your collection, click on the “Add another field” button.
After adding these fields, click on Save to create your IKEA Stores collection type.
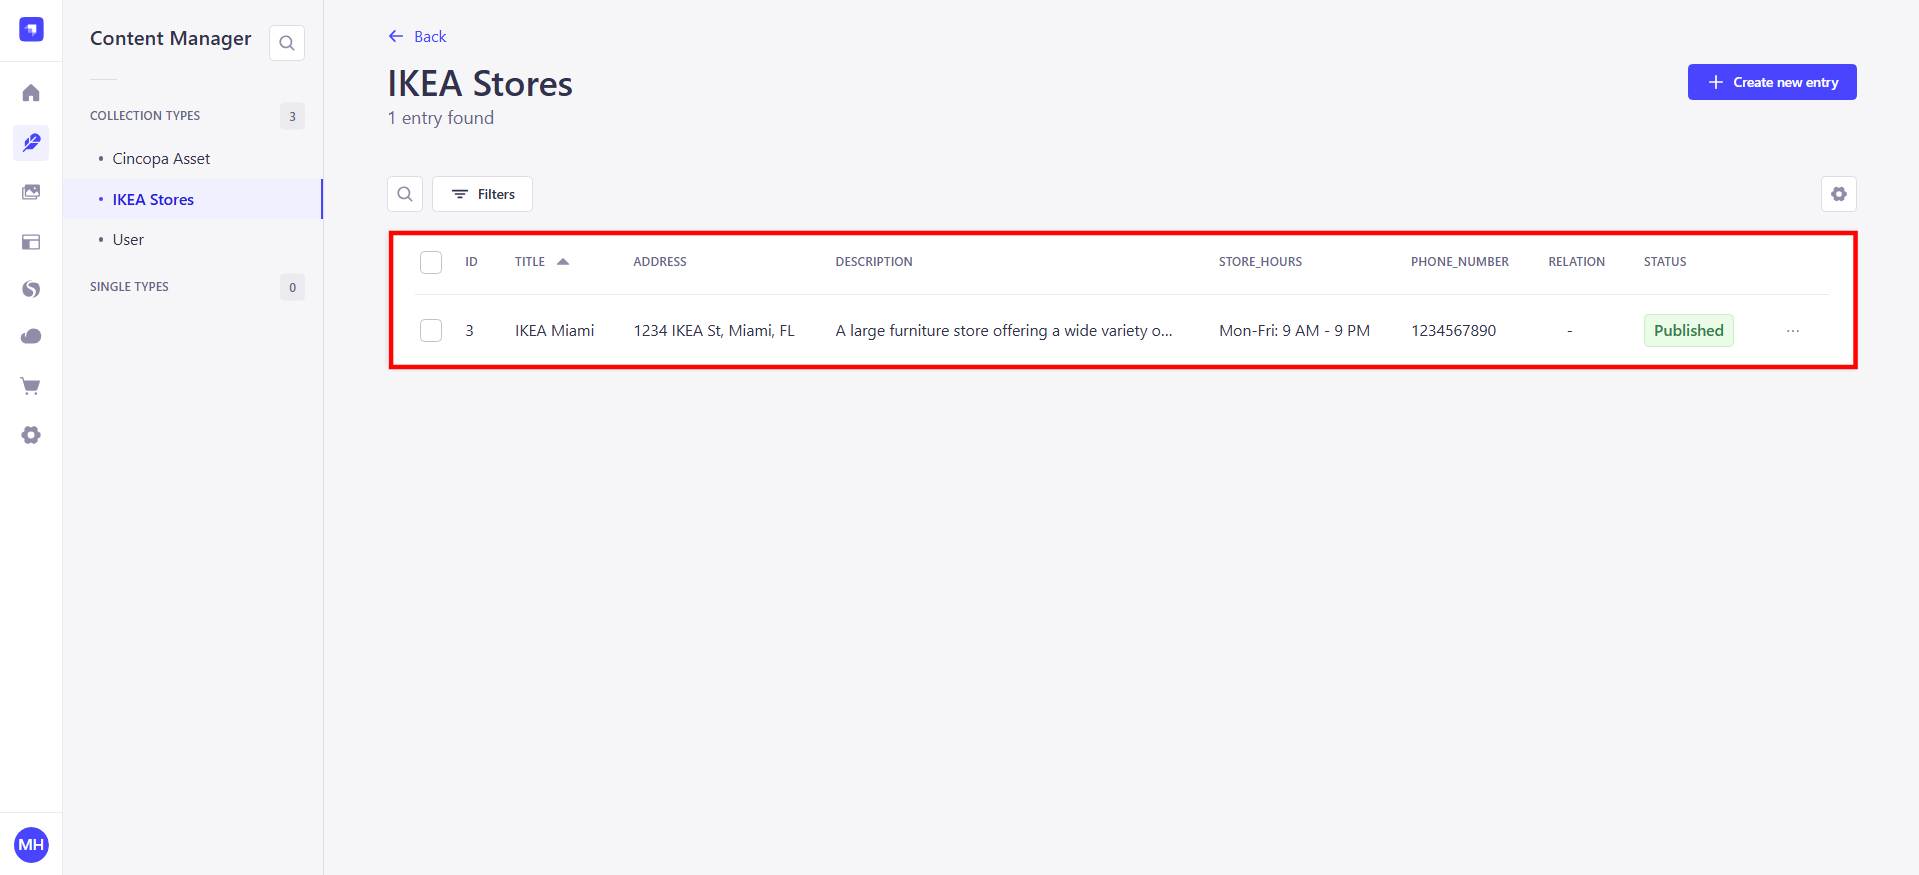
Add New Store Entry
After creating the collection, you can add individual store entries by following these steps:
Step 1. Navigate to the “Content Manager” in your Strapi Admin Panel.
Step 2: Navigate to the IKEA Stores collection in the Strapi Admin Panel.
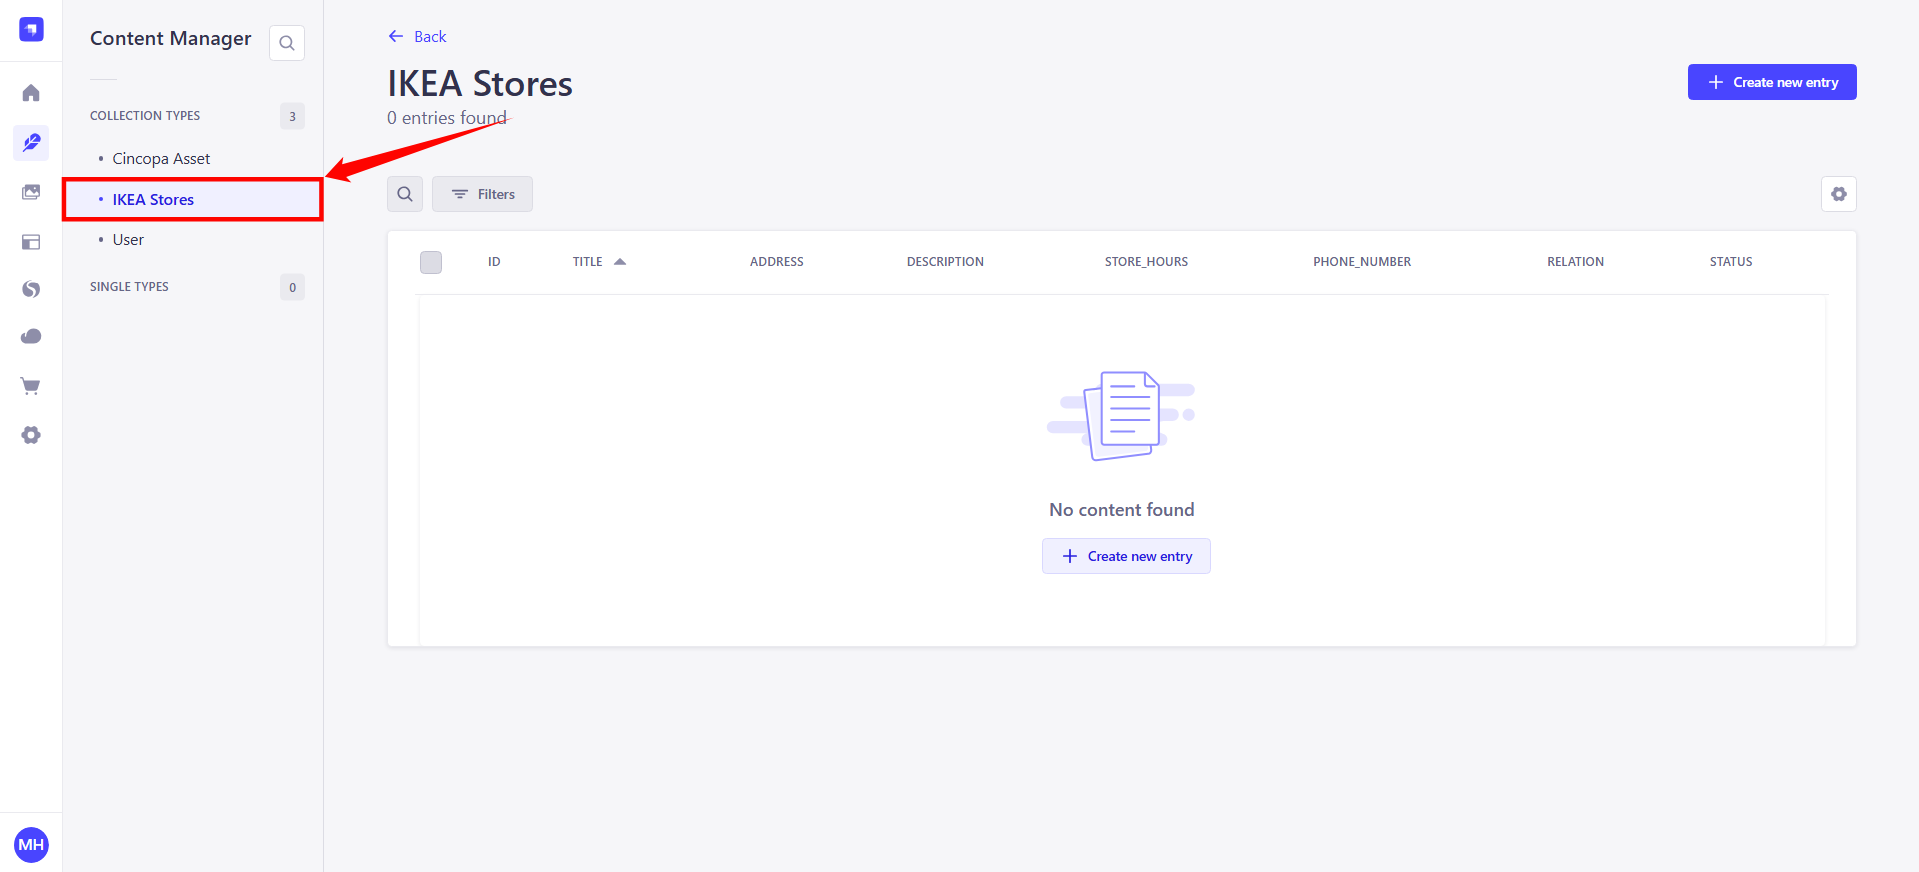
Step 3. Click on Create new entry.
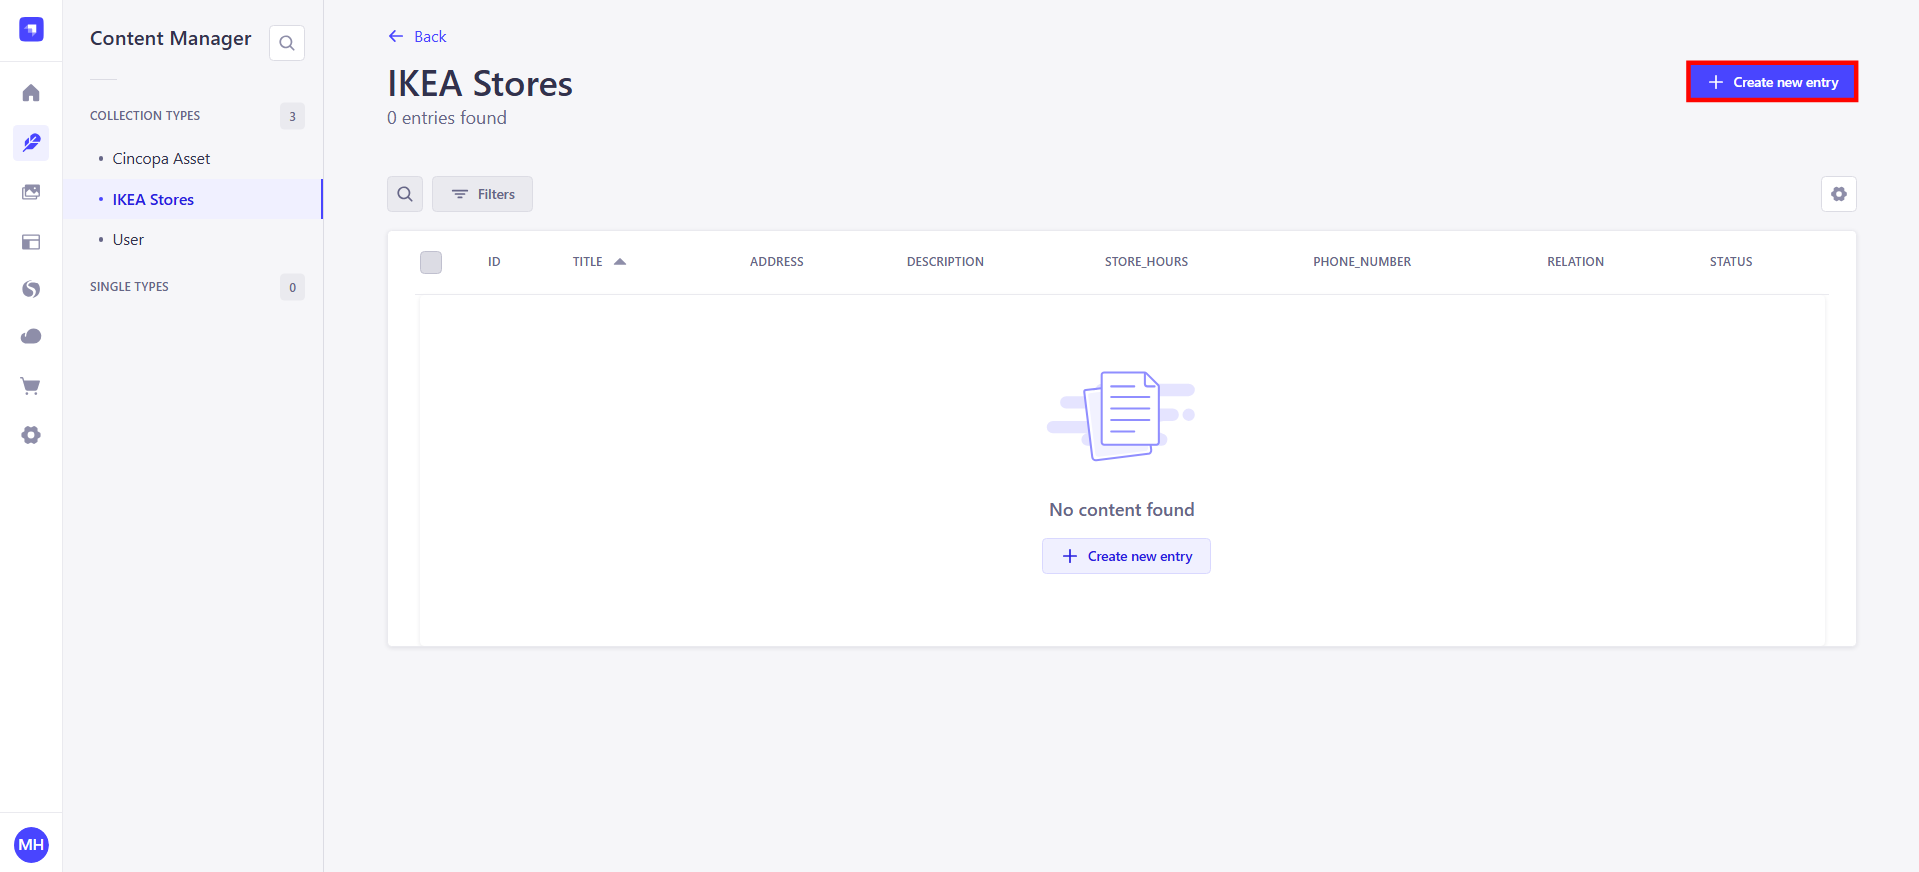
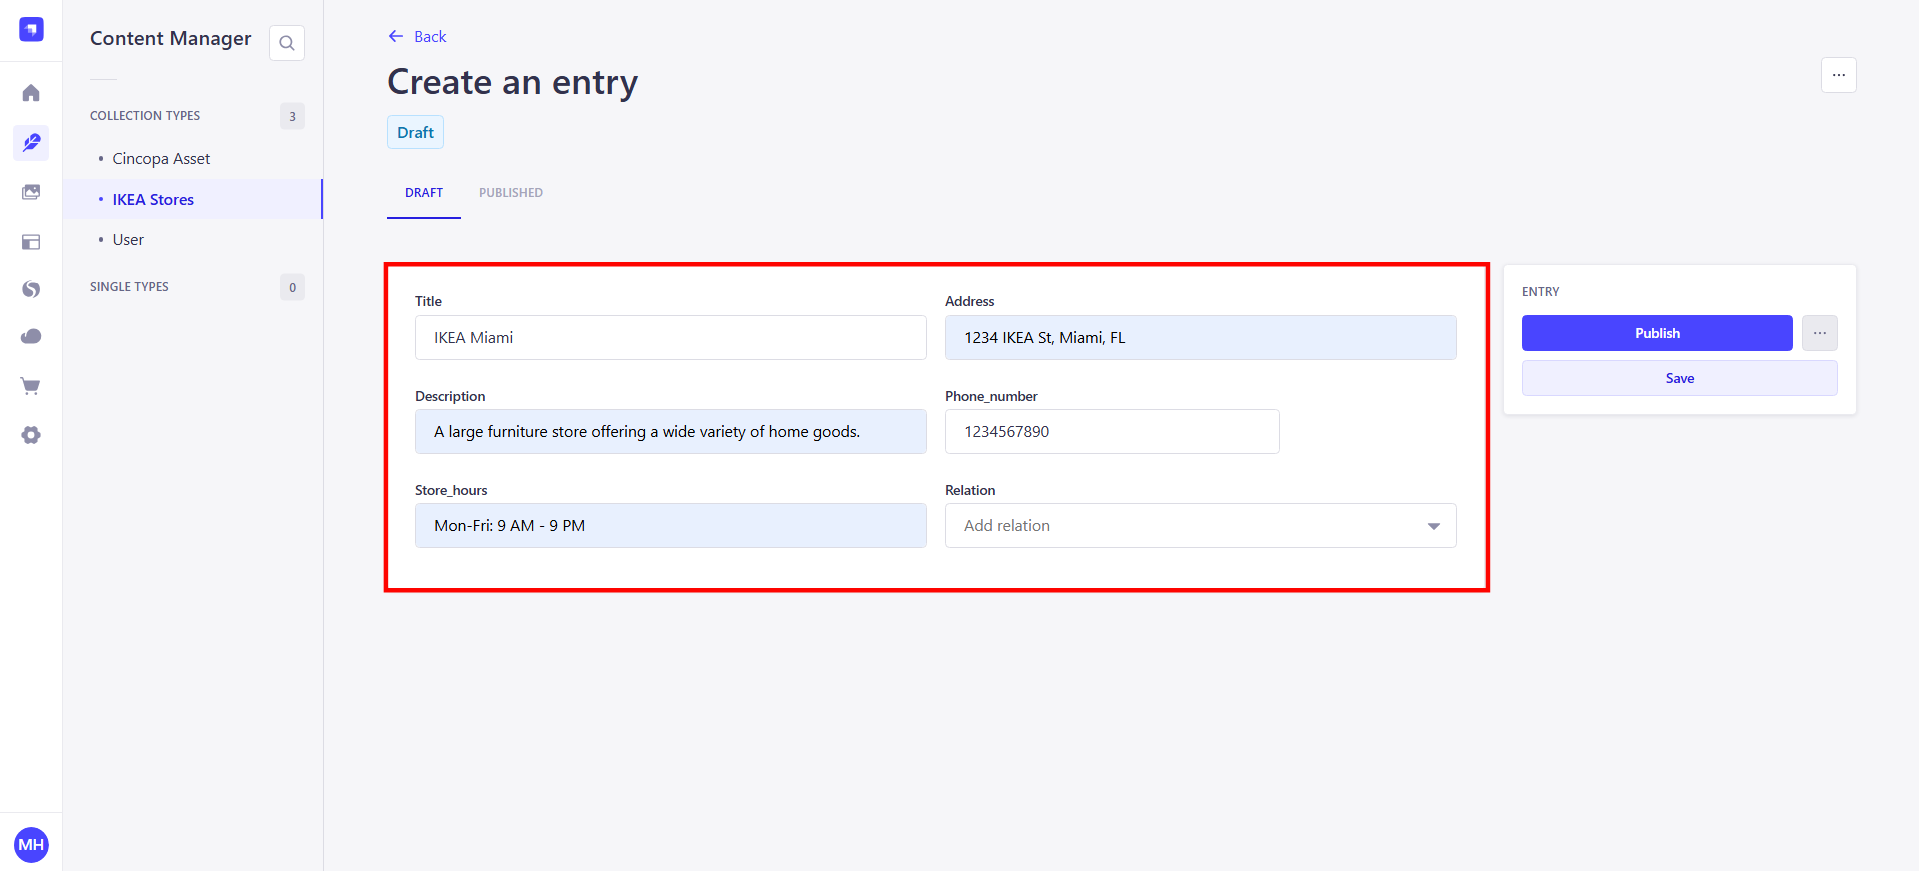
Step 4. Fill in the store details:
Title: IKEA Miami
Address: 1234 IKEA St, Miami, FL
Description: A large furniture store offering a wide variety of home goods.
Phone: +1 123 456 7890
Store Hours: Mon-Fri: 9 AM - 9 PM
Relation: Link the relevant Cincopa Asset (e.g., a store walk-through video from Cincopa).
Step 5: Once you've entered all the required details for the store, click on Publish to save and activate the store entry. This will make the store visible in your IKEA Stores collection.
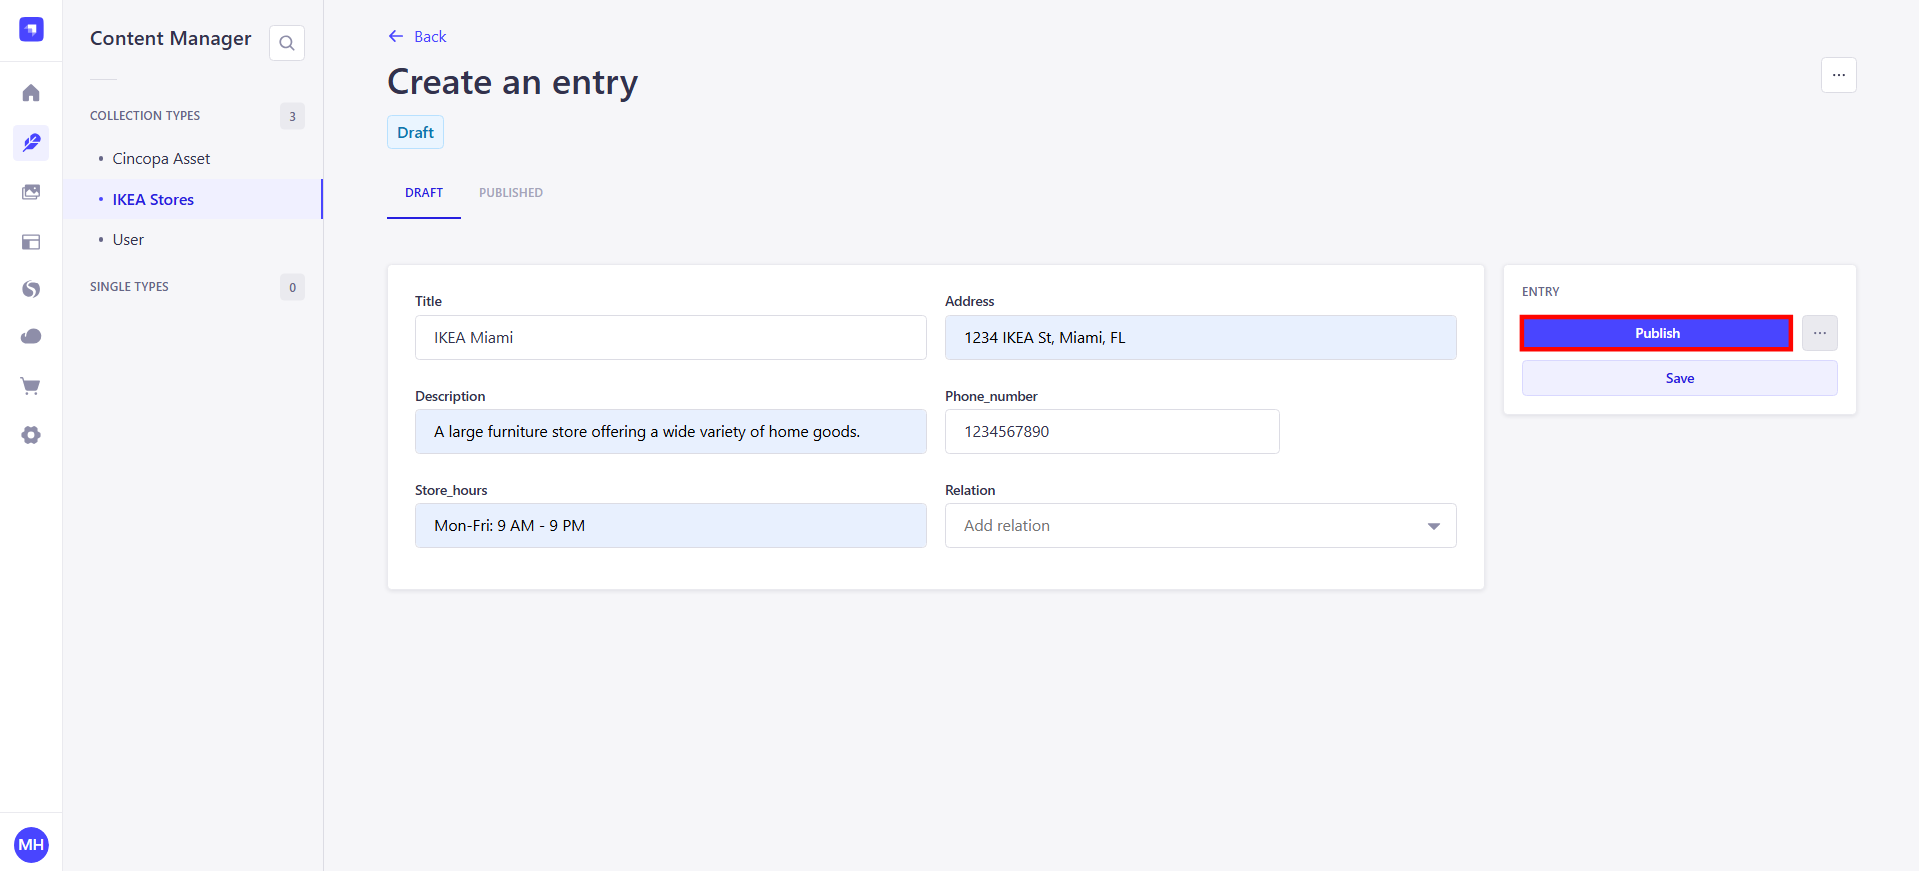
Now that the store entry is published, you can retrieve and display the store details, including the associated Cincopa Asset (video or media), using Strapi's API. This allows you to showcase the store details and media content on your front-end application, website, or platform.
Upload Asset to Cincopa via Strapi
You can upload and manage media files, such as videos and images, to Cincopa directly from the Strapi Admin Panel. These files can be linked to custom collection types to store and manage related metadata.
Step 1. In the Strapi Admin Panel, go to the Cincopa Asset Uploader section. Here, you can choose to upload media either by providing a remote URL or by selecting a local video/image file.

Step 2. Click the “Upload new asset” button.
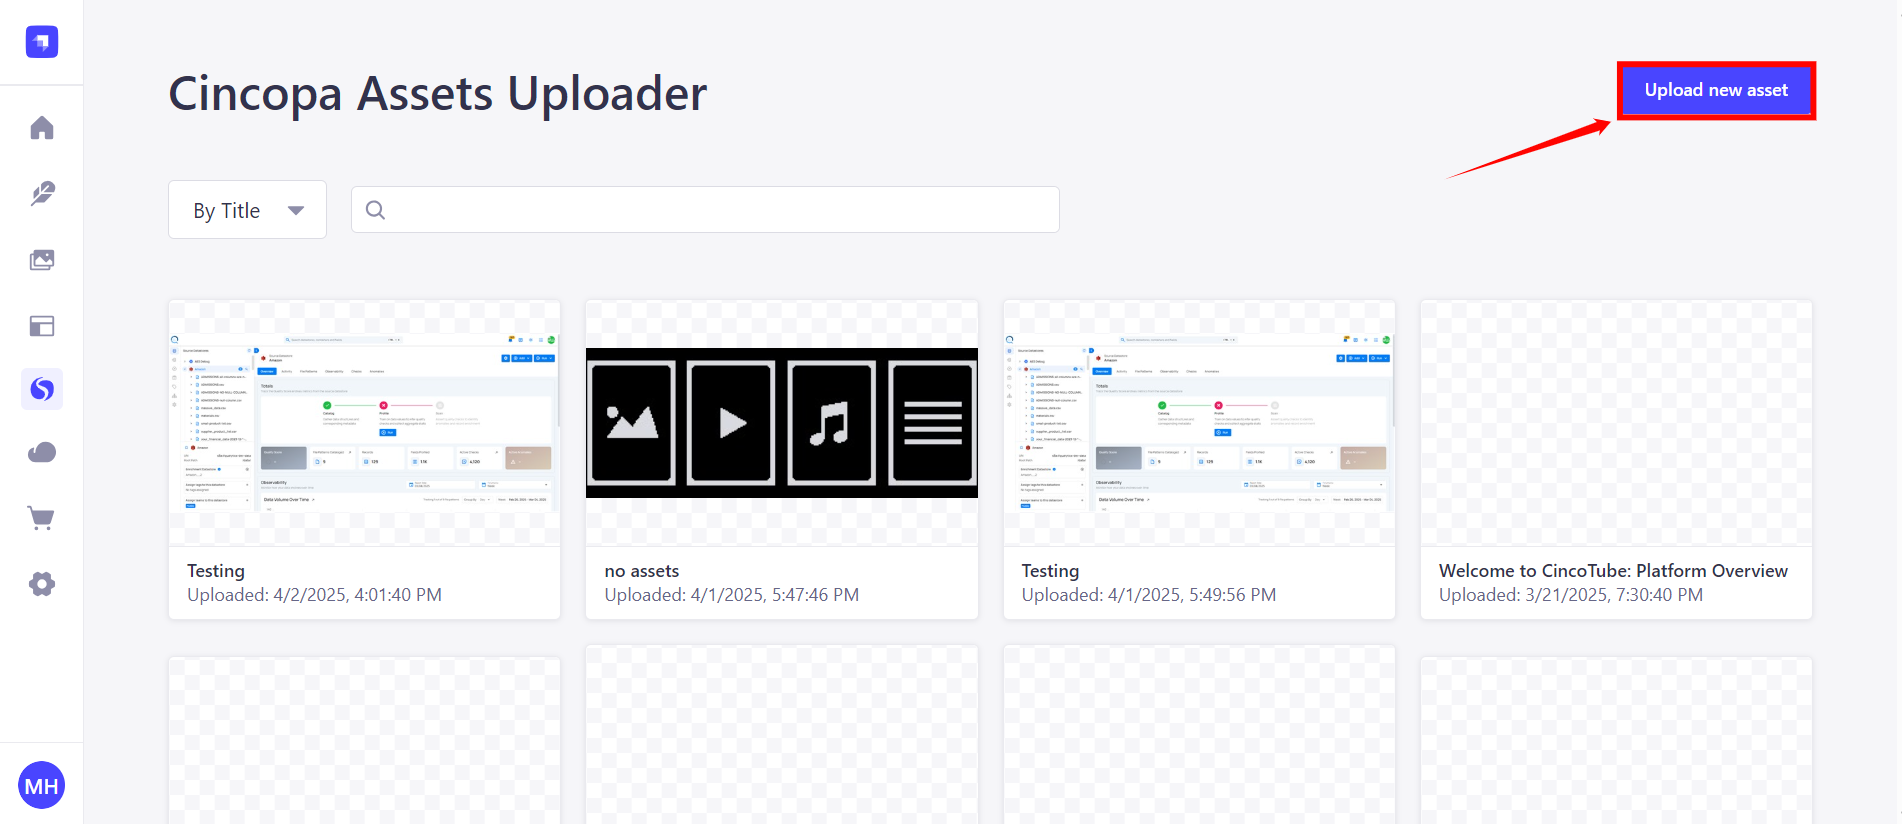
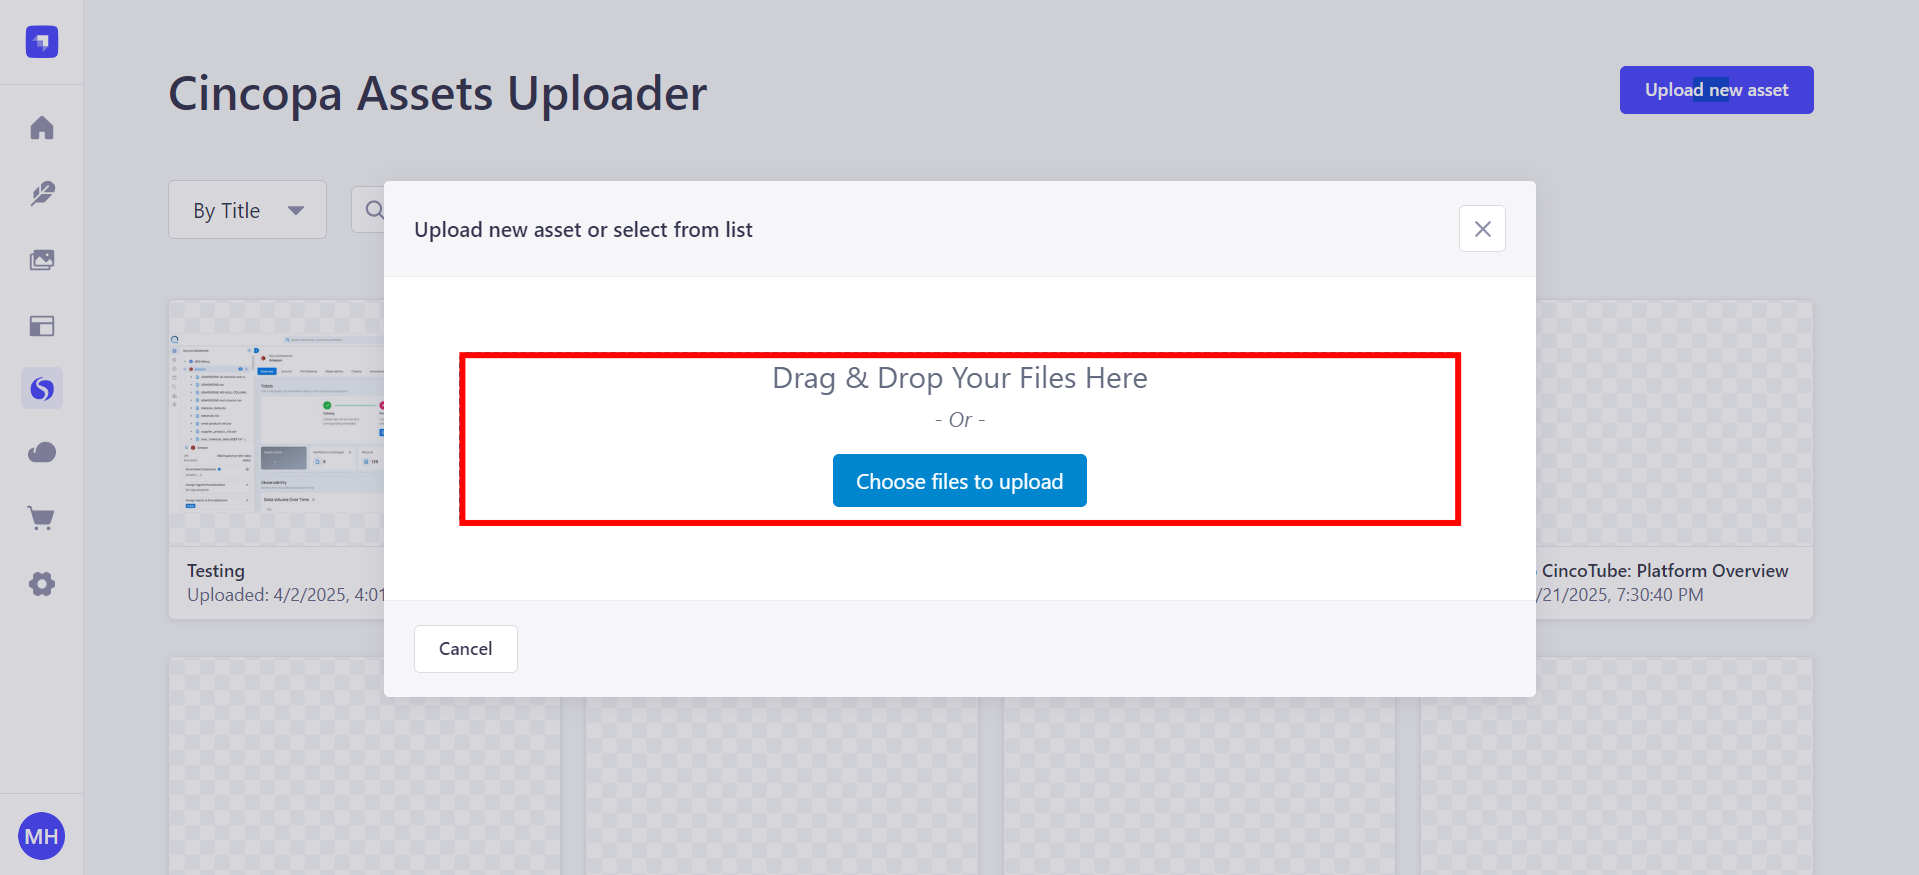
Step 3. Select your file or enter the media URL to begin the upload process.
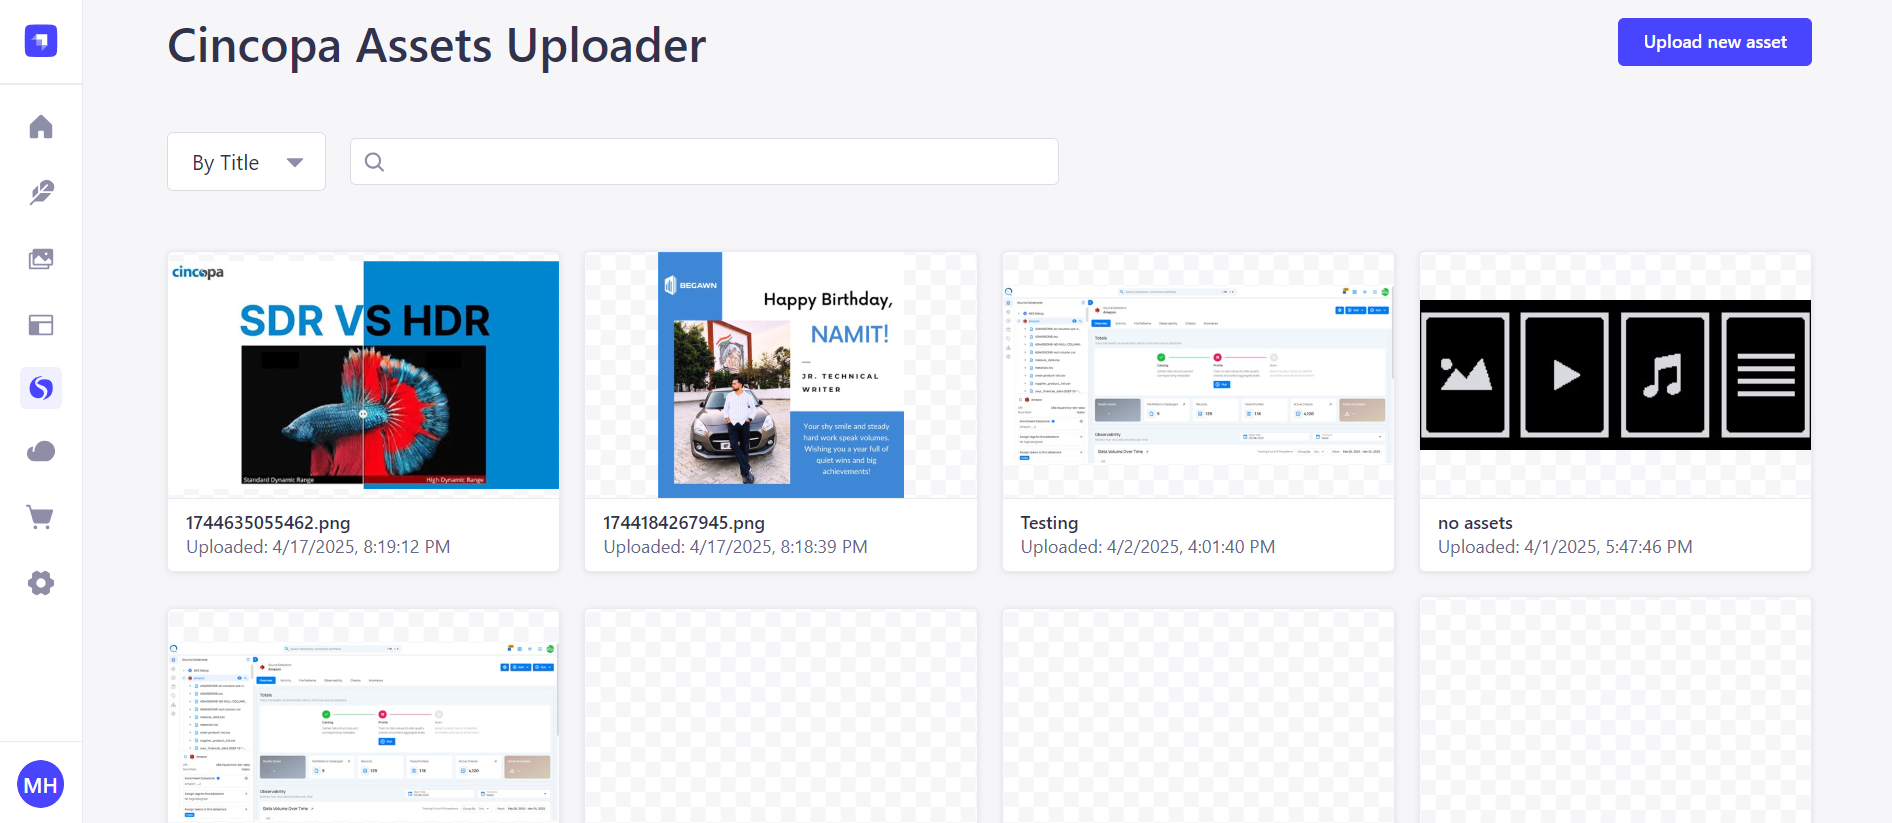
Step 4. Once the upload is successful, you can model relationships between the uploaded Cincopa asset and your custom collection types. This allows you to link media files directly to your content and associate any relevant metadata.
Webhook Events for Real-Time Asset Updates
When a webhook is triggered, it includes an event that explains the reason why the webhook was received. Webhooks notify your system when specific actions occur on your assets or gallery, such as uploads, updates, or deletions. Each action triggers an event that provides detailed information about the asset.
Learn more in the Webhook Events Reference Guide.
How to Get Content using API
Once you have successfully integrated the Cincopa Uploader plugin with Strapi, you can use the Strapi API to retrieve the content associated with your media assets, including the Cincopa assets (such as images, videos, and audio).
Ensure Public Role Access
To make your content accessible via the Strapi API, you need to ensure that the public role is granted permission to access the relevant API endpoints.
Step 1: In the Strapi Admin Panel, go to Settings.
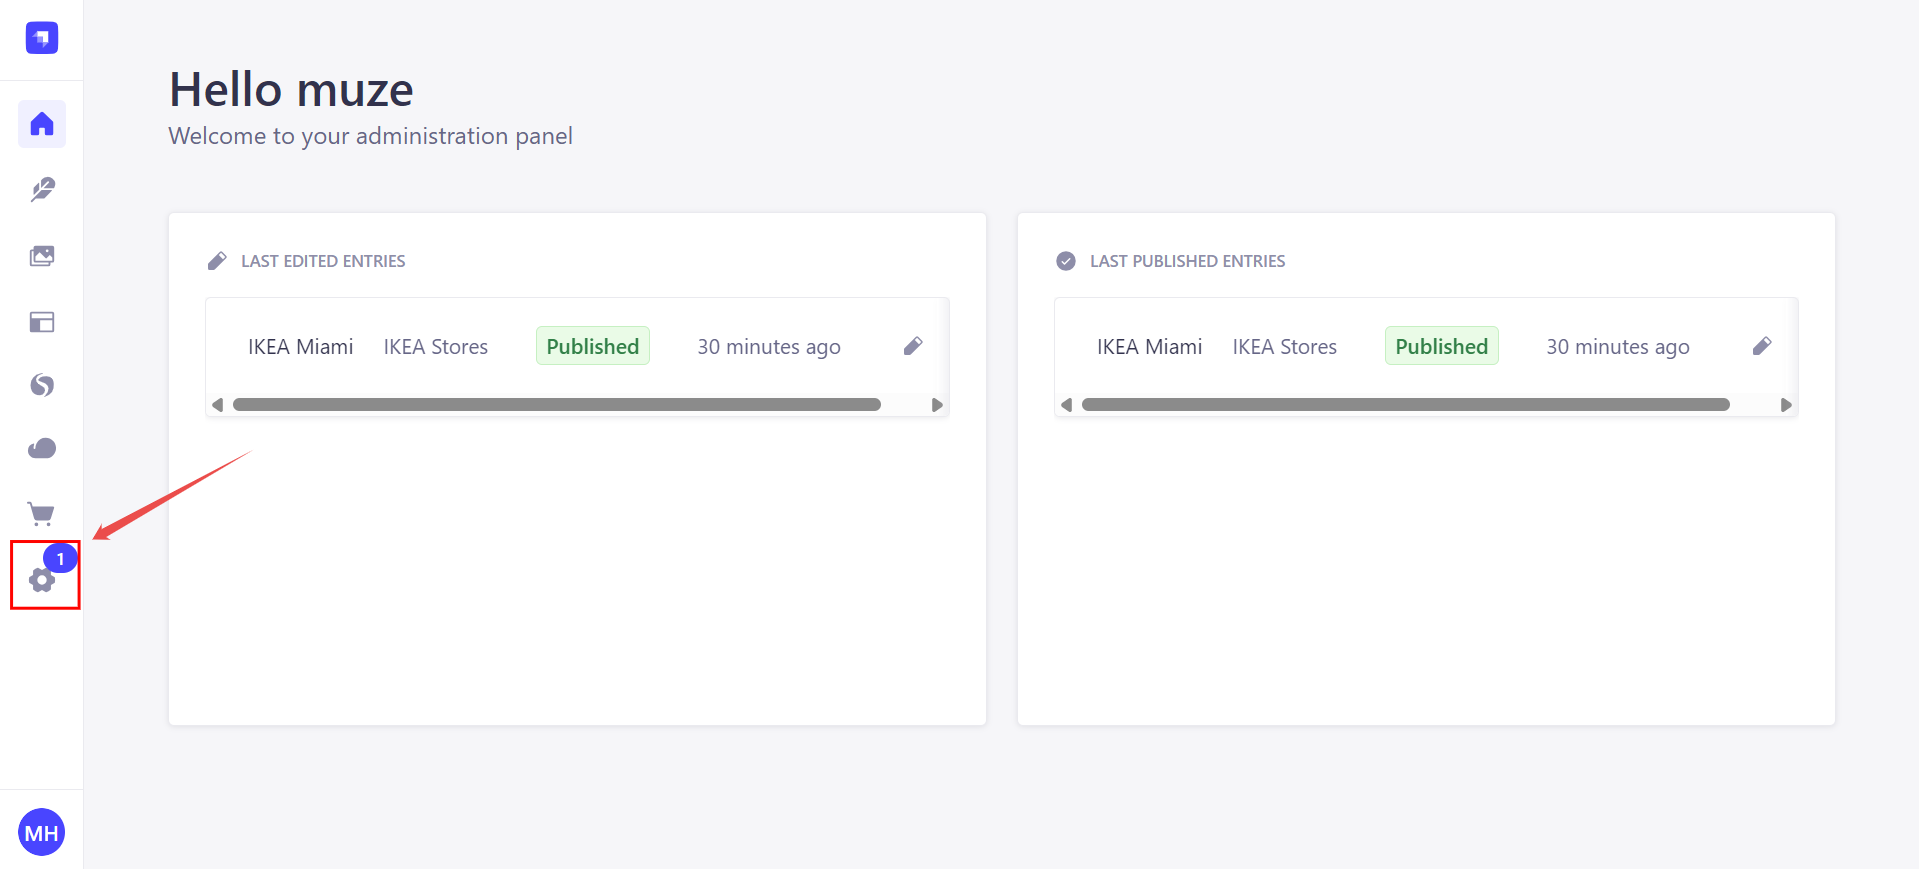
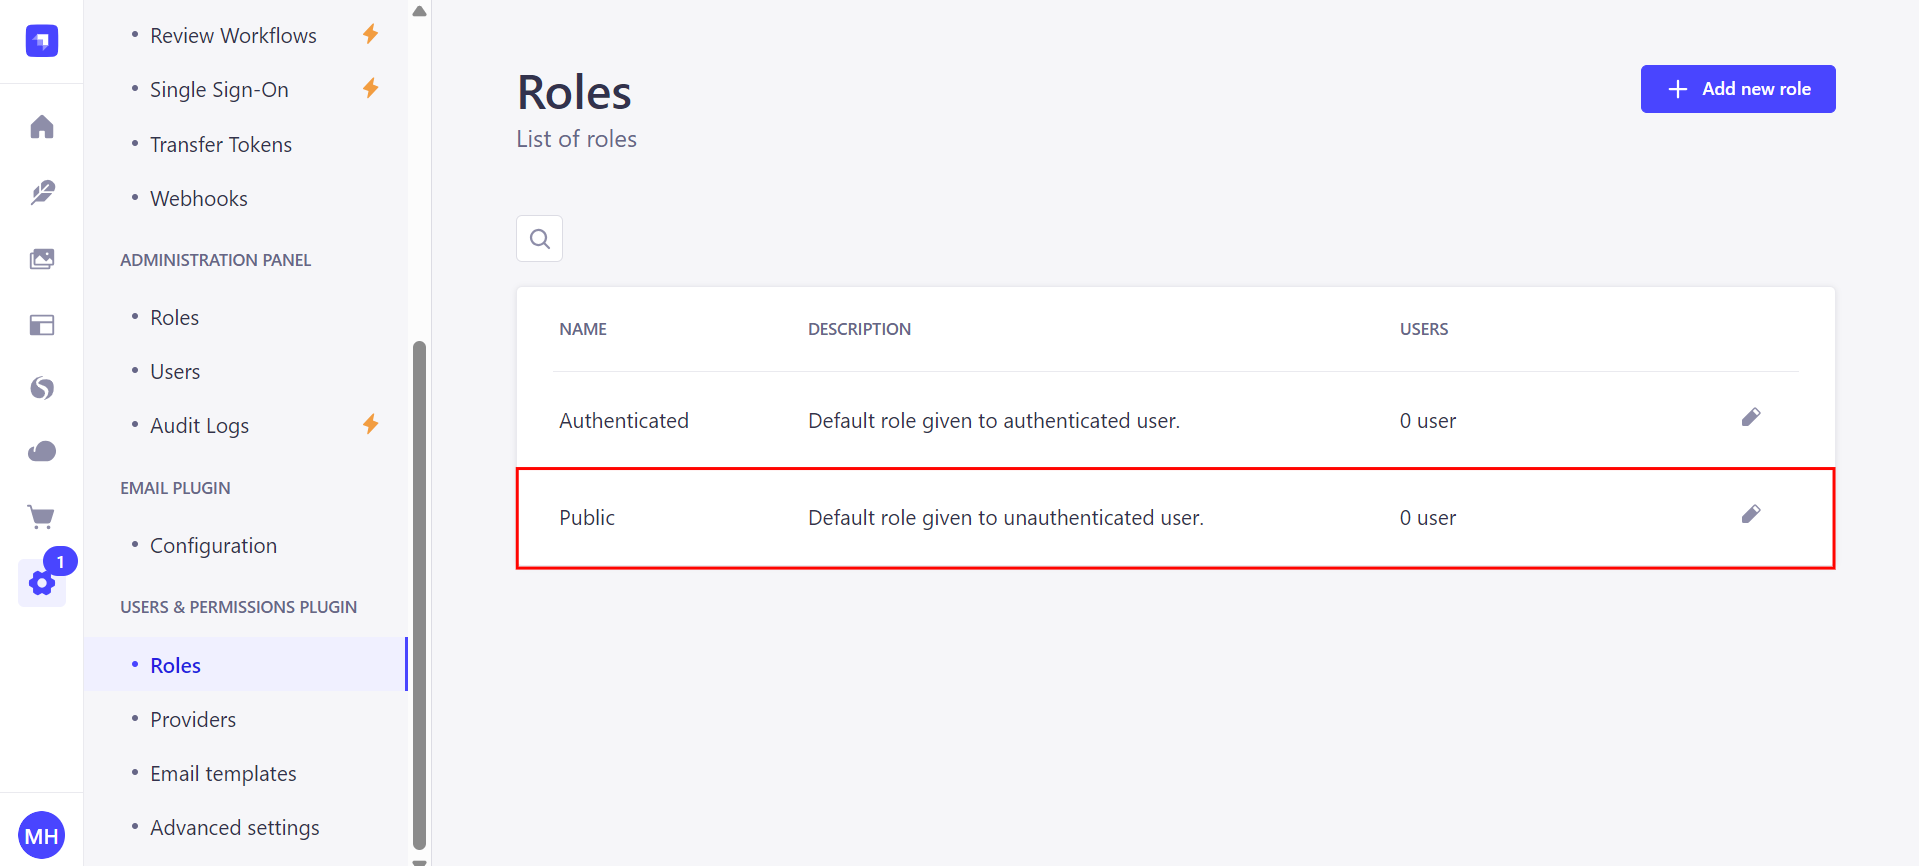
Step 2: Click on the Roles under the User & Permissions Plugin and select the Public role.
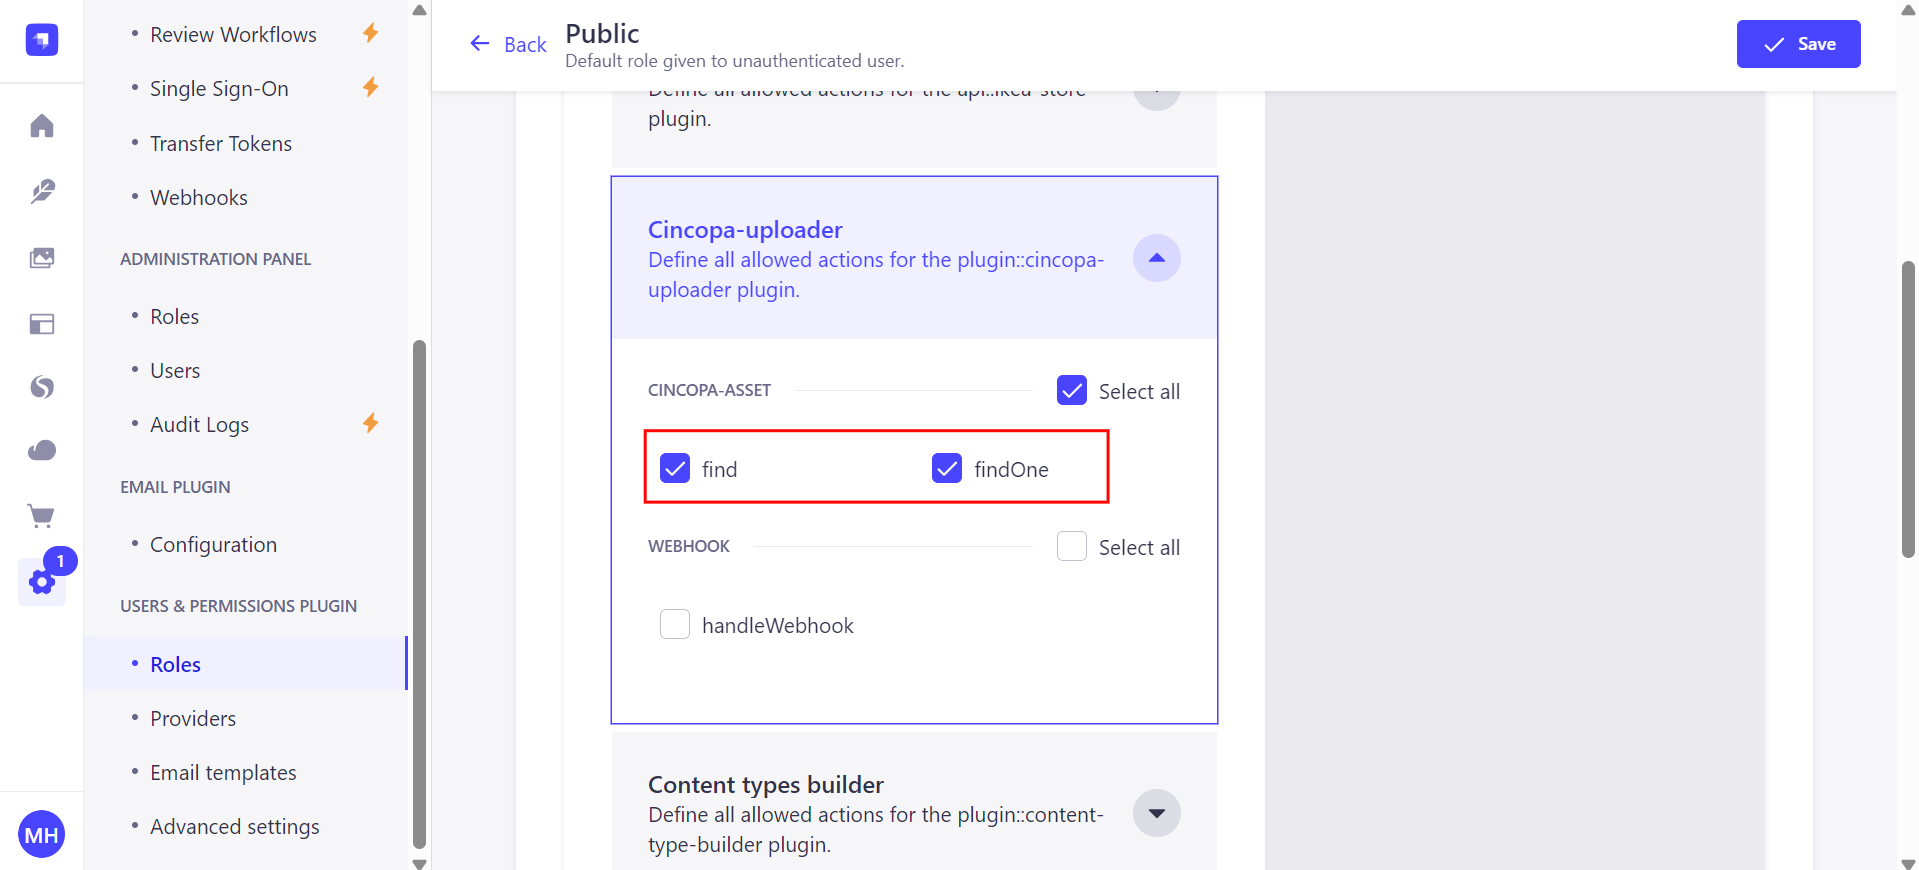
Step 3: In the Permissions section, locate your IKEA Stores collection and enable the find and findOne permissions.

Step 4: Ensure that the Cincopa Asset field is also accessible for the public role so that media files associated with your content are included in the response.
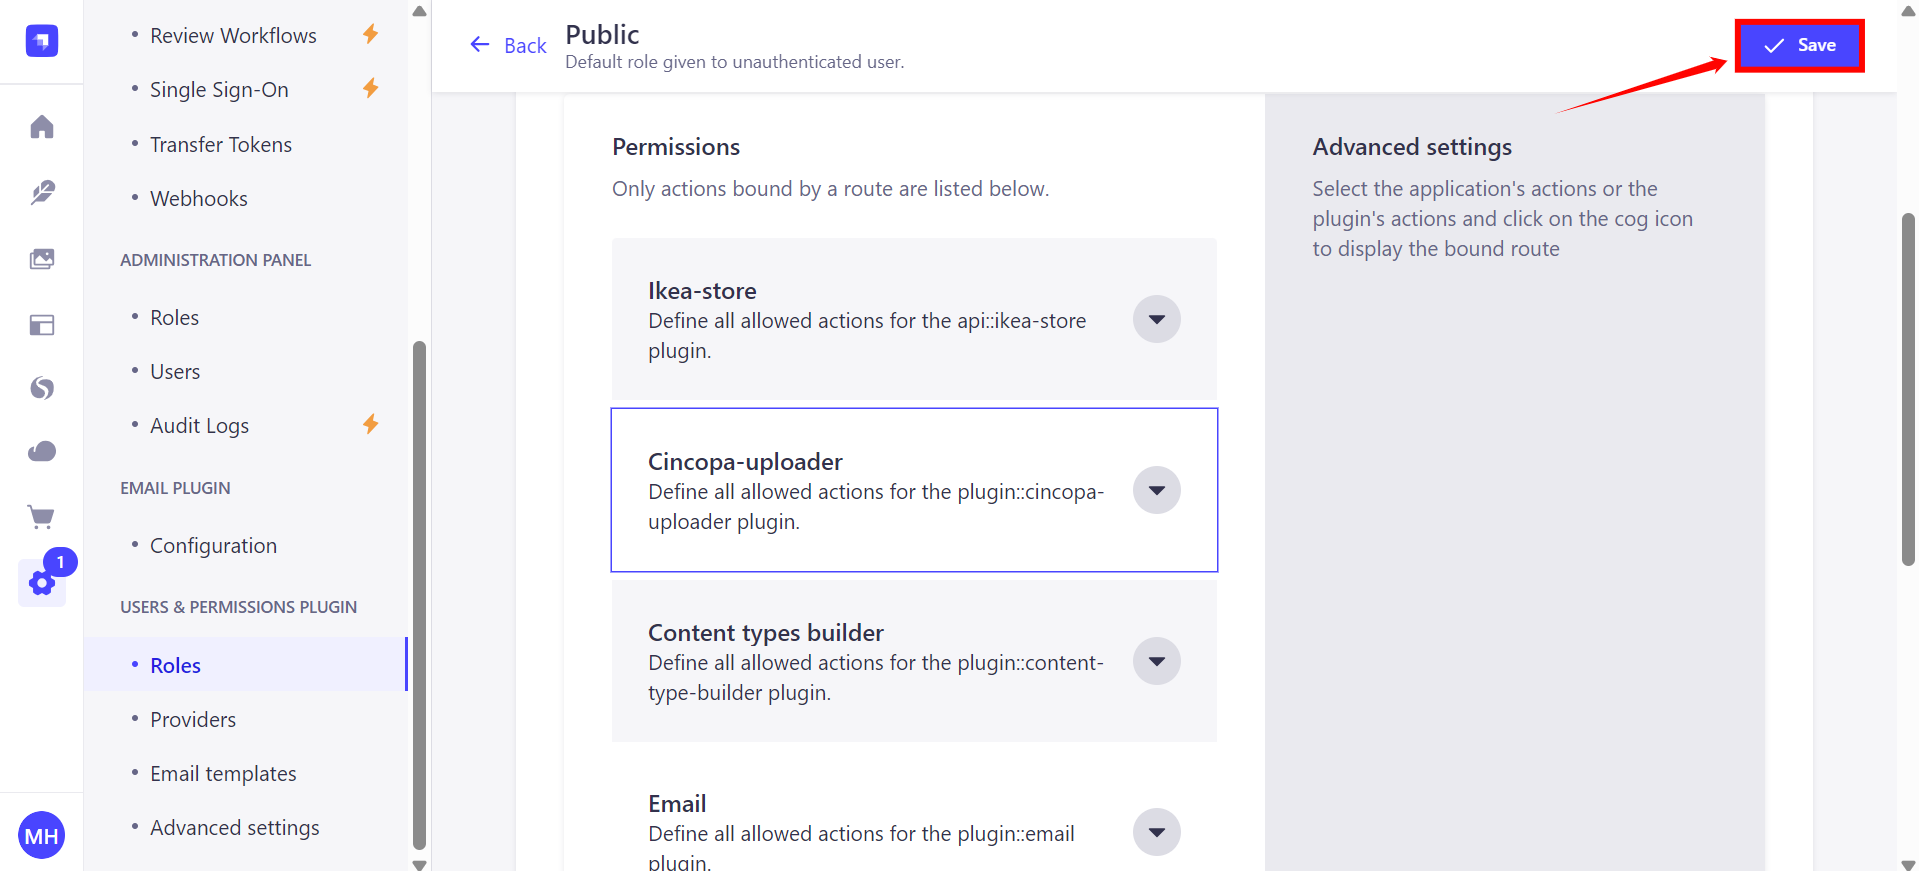
Step 5: Click the Save button to apply the changes to the public role.
Fetch Content via the API
Once the permissions are set and the content type is properly configured, you can fetch the content from the IKEA Stores collection via Strapi’s REST API. To do this, you need to send a GET request to the appropriate endpoint.
To access the IKEA Stores content via the Strapi API, use the following URL:
http://localhost:1337/api/ikea-stores
You can test the GET request by entering the URL directly into your browser or by using a tool like Postman or cURL. If you are using cURL, you can test the request by running this command:
curl http://localhost:1337/api/ikea-stores
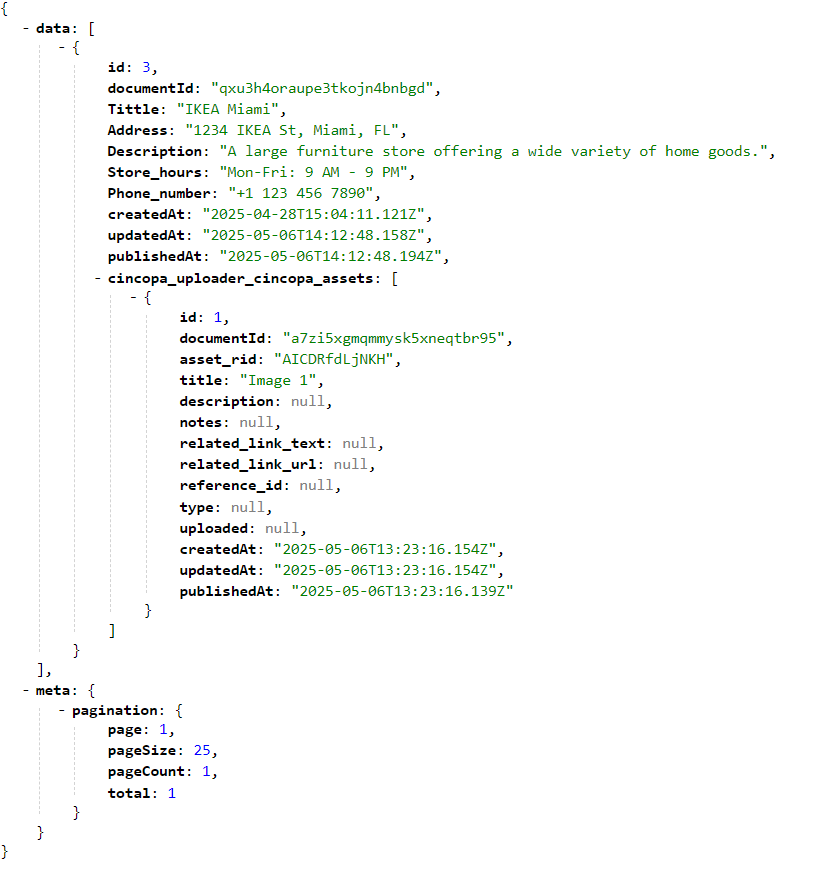
If the permissions are correctly set, Strapi will return a list of all store entries from the IKEA Stores collection. The response will include metadata about each store entry, including any related Cincopa media assets, such as URLs for videos, images, or audio.
Accessing IKEA Stores Data with Images
To access the IKEA Stores collection and also populate the related images, you need to send a GET request to the appropriate endpoint with the populate parameter specifying images.
URL for fetching stores with images:
http://localhost:1337/api/ikea-stores?populate=cincopa\_uploader\_cincopa\_assets
cincopa_uploader_cincopa_assetsis the field (relation) in your IKEA Stores content type that links to the related media assets.The
populatequery tells Strapi to include the related media data (images) along with the store data.
An example of the API response could look like this:
Create an API Token
To use the Cincopa Uploader Plugin effectively, you need to create an API Token in the Cincopa Dashboard:
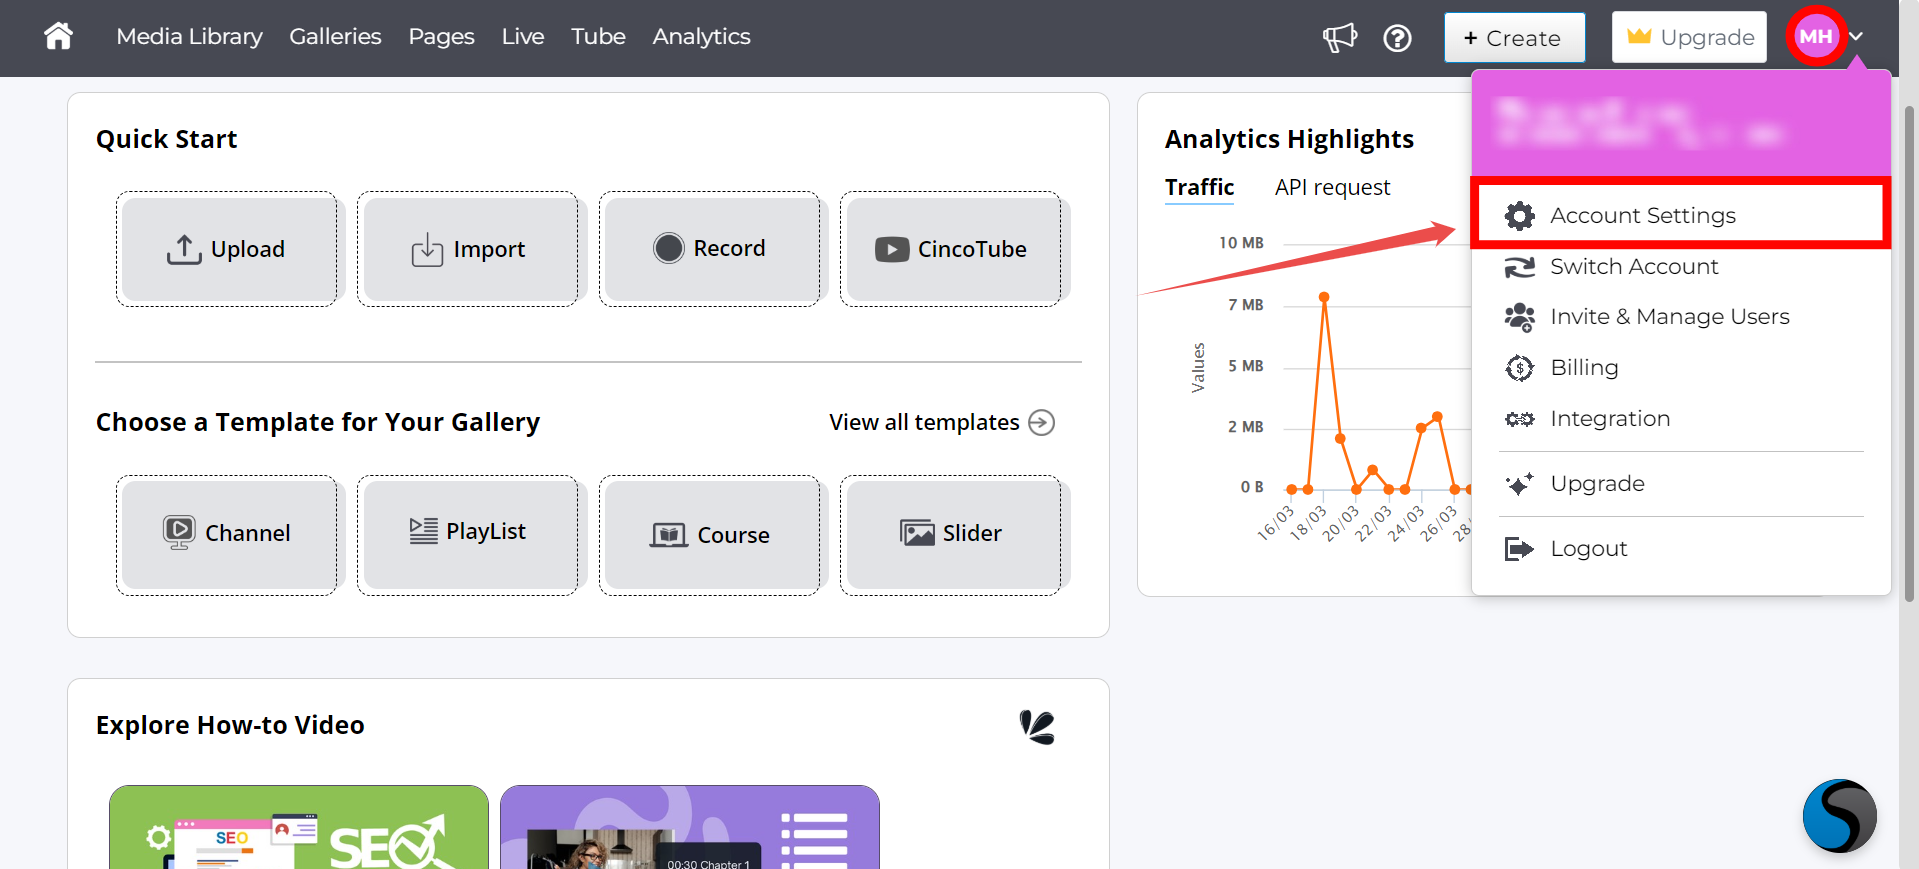
Step 1. Log in to your Cincopa account. Then, click on your profile menu and select “Account Settings” from the dropdown.
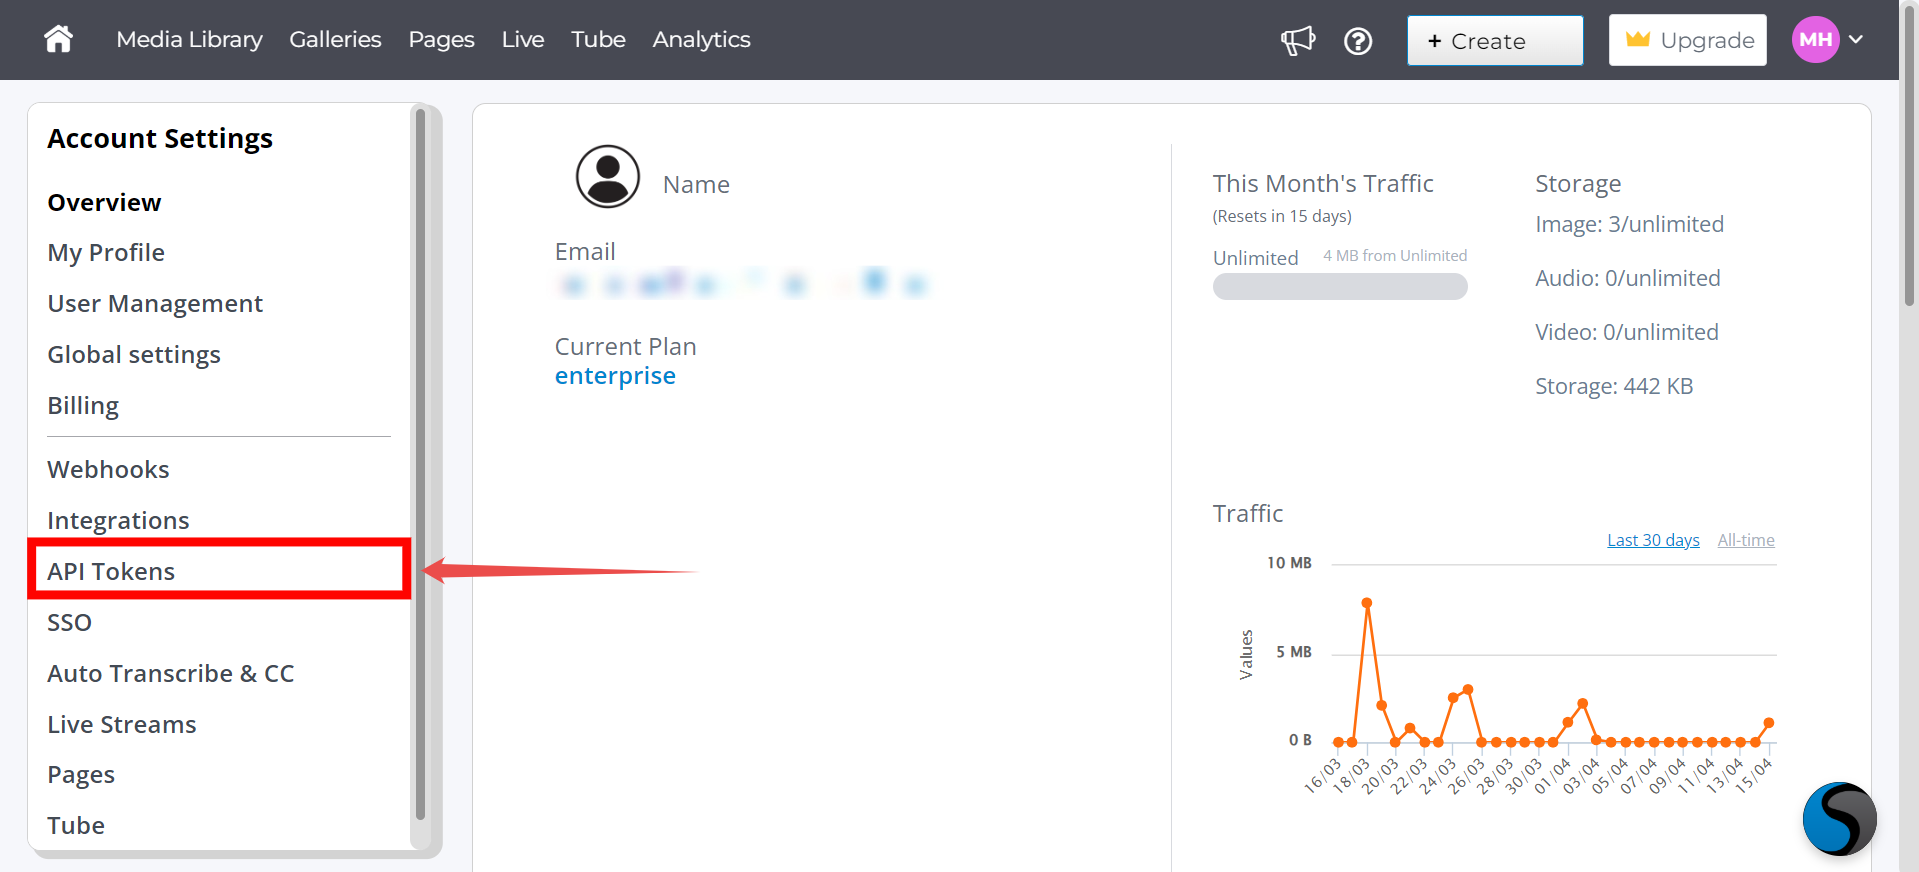
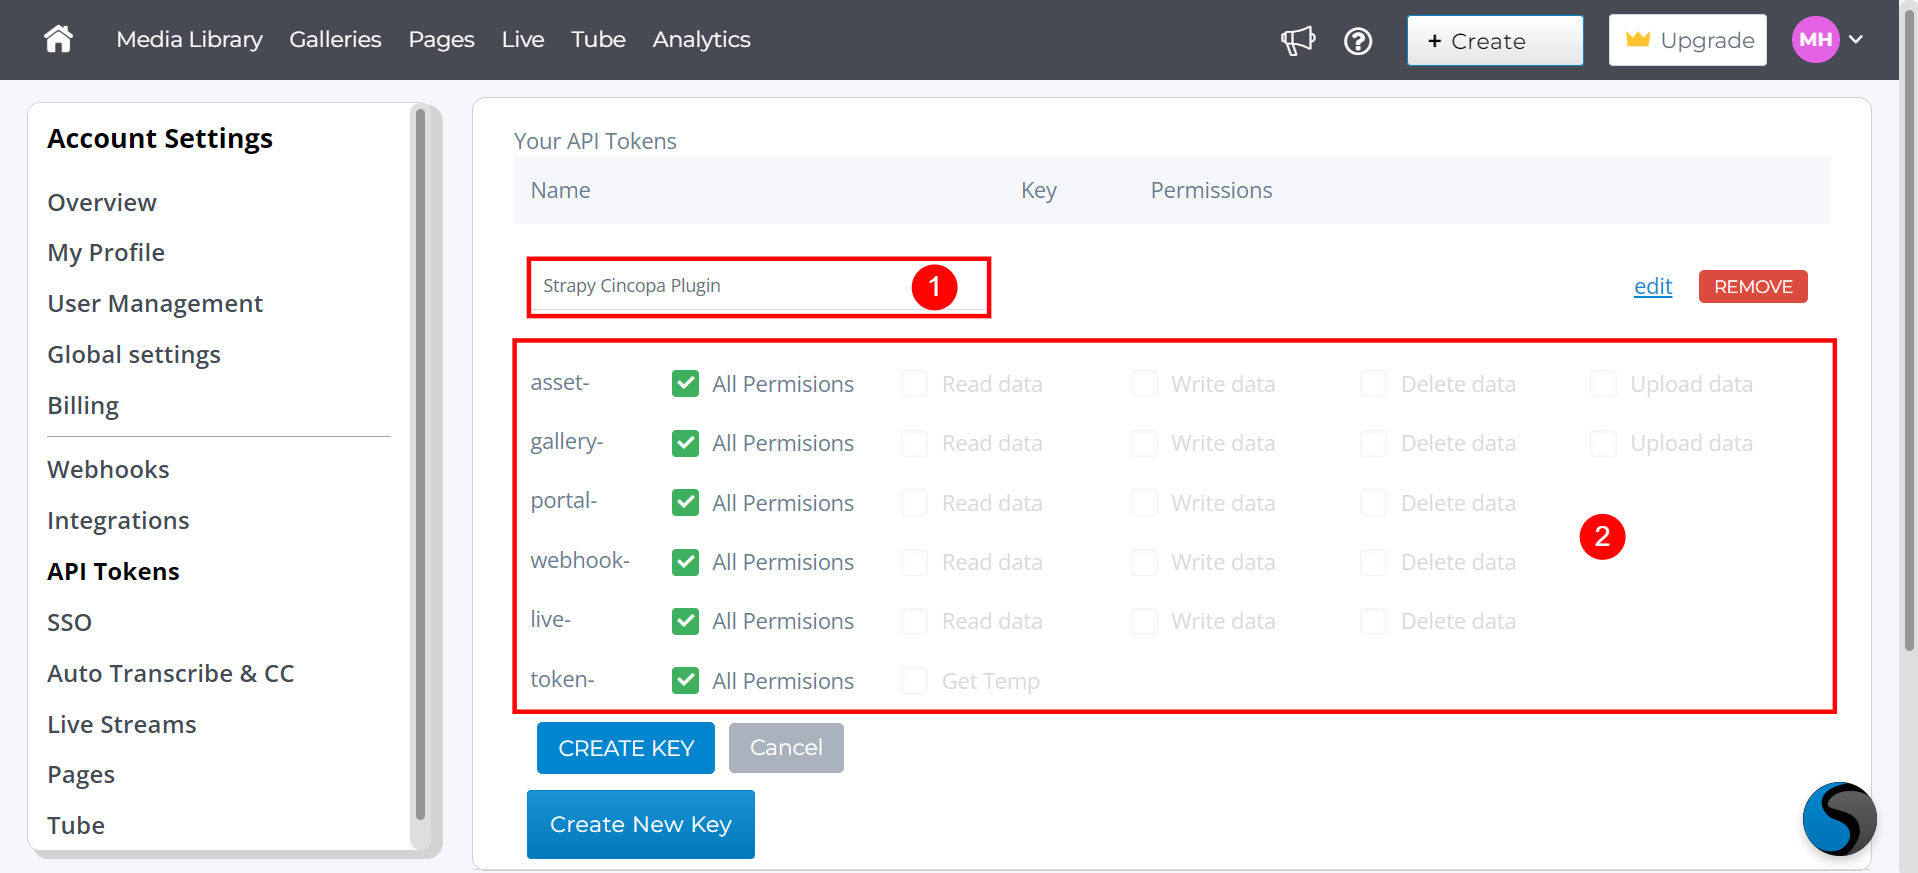
Step 2. Select “API Token” from the left-hand sidebar menu.
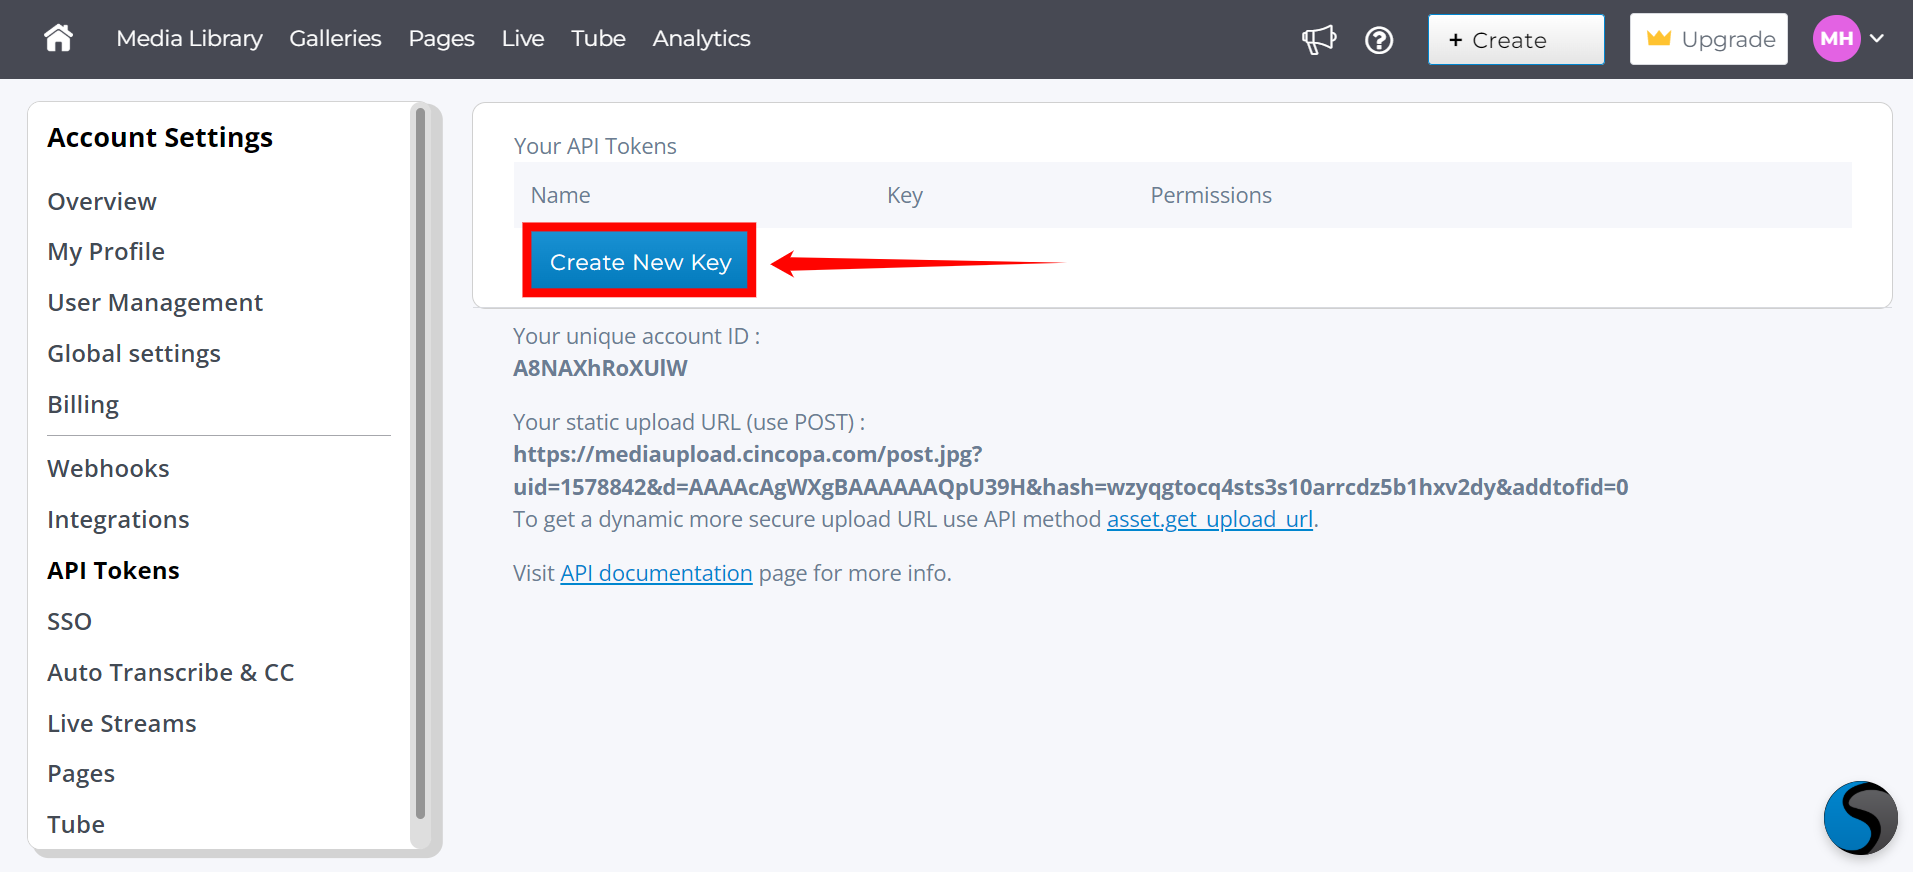
Step 3: Click the "Create New Key" button to generate a new key
Step 4: Name the token and grant it all necessary permissions (full access).
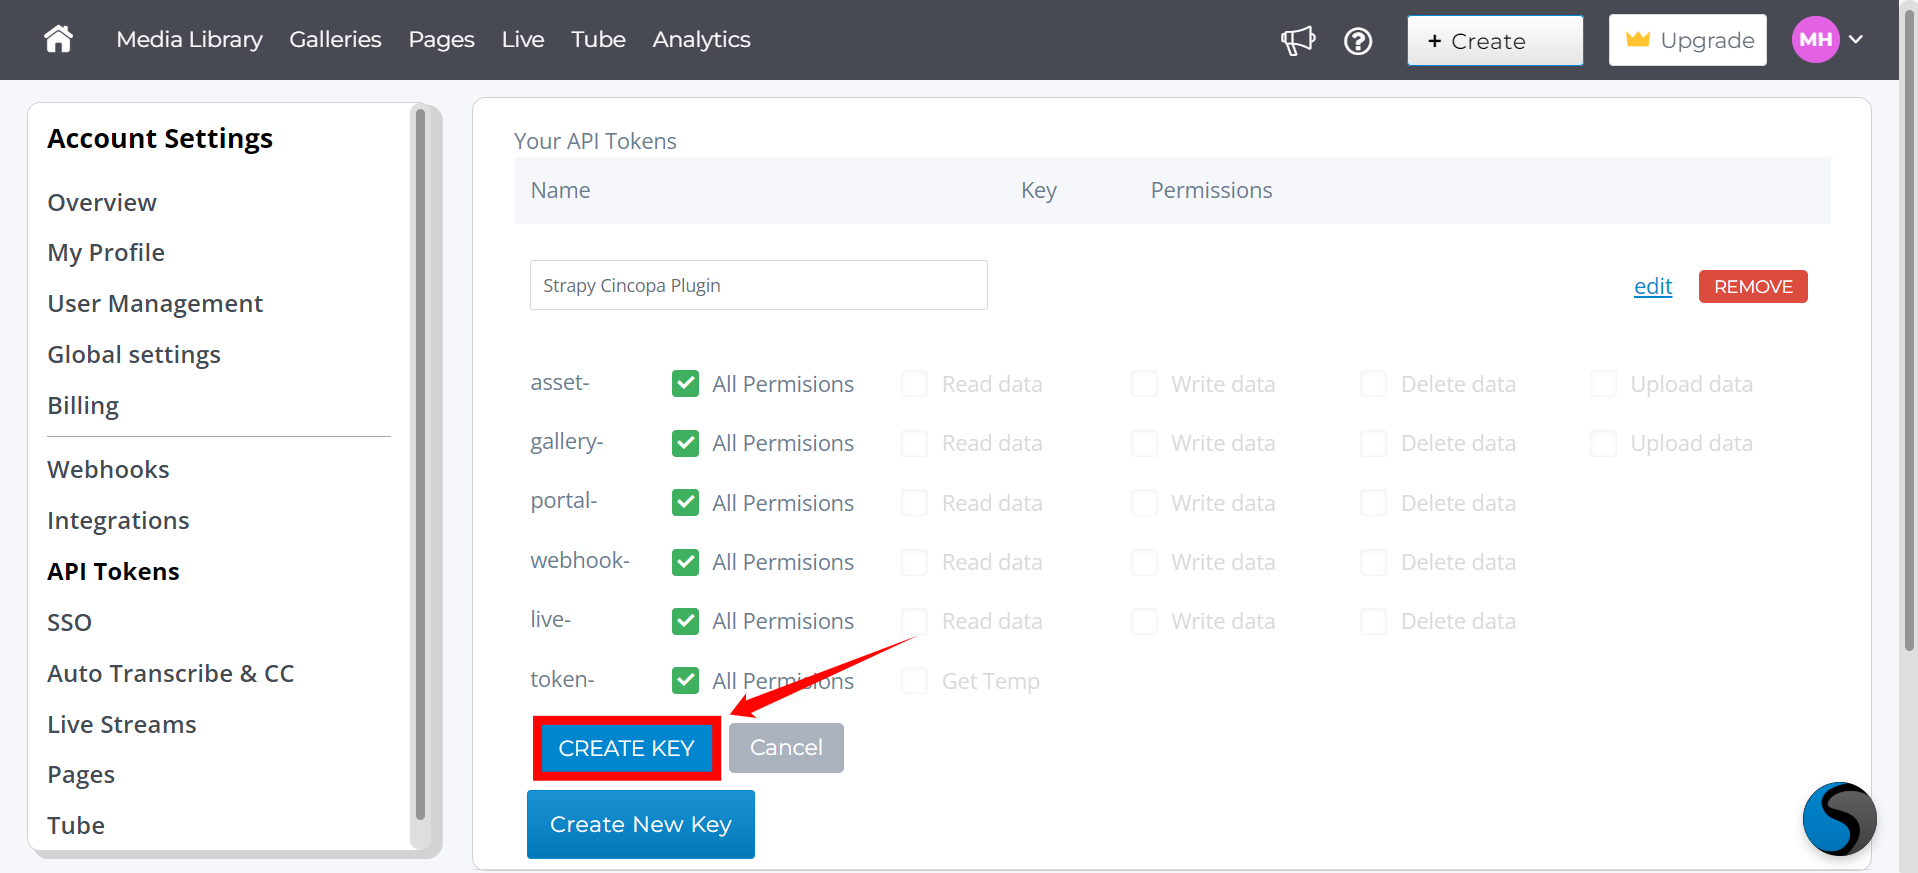
Step 5. After granting the necessary permissions, click the "Create Key" button.
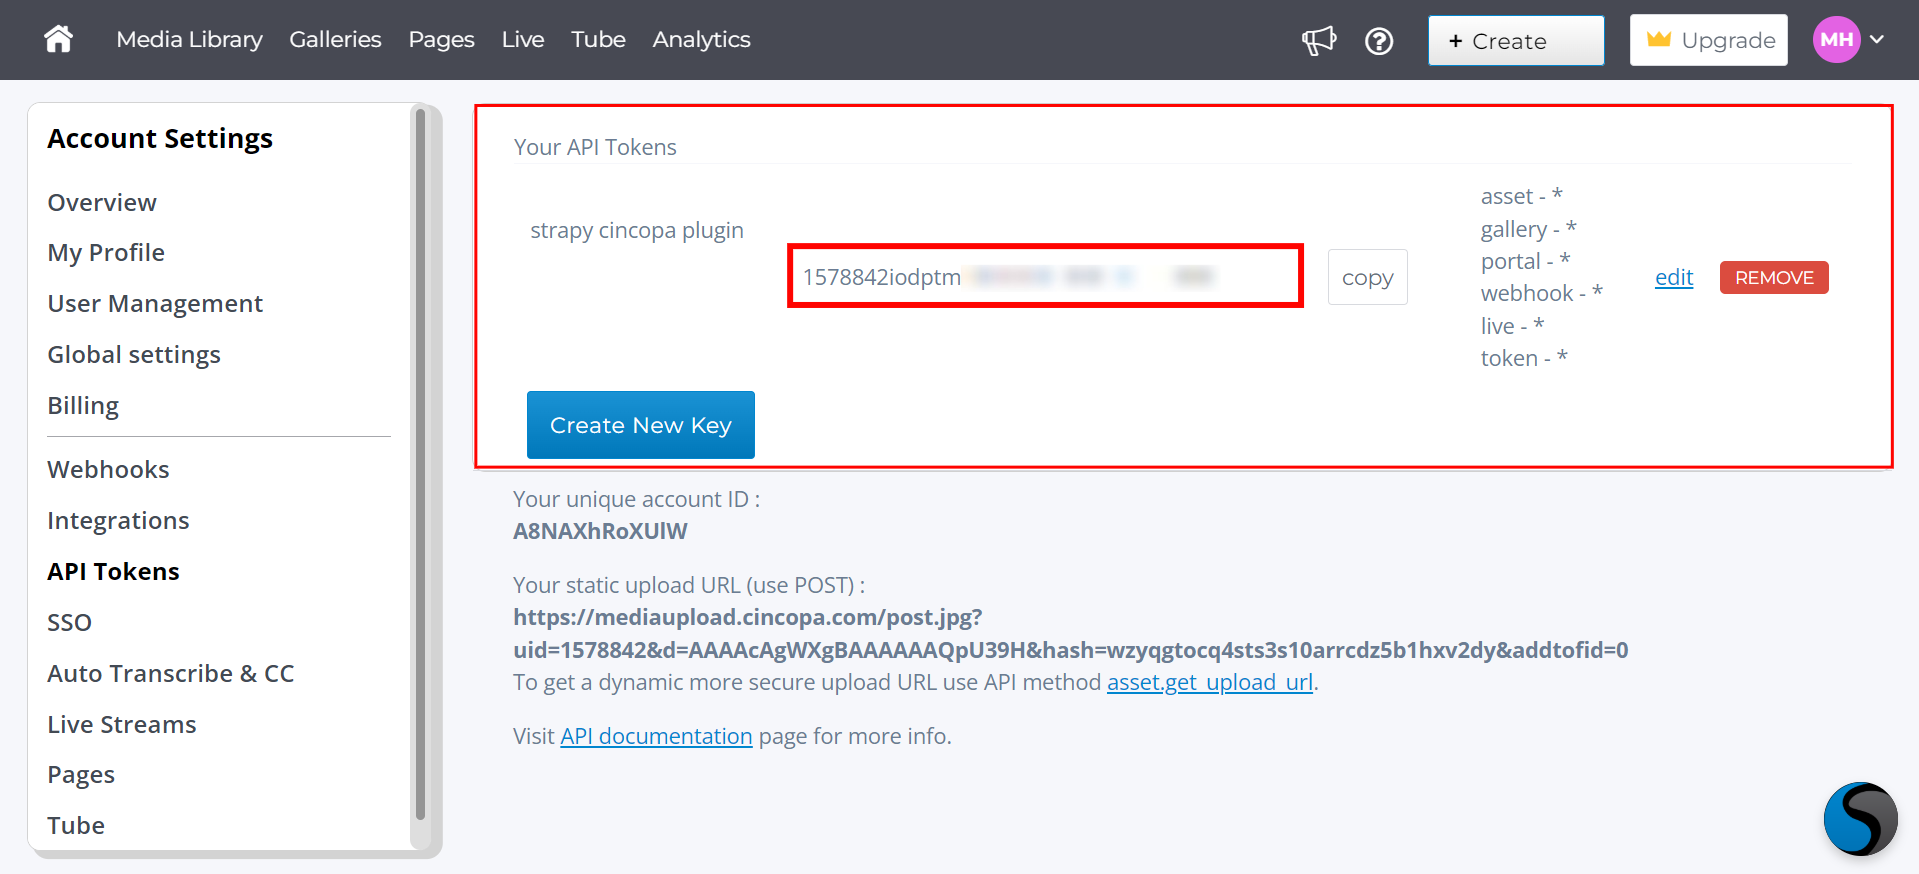
Step 6. Copy these credentials for use in the Strapi configuration.
Next Steps
Now that you've integrated Cincopa with Strapi, you can deploy your Strapi project to a public server to ensure everything functions smoothly. For deployment and further configuration, follow these resources:
How to deploy Strapi to a public server