Upload content from your site or dashboard using an iFrame
You can upload content to a gallery directly from your website, this iframe provides a unified simple interface for an end user to upload using drag and drop, select media, edit the media information, reorder, and delete. The iframe supports mobile, tablet, and desktop and will adopt the size and shape according to the site layout.
Here are some scenarios where this iframe can be used :
CMS systems like WordPress and BuddyPress are in an editor mode where the user can attach the media while in the authoring mode of a post, article, or profile. The iframe allows managing and uploading content directly from the dashboard (for example WordPress's Easy Albums plugin).
LMS system in teachers mode like moodle.org where the teachers can add media to a lesson.
CRM system like Salesforce where a media can be attached to any object for example product object where the iframe can be added to the product's layout and allow adding videos, images, audio and docs to that object.
Media that is uploaded will reside in a gallery, this gallery can be referenced using 2 methods, those 2 methods are interchangeable and were created to make the integration with the different systems much simpler :
Cincopa Identifier - this id (also known as FID) is issued by the API (or when creating a gallery in www.cincopa.com). when using FIDs your system should save it either in CMS page (like short code in WordPress) or in an extra field in the CRM object.
External Identifier - this id (also knows as RRID) is actually a remote reference given by your system, for example in WordPress this can be post id. in Salesforce this can be the unique id of the specific object.
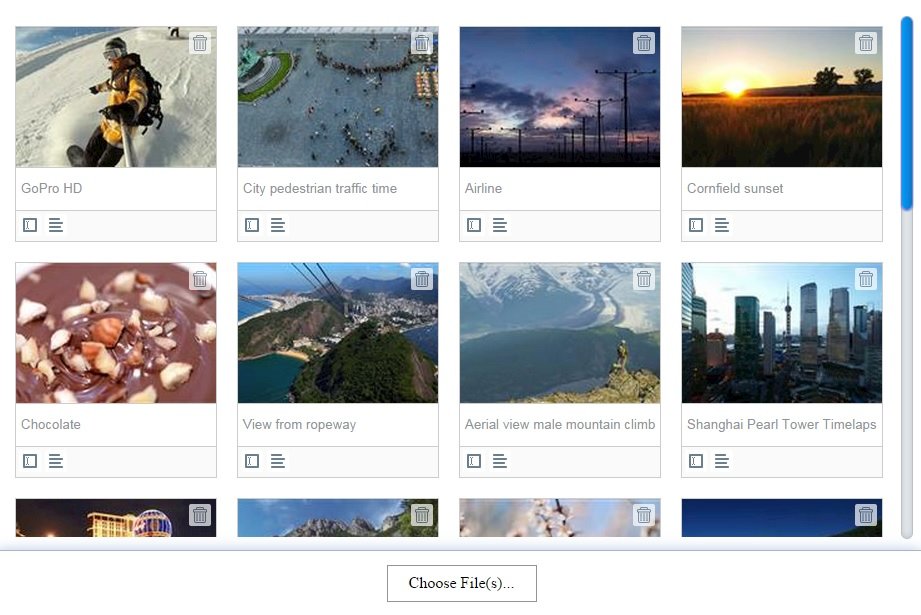
This is how the iframe will look at your site:
For more information about this method and how to use it check the V2 API doc under method upload.iframe.
Embedding the gallery in your page can be done by adding a javascript or HTML code. When embedding a fix gallery with a know fid (created manually using the Cincopa wizard or obtained with the REST API) use the following code (or copy and paste from step #4 in the wizard) :
<div id="cp_widget_1">...</div>
<script type="text/javascript">
var cpo = [];
cpo["_object"] ="cp_widget_1";
cpo["_fid"] = "<GALLERY_FID>";
var _cpmp = _cpmp || []; _cpmp.push(cpo);
(function() { var cp = document.createElement("script"); cp.type = "text/javascript";
cp.async = true; cp.src = "//www.cincopa.com/media-platform/runtime/libasync.js";
var c = document.getElementsByTagName("script")[0];
c.parentNode.insertBefore(cp, c); })();
</script>
When embedding a gallery with rrid (created by the upload.iframe) use the following code :
<div id="cp_widget_1">...</div>
<script type="text/javascript">
var cpo = [];
cpo["_object"] ="cp_widget_1";
cpo["_uid"] = "<UNIQUE_ACCOUNT_ID>";
cpo["_rrid"] = "<REFERENCE_ID >";
cpo["_template"] = "<GALLERY_ID>";
var _cpmp = _cpmp || []; _cpmp.push(cpo);
(function() { var cp = document.createElement("script"); cp.type = "text/javascript";
cp.async = true; cp.src = "//www.cincopa.com/media-platform/runtime/libasync.js";
var c = document.getElementsByTagName("script")[0];
c.parentNode.insertBefore(cp, c); })();
</script>
Comments about the code :
cp_widget_1 in the id of the div and should be unique in the page, if you have more than one then set the second to cp_widget_2 etc. make sure to update
cpo["_object"] ="cp_widget_2";to the same div id.UNIQUE_ACCOUNT_ID can be found at the bottom of the API page
REFERENCE_ID should be the same as rrid from the iframe
GALLERY_ID is the ID of a gallery in your account that will be used as the visual template, create as many templates as your like in your account, call it template1-X, choose the template, customize to your liking and use the ID. you can also use Ids of system templates from the start page. For example AEAAQdbniShi