Flutter + Cincopa_Video_Player Integration Guide
The player enables HLS streaming with automatic tracking of playback events such as play, pause, and time updates. It supports both user and video metadata, allowing accurate analytics collection through your Cincopa account.
The video player is built using Flutter’s native video rendering system and is designed to seamlessly send event data to Cincopa's analytics platform. When a video is played using this player, it connects to the video stream via a unique resource ID (RID) and sends event data directly to Cincopa Dashboard. This makes it easy to manage and track video performance across your app.
For example, this integration creates a basic Flutter application built entirely around the Cincopa video player. The app presents a clean interface with an embedded HLS video player and includes a simple control to switch between video streams. It serves as a practical reference for how the player can be implemented in real mobile use cases, showing how it fits into a typical Flutter layout and interacts with user input.
In this guide, we’ll walk through how to integrate the cincopa_video_player Flutter package into your app for native video playback without relying on WebView.
For additional reference, you can also visit the Flutter Welcome Page.
Let’s get started 🚀
Prerequisites:
1. Flutter SDK Installed: You need to have Flutter installed on your system. If you don’t have it, you can download it from the official Flutter website: Flutter Install Guide.
2. Android Studio: Install Android Studio for managing your Flutter project, handling the Android-specific setup, and running the emulator. Ensure that the required Android SDK components are also installed.
3. Java 17(JDK): You need to have java 17(JDK) installed on your system.If you don’t have it, you can download it from here OpenJDK Downloads
Steps for Integration:
Android Setup
Step 1.Enable Internet Access
To allow your app to access the internet and play videos on Android, follow these configuration steps:
1. Open android/app/src/main/AndroidManifest.xml.
2. Add the following inside the <manifest> tag to allow internet access:
<uses-permission android:name="android.permission.INTERNET" />
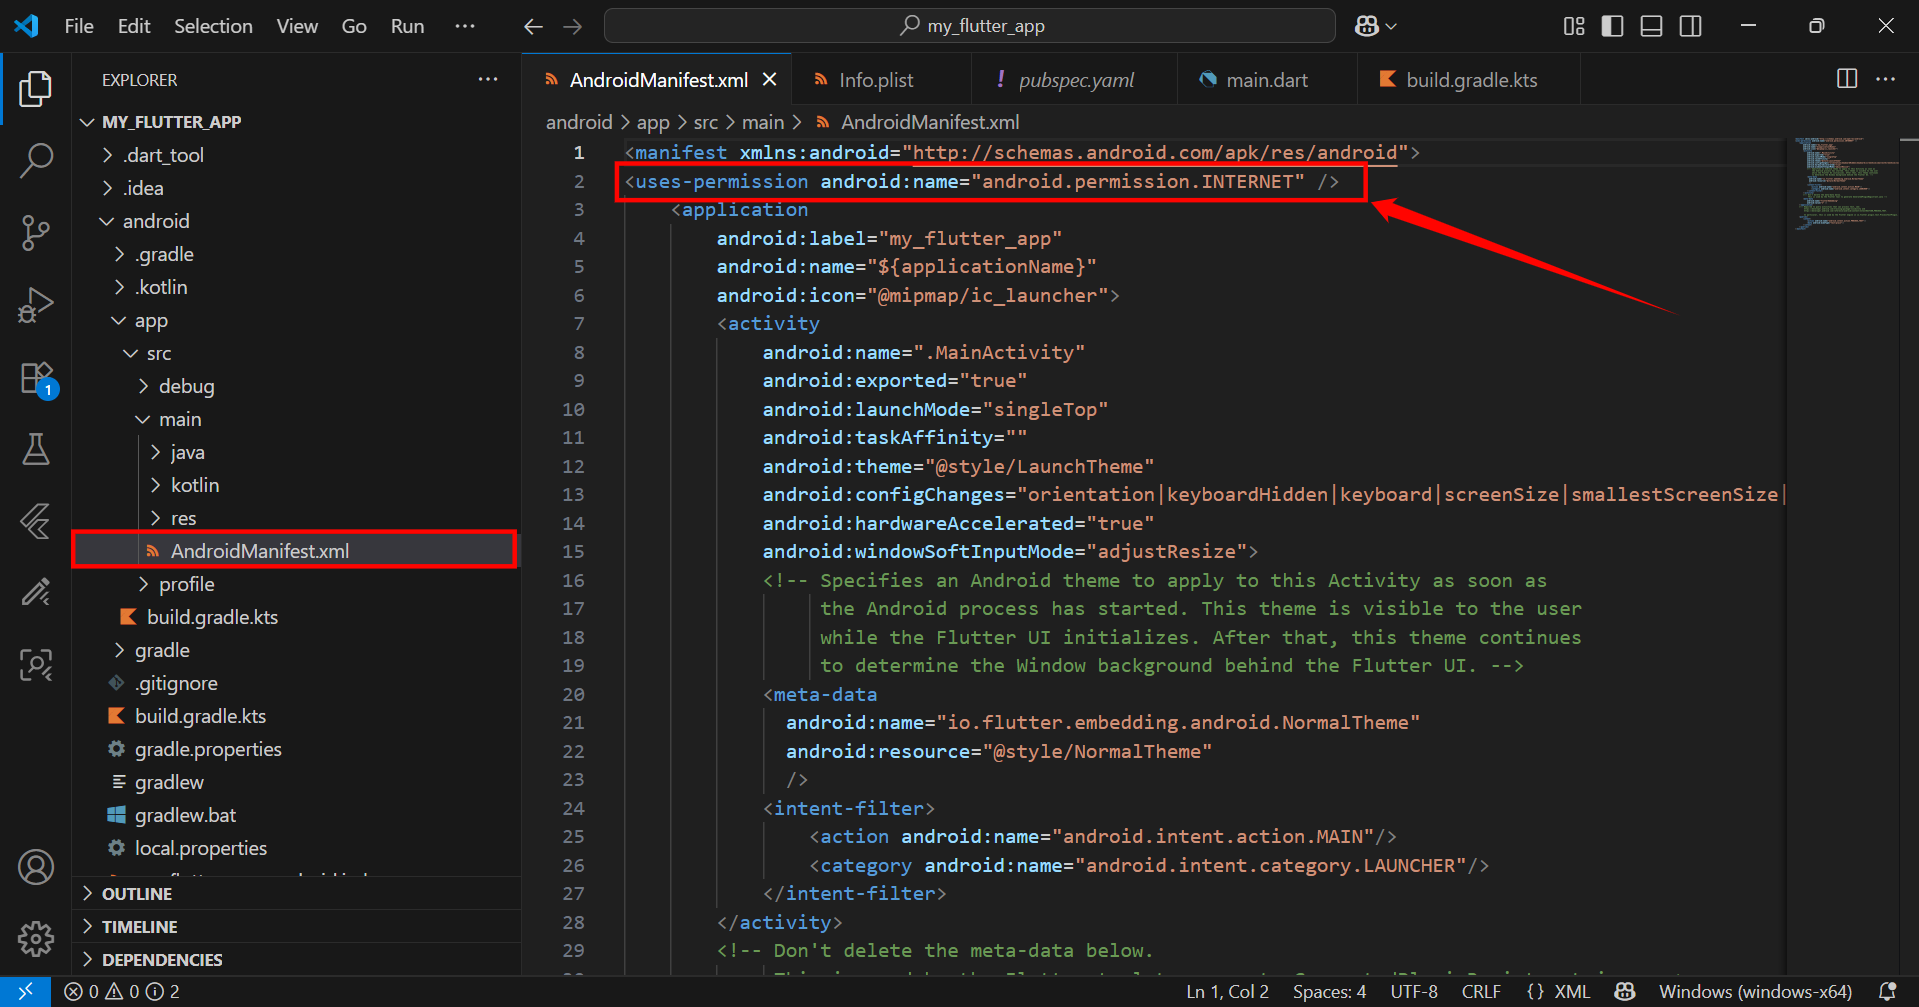
3. Inside the <application> tag, add:
android:hardwareAccelerated="true"
android:usesCleartextTraffic="true"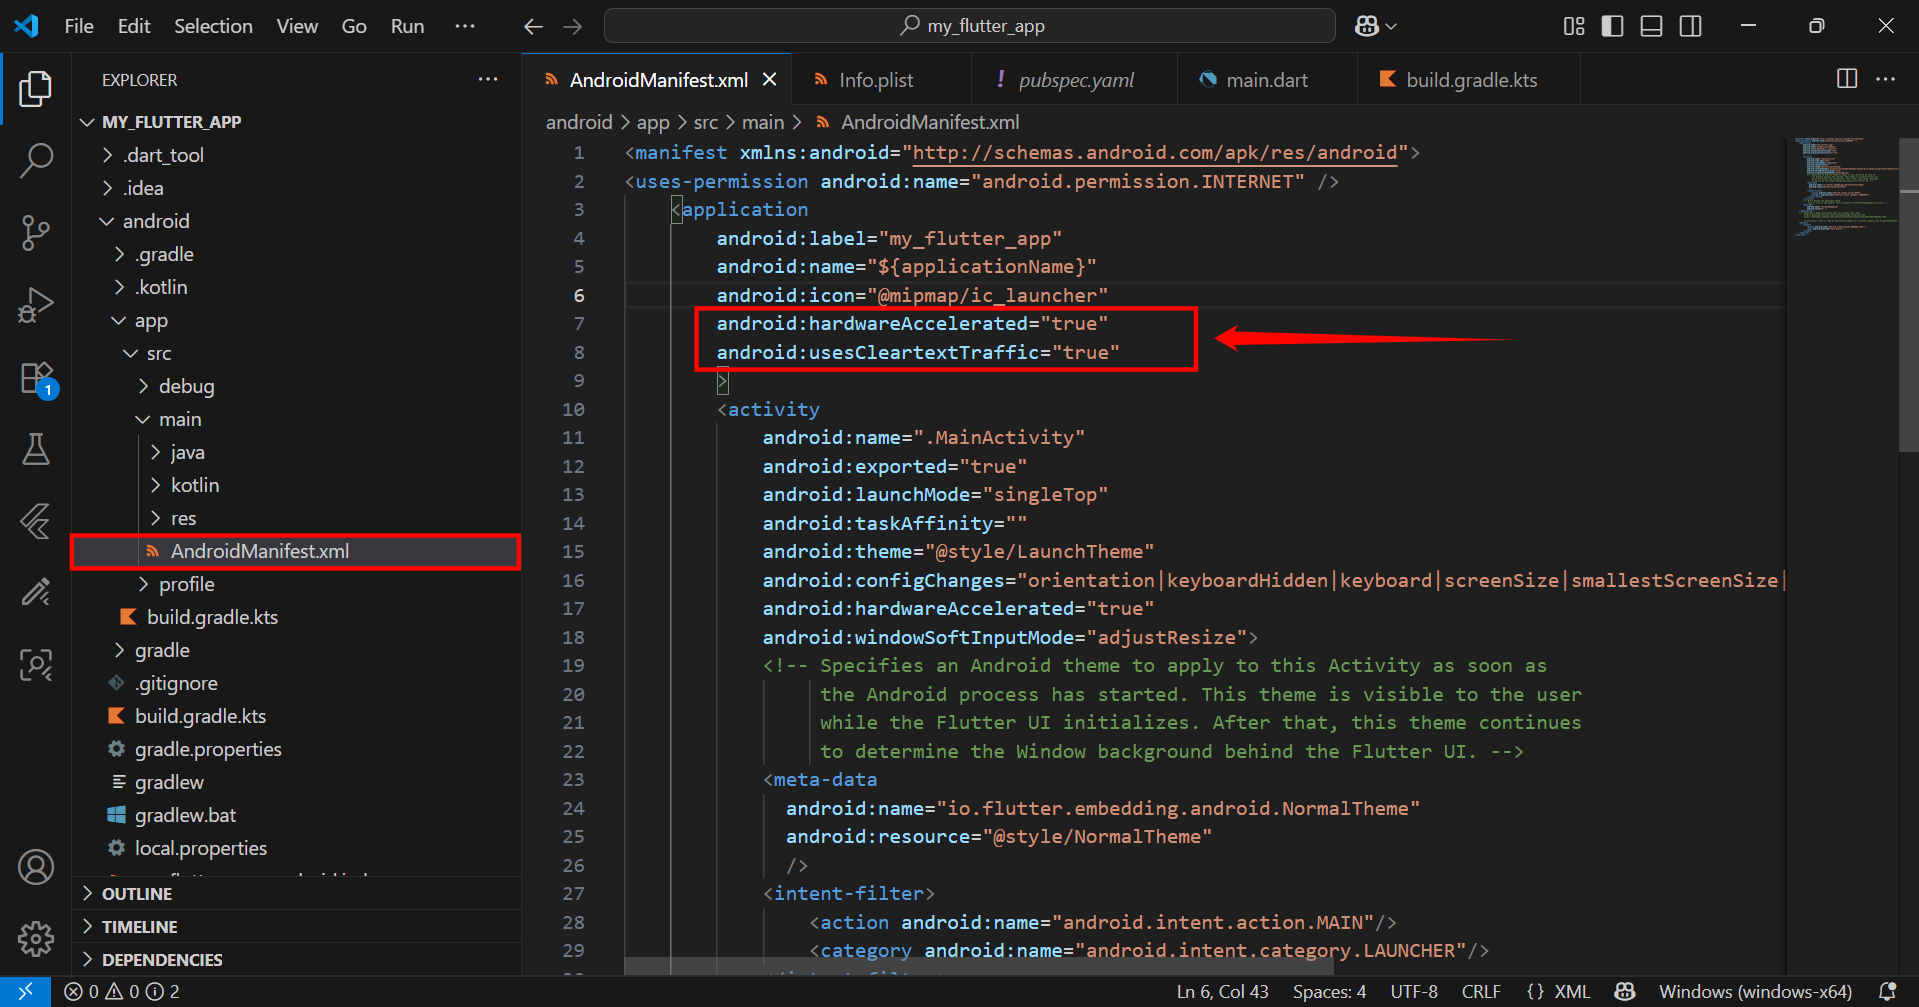
These settings ensure that your app can load external content like the Cincopa gallery and render it smoothly.
Step 2. Add Required Dependencies
To begin, you need to add the cincopa_video_player package to your Flutter project.
Run the following command in your terminal:
flutter pub add cincopa_video_player

This will update your pubspec.yaml file with the dependency:
dependencies:
cincopa_video_player: ^0.0.4 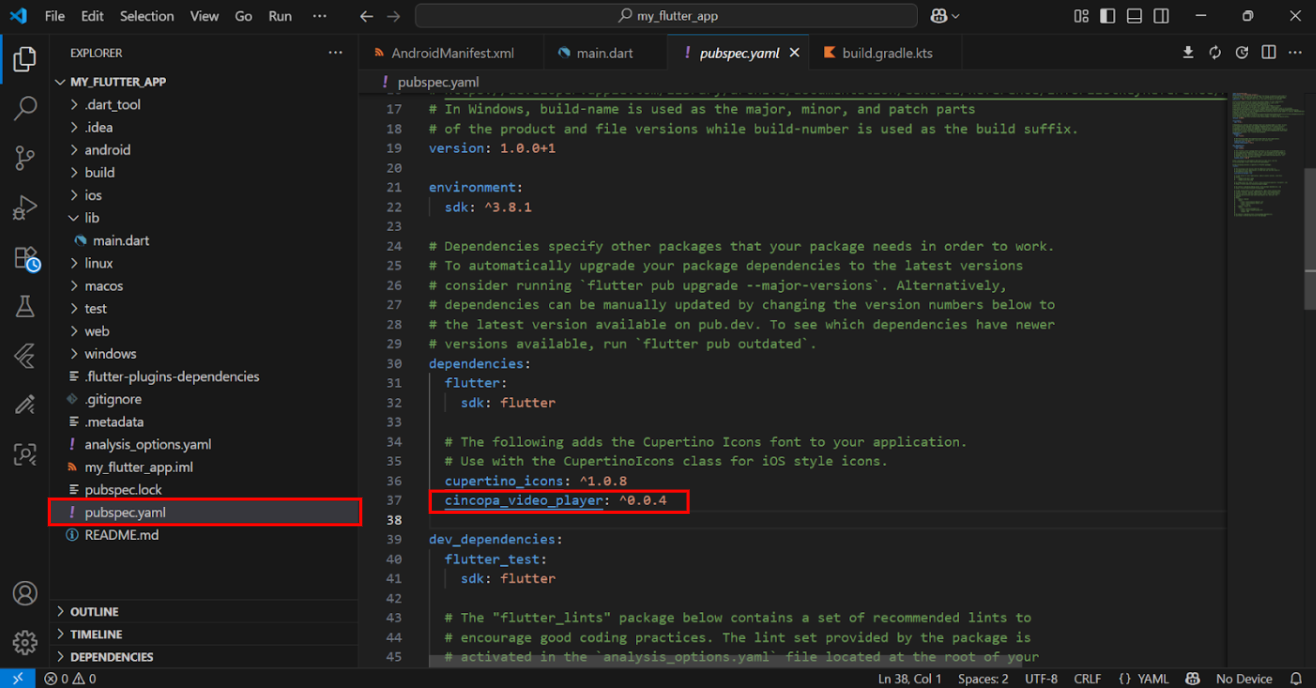
After that, run the following command to fetch the package:
flutter pub get
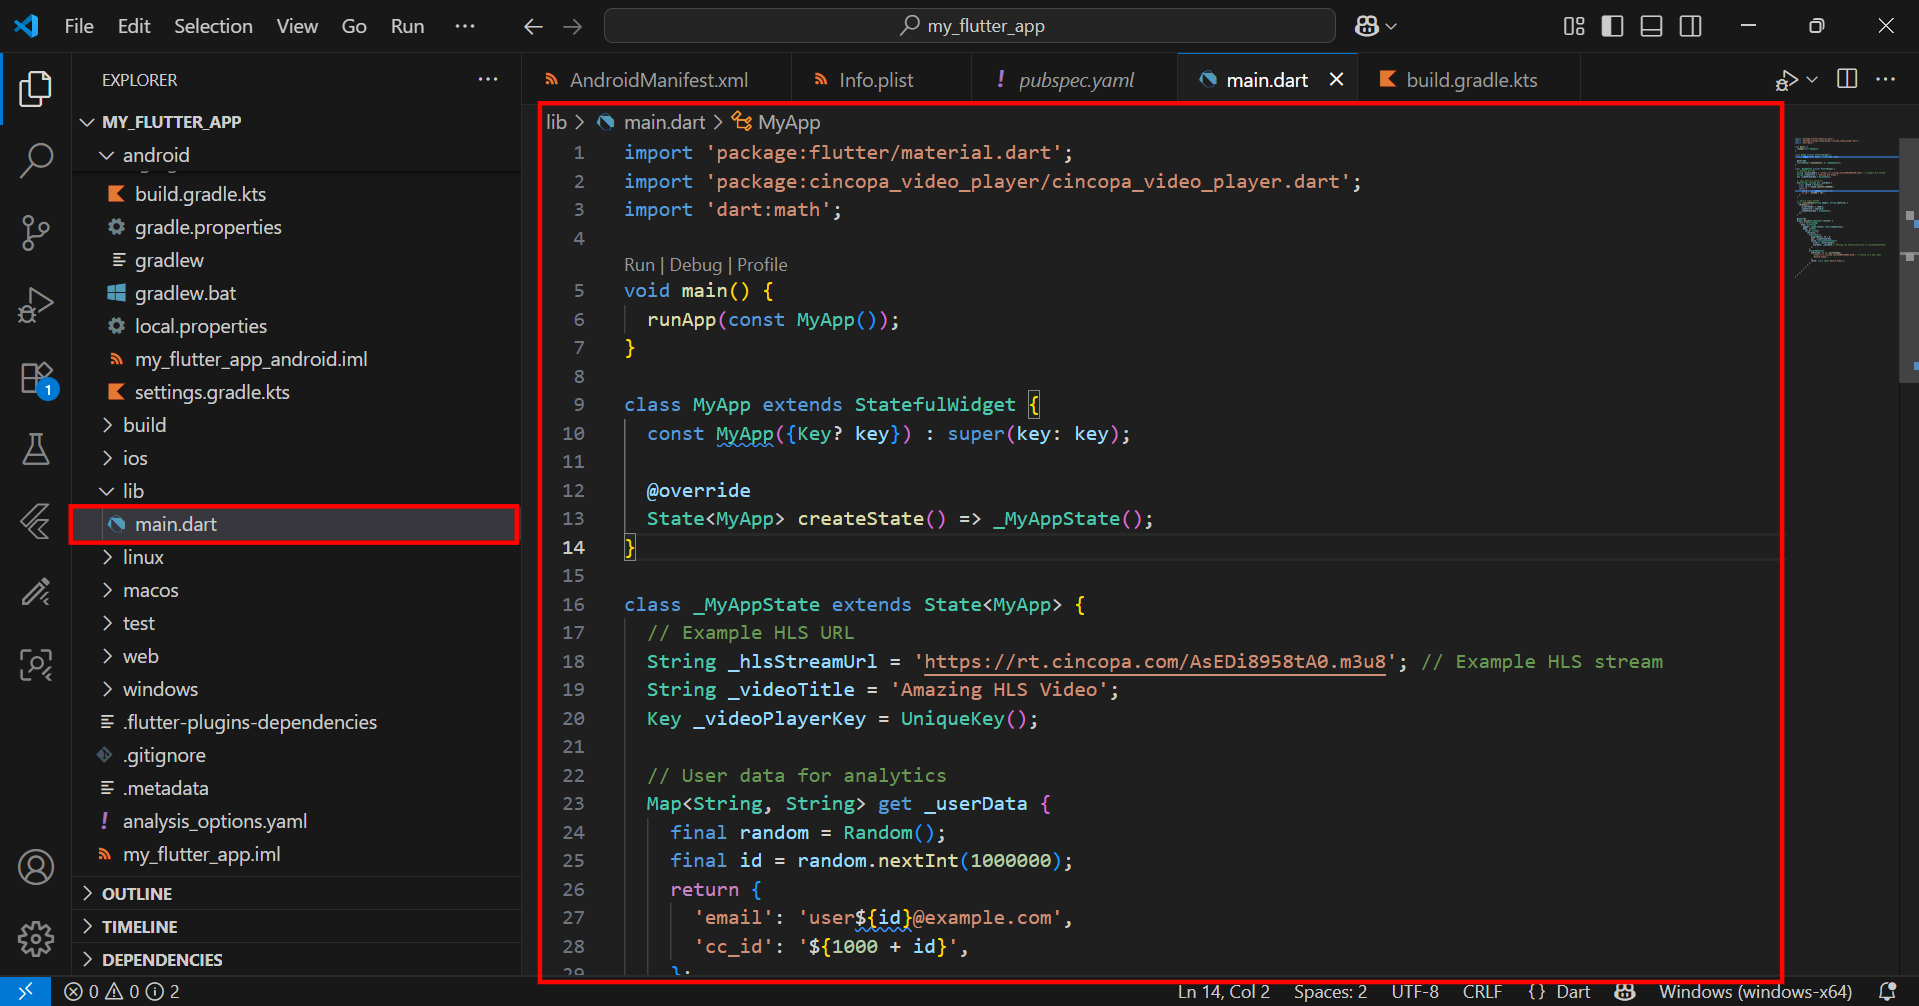
Step 3: Render the Player in Flutter (main.dart)
Use the following Dart code to render the WebView inside your Flutter app.
Replace the contents of lib/main.dart with this:
import 'package:flutter/material.dart';
import 'package:cincopa_video_player/cincopa_video_player.dart';
import 'dart:math';

void main() {
  runApp(const MyApp());
}

class MyApp extends StatefulWidget {
  const MyApp({Key? key}) : super(key: key);

  @override
  State<MyApp> createState() => _MyAppState();
}

class _MyAppState extends State<MyApp> {
  // Example HLS URL
  String _hlsStreamUrl = 'https://rtcdn.cincopa.com/RID.m3u8'; // Example HLS stream
  String _videoTitle = 'Amazing HLS Video';
  Key _videoPlayerKey = UniqueKey();

  // User data for analytics
  Map<String, String> get _userData {
    final random = Random();
    final id = random.nextInt(1000000);
    return {
      'email': 'user${id}@example.com',
      'acc_id': '${1000 + id}',
    };
  }

  // Switch video method
  void _switchVideo(String newUrl, String newTitle) {
    setState(() {
      _hlsStreamUrl = newUrl;
      _videoTitle = newTitle;
      _videoPlayerKey = UniqueKey();
    });
  }

  @override
  Widget build(BuildContext context) {
    return MaterialApp(
      home: Scaffold(
        appBar: AppBar(title: Text(_videoTitle)),
        body: Center(
          child: Column(
            children: [
              AspectRatio(
                aspectRatio: 16 / 9,
                key: _videoPlayerKey,
                child: CincopaVideoPlayer(
                  hlsUrl: _hlsStreamUrl,
                  userData: _userData,// Passing the AnalyticsService to CincopaVideoPlayer
                ),
              ),
              ElevatedButton(
                onPressed: () => _switchVideo(
                  'https://rtcdn.cincopa.com/RID.m3u8', // Switch to a new video
                  'Second Video',
                ),
                child: const Text('Switch Video'),
              ),
            ],
          ),
        ),
      ),
    );
  }
}
Step 4. Run the Application
After completing all the setup steps—adding dependencies, configuring platform settings, and writing the Dart code—you’re ready to launch the app.
Use the following command to run the app. Make sure your Android emulator or physical device is connected and has internet access.
flutter run
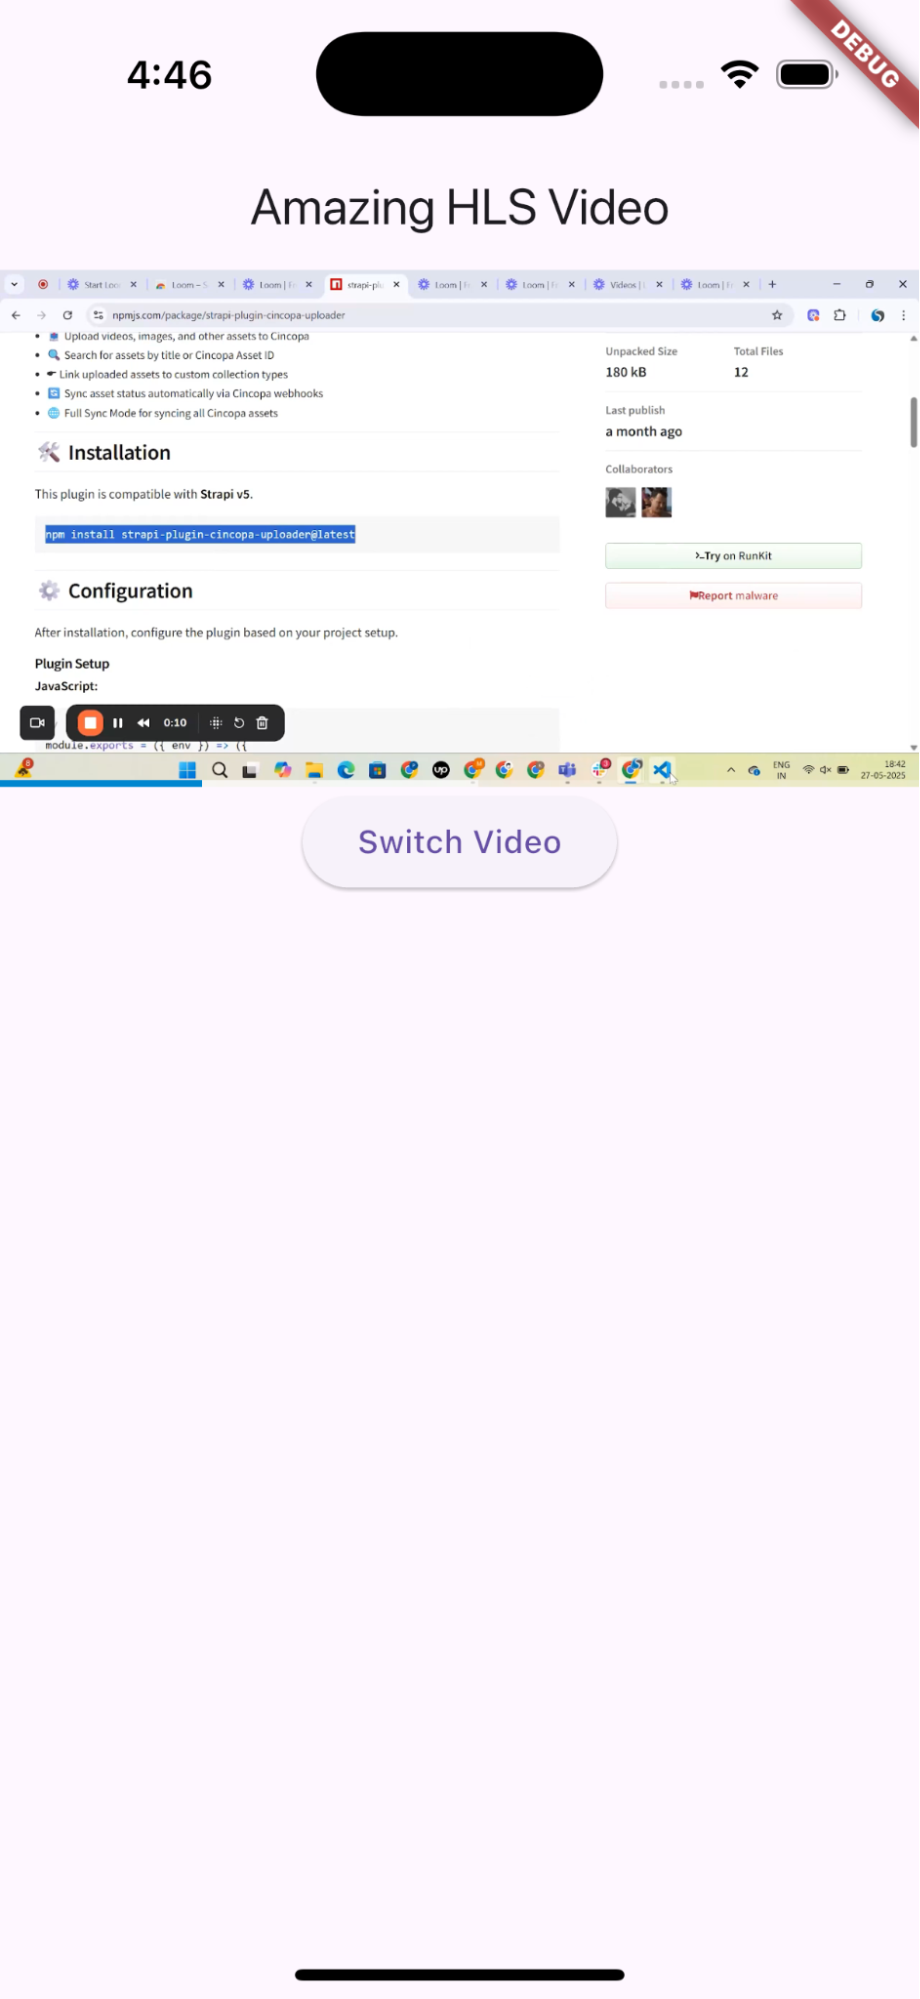
✅ Final Result
When the app launches, the screen is divided into two vertical sections:
Top Half displays the video using the CincopaVideoPlayer widget, embedded within a 16:9 AspectRatio container. A play button appears over the video by default, allowing the user to start playback. Playback state changes (e.g., play, pause, time update) are automatically tracked and sent to Cincopa
Bottom Half includes a button “Switch Video” that allows the user to switch the current video stream.

iOS Setup
Step 1. Enable Internet Access
For iOS, you need to allow internet access in your app. Open the ios/Runner/Info.plist file and add the following lines to enable internet access:
<key>NSAppTransportSecurity\</key>
<dict>
<key>NSAllowsArbitraryLoads\</key>
<true/>
</dict>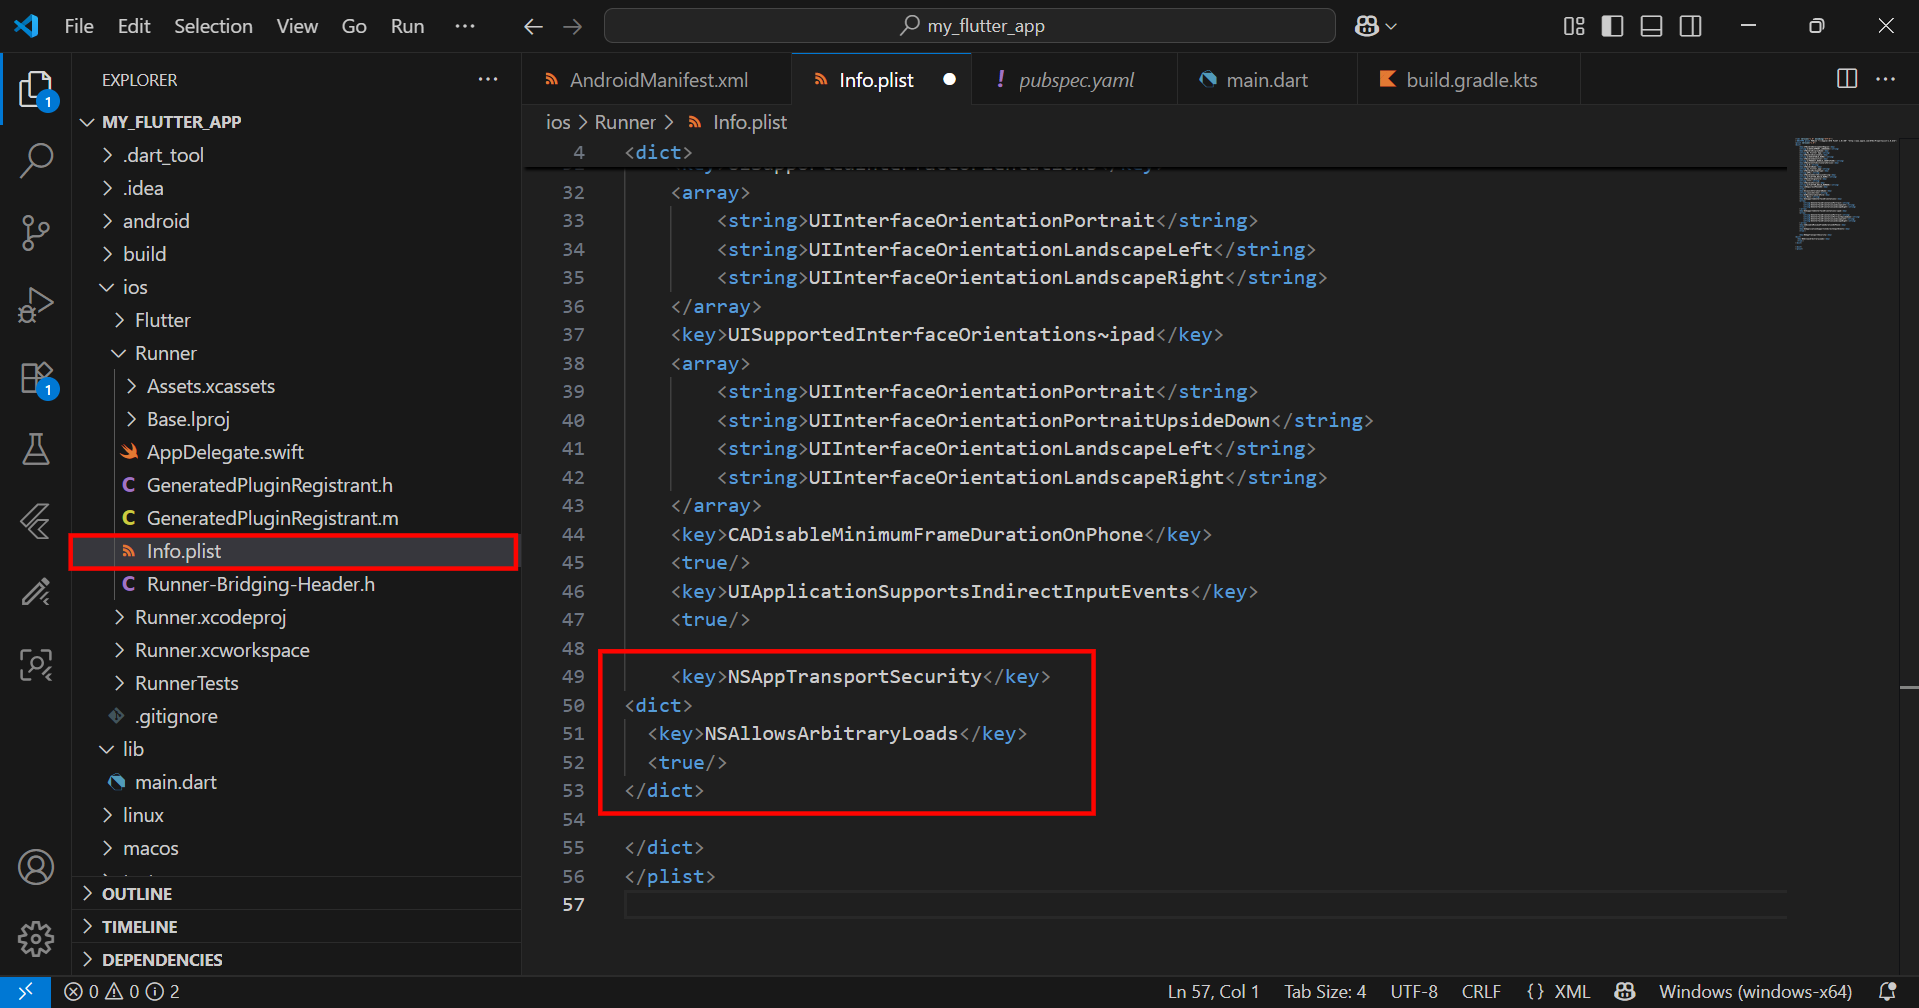
Step 2. Add Required Dependencies
To begin, you need to add the cincopa_video_player package to your Flutter project.
Run the following command in your terminal:
flutter pub add cincopa_video_player
This will update your pubspec.yaml file with the dependency:
dependencies:
 cincopa_video_player: ^0.0.4
After that, run the following command to fetch the package:
flutter pub get
Step 3: Render the Player in Flutter (main.dart)
Use the following Dart code to render the WebView inside your Flutter app.
Replace the contents of lib/main.dart with this:
import 'package:flutter/material.dart';
import 'package:cincopa_video_player/cincopa_video_player.dart';
import 'dart:math';

void main() {
  runApp(const MyApp());
}

class MyApp extends StatefulWidget {
  const MyApp({Key? key}) : super(key: key);

  @override
  State<MyApp> createState() => _MyAppState();
}

class _MyAppState extends State<MyApp> {
  // Example HLS URL
  String _hlsStreamUrl = 'https://rtcdn.cincopa.com/RID.m3u8'; // Example HLS stream
  String _videoTitle = 'Amazing HLS Video';
  Key _videoPlayerKey = UniqueKey();

  // User data for analytics
  Map<String, String> get _userData {
    final random = Random();
    final id = random.nextInt(1000000);
    return {
      'email': 'user${id}@example.com',
      'cc_id': '${1000 + id}',
    };
  }

  // Switch video method
  void _switchVideo(String newUrl, String newTitle) {
    setState(() {
      _hlsStreamUrl = newUrl;
      _videoTitle = newTitle;
      _videoPlayerKey = UniqueKey();
    });
  }

  @override
  Widget build(BuildContext context) {
    return MaterialApp(
      home: Scaffold(
        appBar: AppBar(title: Text(_videoTitle)),
        body: Center(
          child: Column(
            children: [
              AspectRatio(
                aspectRatio: 16 / 9,
                key: _videoPlayerKey,
                child: CincopaVideoPlayer(
                  hlsUrl: _hlsStreamUrl,
                  userData: _userData,// Passing the AnalyticsService to CincopaVideoPlayer
                ),
              ),
              ElevatedButton(
                onPressed: () => _switchVideo(
                  'https://rtcdn.cincopa.com/RID.m3u8', // Switch to a new video
                  'Second Video',
                ),
                child: const Text('Switch Video'),
              ),
            ],
          ),
        ),
      ),
    );
  }
}
Step 4. Run the Application
After completing all the setup steps—adding dependencies, configuring platform settings, and writing the Dart code—you’re ready to launch the app.
Use the following command to run the app. Make sure your IOS emulator or physical device is connected and has internet access.
flutter run
✅ Final Result
When the app launches, the screen is divided into two vertical sections:
Top Half displays the video using the CincopaVideoPlayer widget, embedded within a 16:9 AspectRatio container. A play button appears over the video by default, allowing the user to start playback. Playback state changes (e.g., play, pause, time update) are automatically tracked and sent to Cincopa
Bottom Half includes a button “Switch Video” that allows the user to switch the current video stream.
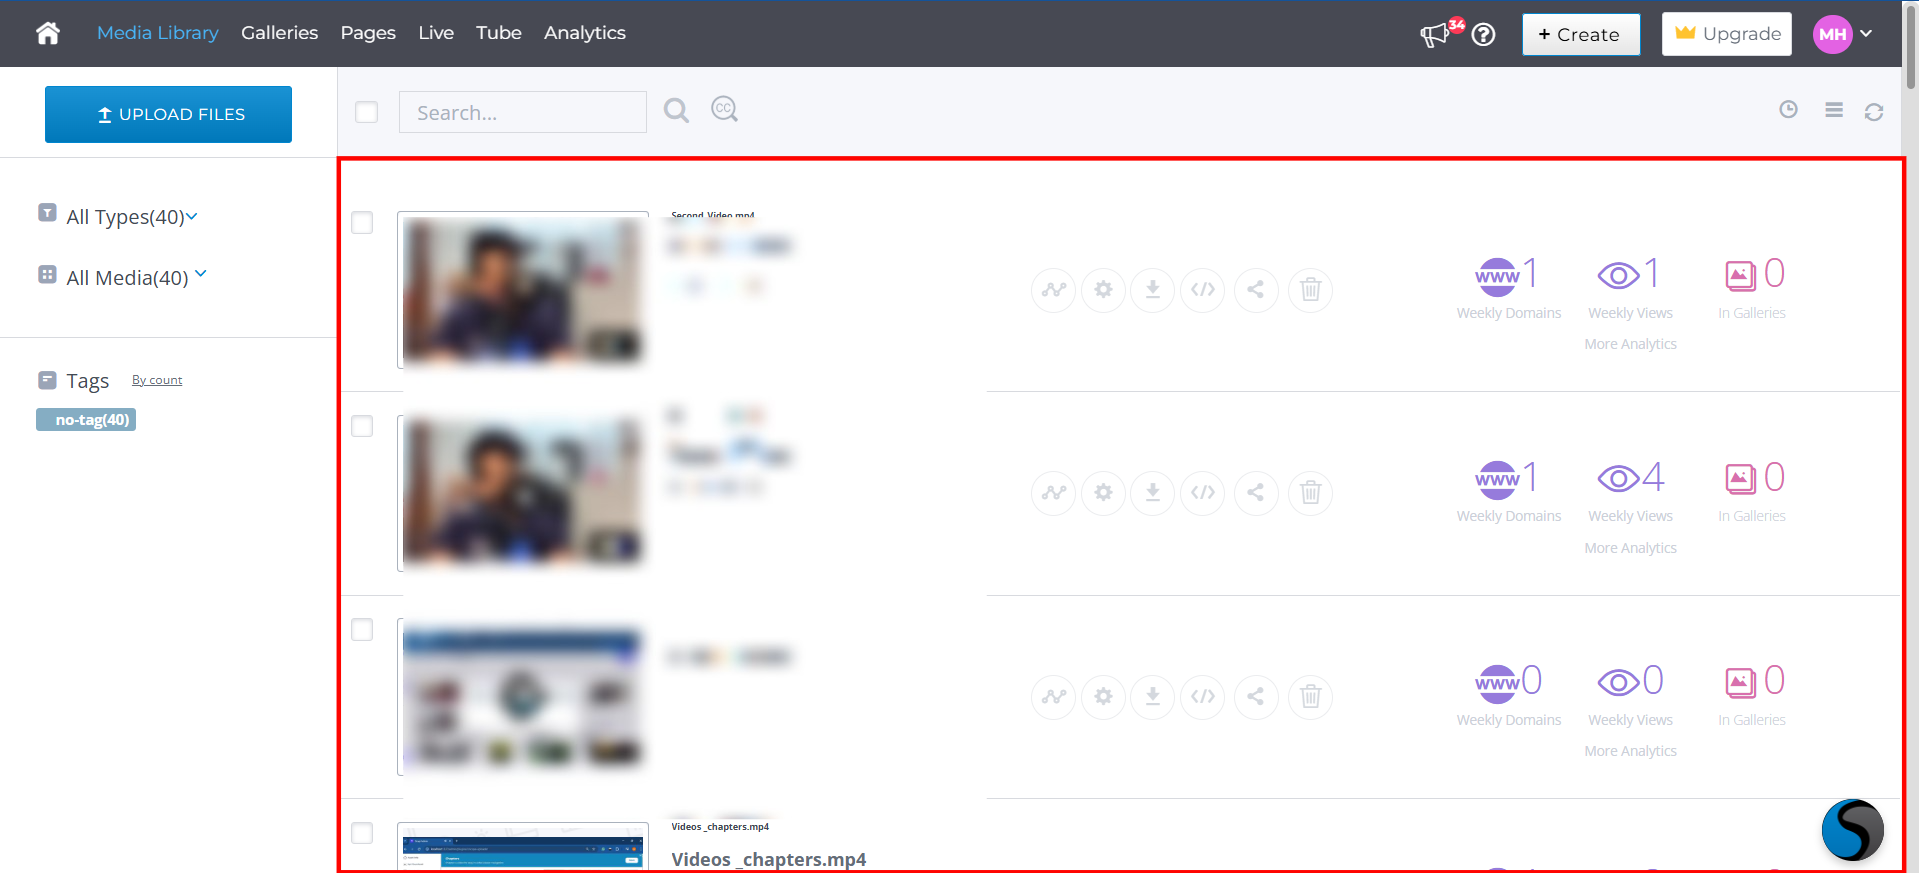
How to Find RID
The RID (Resource ID) is a unique identifier for each media asset in your Cincopa account. To find the RID for a video follow these steps:
Step 1: Login to your Cincopa Account and navigate to the Media Library.

Step 2: After Clicking on the media library Click on the media asset for which you need the RID.
Step 3: After selecting the media, the Cincopa editor will open where you can find the RID of the asset.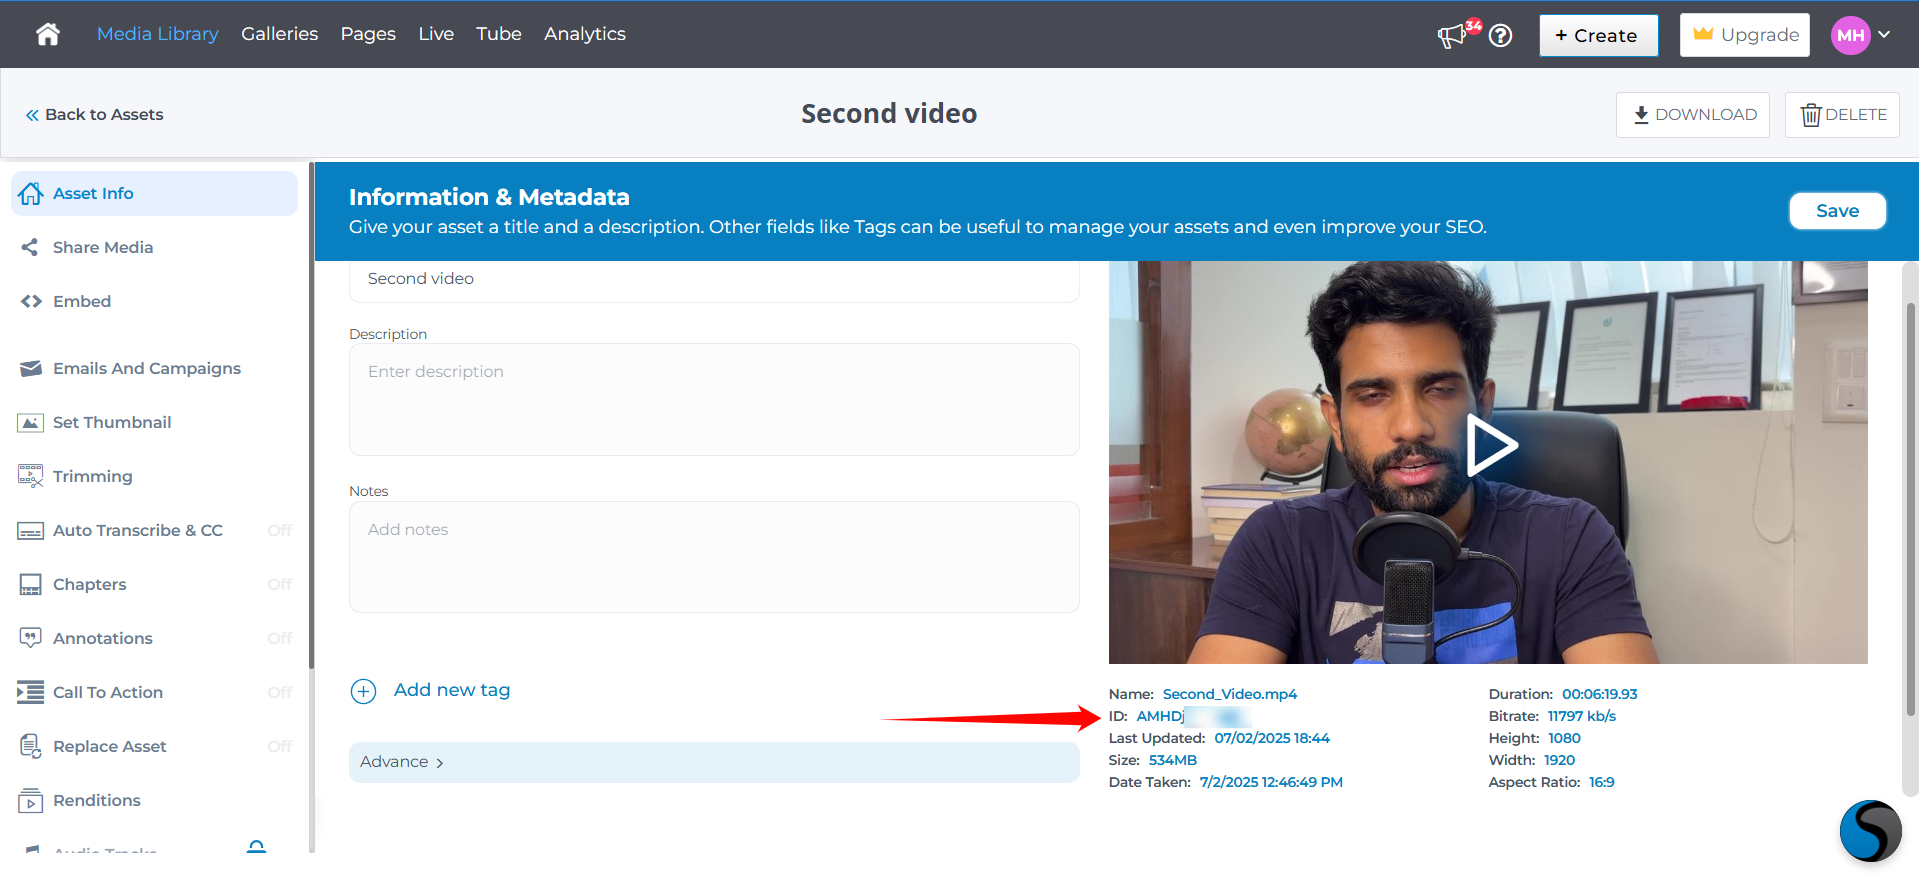
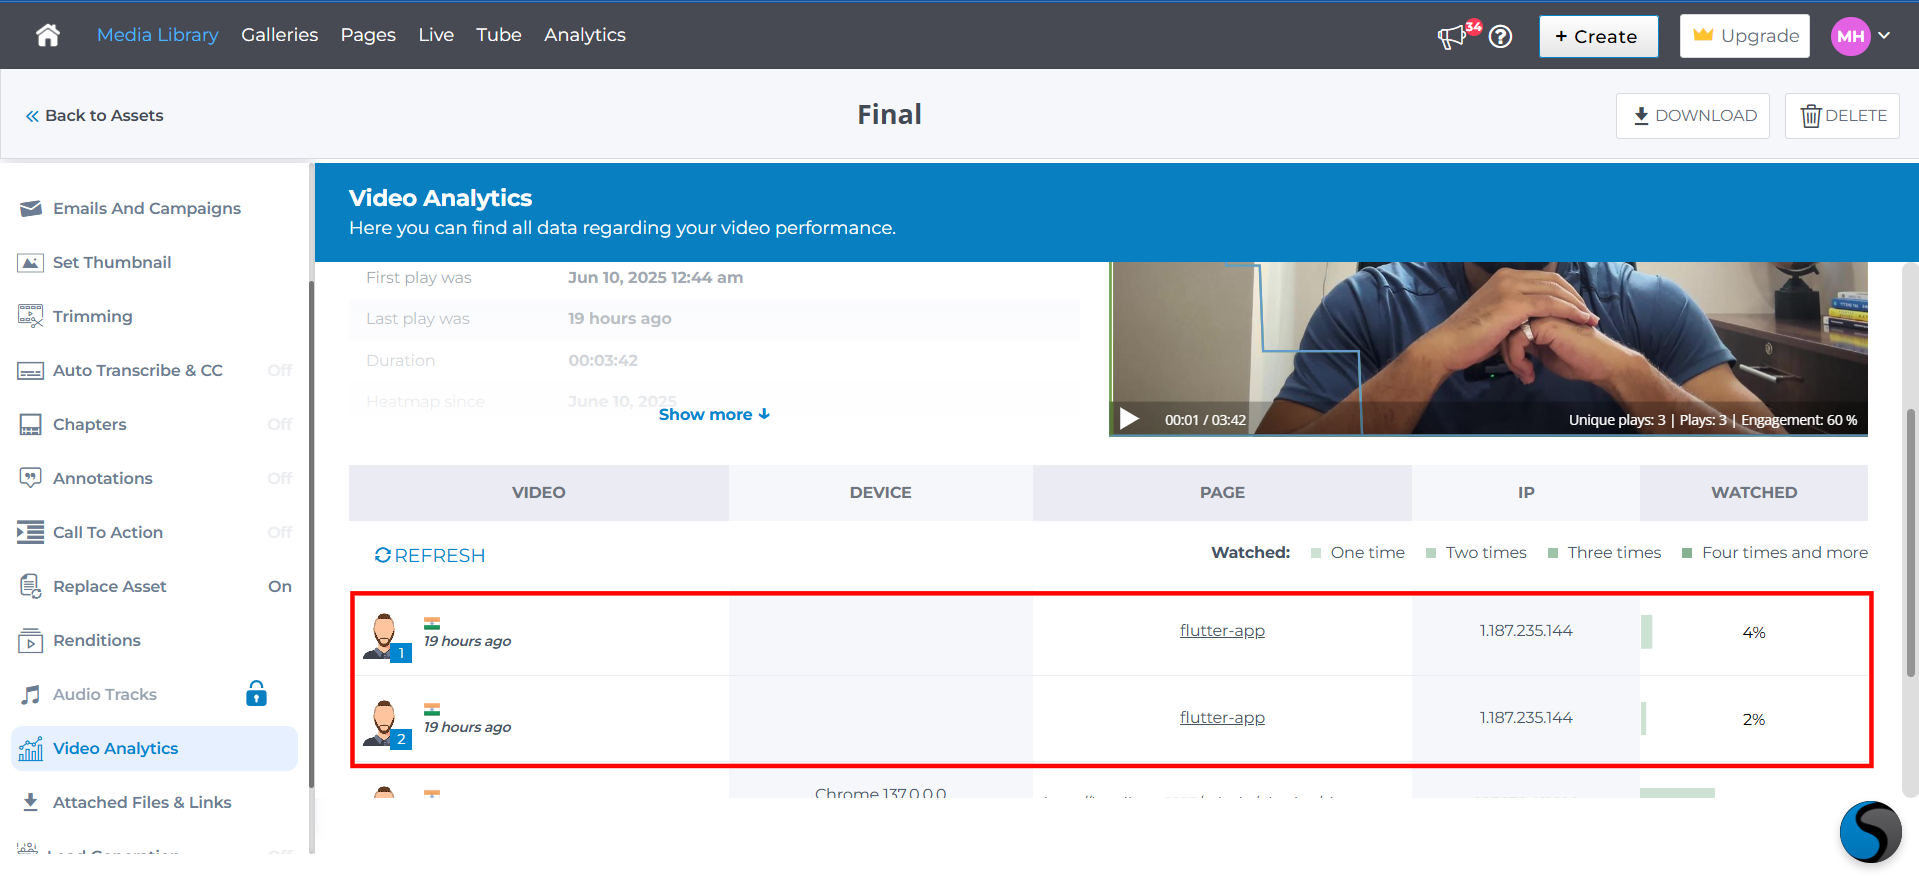
How to Track Analytics by RID
Cincopa tracks video playback analytics using the RID. To view the analytics data for a video:
Step 1: Login to your Cincopa Account and navigate to the Media Library.
Step 2: Click on the media asset you want to analyze.
Step 3: Once the asset editor is open, navigate to the Video Analytics section in the left sidebar.
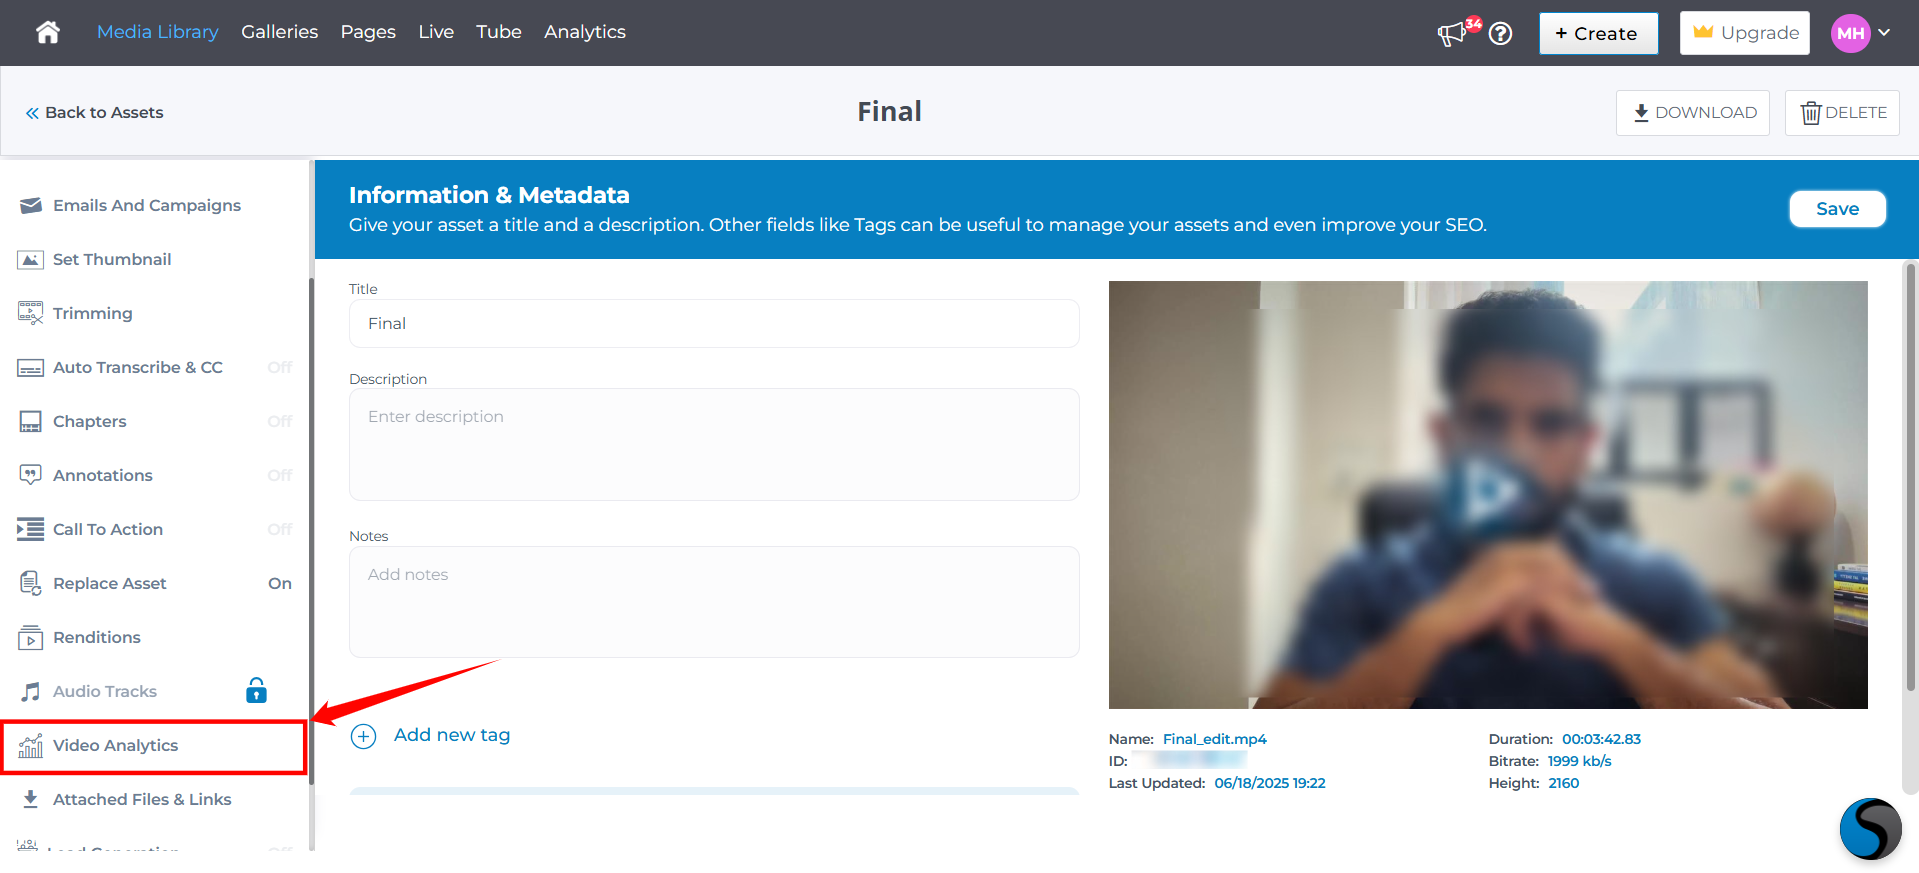
Step 4: You will now see a detailed report with analytics data for that specific RID, including metrics such as IP, Watched time .