Integrate Cincopa with Sanity
Integrating Cincopa with Sanity allows editors to upload and manage media files directly within the Sanity Studio interface. This integration enhances the media management experience by enabling seamless uploading, searching, and displaying of assets from Cincopa.
With the Cincopa Uploader plugin, you can upload videos, images, and other media files to Cincopa and associate them with custom collection types in Sanity.
Prerequisites
✅ A Cincopa API Token with "Full Access" permissions. Refer to the heading Create an API Token for the steps.
✅ Node.js: Ensure you have Node.js installed on your system.
✅ npm: This comes with Node.js, so no need to install it separately.
How to Set Up a Sanity Project
Step 1. Create a new folder for your project. Open your terminal or command prompt and run the following commands to navigate to the folder:
mkdir my-folder cd my-folder
Step 2. Run the following command to create a new Sanity project:
npm create sanity@latest
Step 3: The terminal will ask you a few questions. For each of them, if you press Enter instead of typing something, the default answer (Yes) will be used:
Create a new Project or Select an Existing one: If you choose "Create a new project," enter a name for your project. If you choose "Select an existing project," the selected project will open, and you can select it using the arrow keys on your keyboard
Select Organization or Create a New Organization: If you choose "Create a new organization," enter a name for the organization. If you choose "Select organization," a list of existing organizations will appear, and you can select the organization using the arrow keys. Make sure you have sufficient permissions to access the existing organization.
Select dataset to use:The dataset is already configured. Simply type Y to confirm using the default dataset "Production" and continue
Project Output Path: Enter the path where you want to store your Sanity project (e.g., C:\Users\BEGAWN\Sanity_Project).
Select Project Template: Select a schema type based on your project requirements, from Blog, E-commerce (Shopify), or Movie project. You can select an option with the arrow keys on the keyboard
Do you want to use TypeScript?: This question asks if you want to use TypeScript for your project. If you select Yes, your project will use TypeScript; if you prefer JavaScript, select No.
Install dependencies with npm or manual ?: This asks whether you want to install the project dependencies using npm or maunal . Choosing npm is the standard option, as it ensures all required packages are installed for your project to run.

Install instructions for Sanity v3
This plugin is compatible with Sanity v3. Integrate Cincopa with Sanity using these steps:
Step 1: Run the following command to install React and React DOM:
npm install react@18 react-dom@18
Step 2: Run the following command to install the Cincopa Uploader plugin for Sanity:
npm install sanity-plugin-cincopa-uploader@latest
Set up Configuration in Sanity
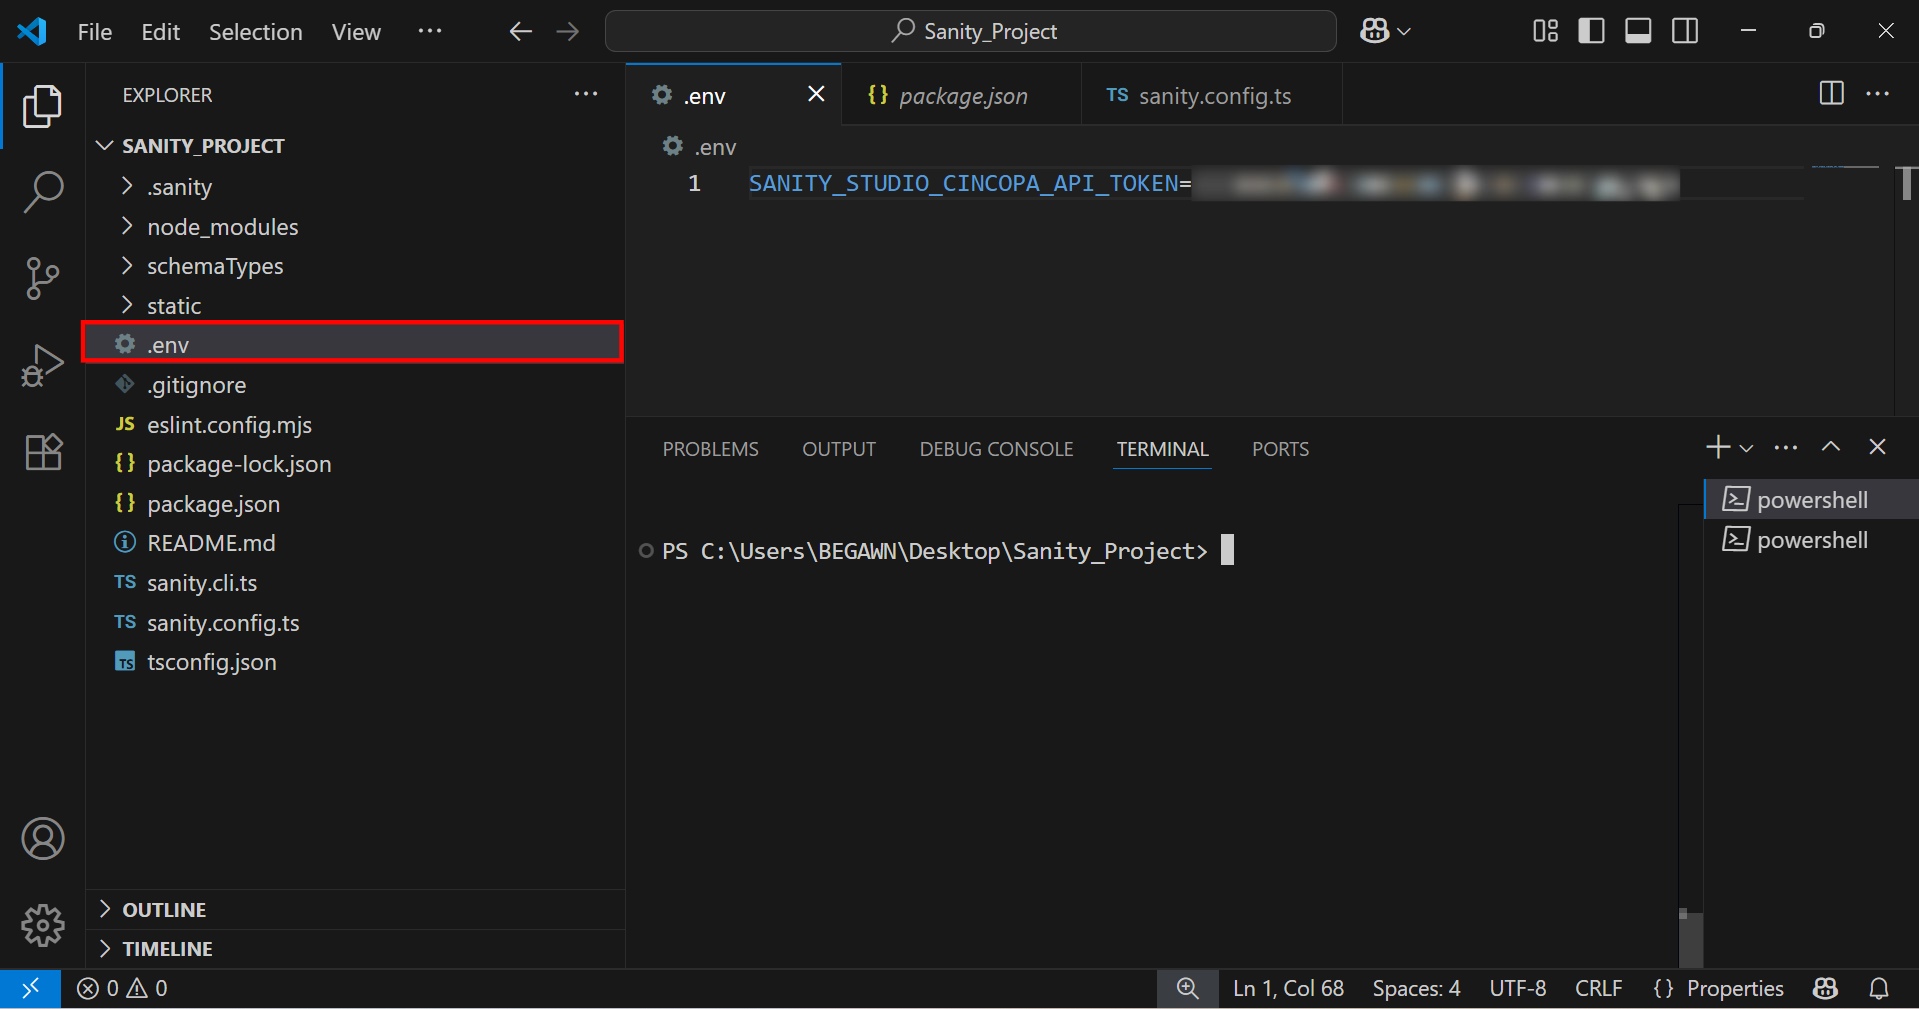
Step 1: After installing the Cincopa Uploader Plugin in Sanity, add the .env file in your project and add your Cincopa API token in the .env file
SANITY_STUDIO_CINCOPA_API_TOKEN=YOUR_CINCOPA_FULL_ACCESS_TOKENSANITY_STUDIO_CINCOPA_API_TOKEN_EDITOR=YOUR_CINCOPA_VIEWER_ACCESS_TOKEN
The SANITY_STUDIO_CINCOPA_API_TOKEN is required for users who need full access to upload, manage, and modify assets in Sanity. The SANITY_STUDIO_CINCOPA_API_TOKEN_EDITOR is an optional token used for providing read-only access to the Cincopa assets within Sanity. This token allows users to view the assets without the ability to upload, modify, or delete them.
For more information on how to generate an API Token, refer to the section “Create an API Token.”
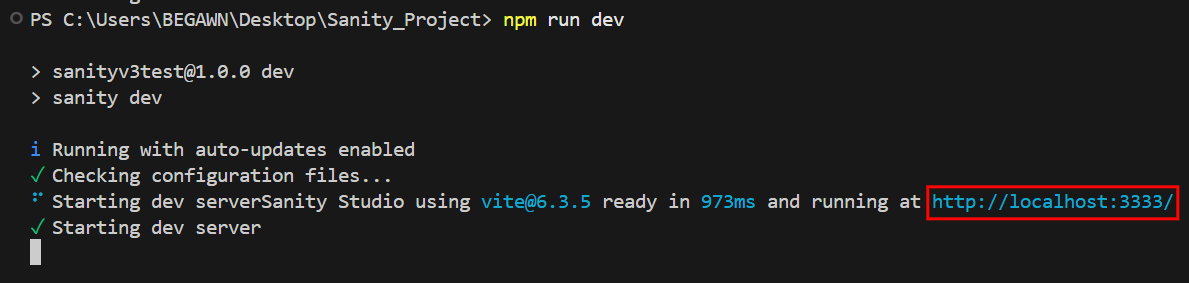
Step 2: After configuring the .env file, run this command to restart the server
npm run dev
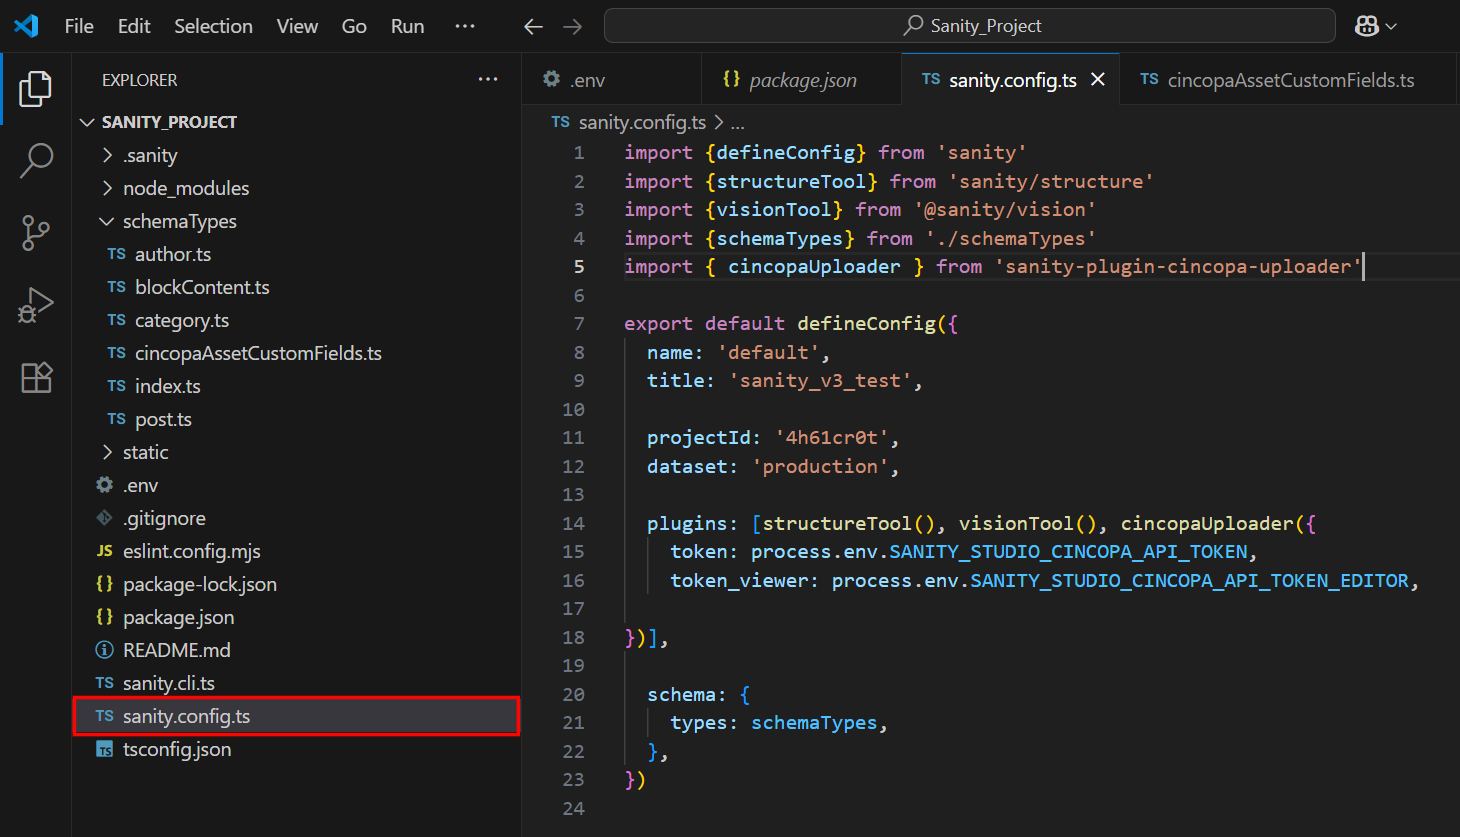
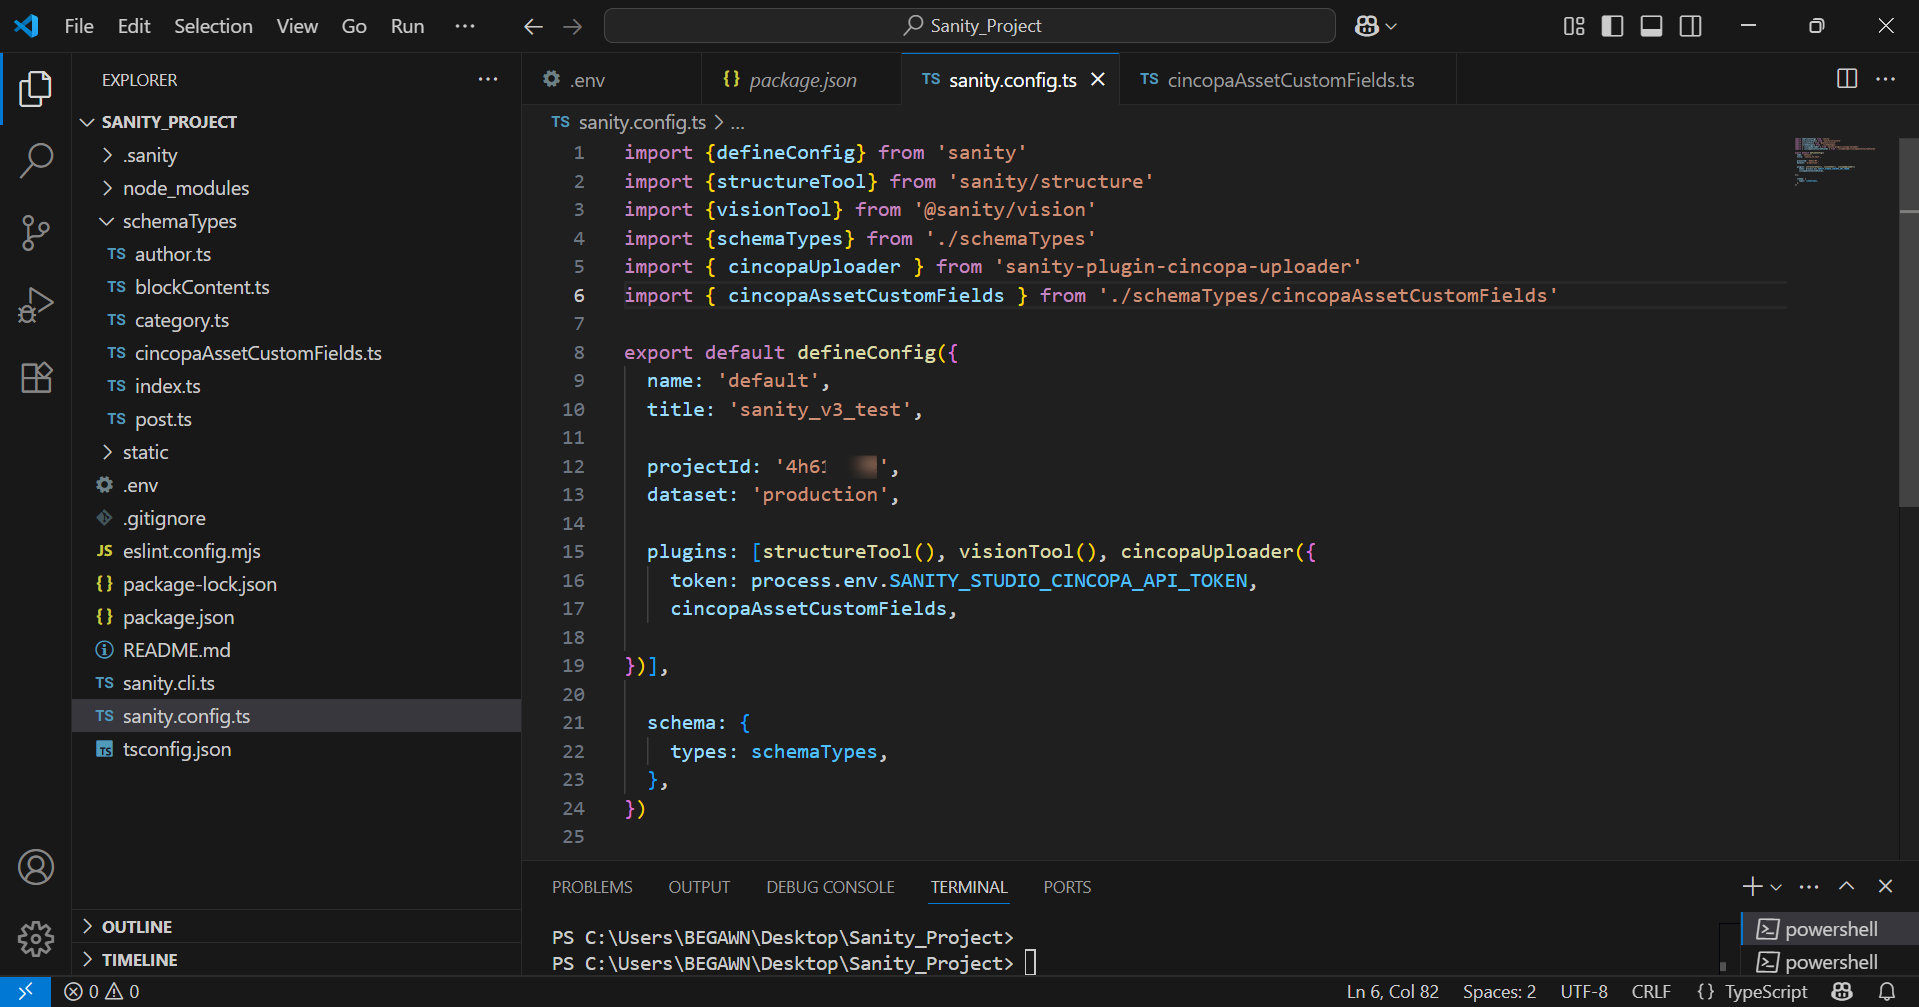
Step 3: Now, configure the plugin in sanity.config.ts and add this code to configure it
import {defineConfig} from 'sanity'
import {structureTool} from 'sanity/structure'
import {visionTool} from '@sanity/vision'
import {schemaTypes} from './schemaTypes'
import { cincopaUploader } from 'sanity-plugin-cincopa-uploader'

export default defineConfig({
  name: 'default',
  title: 'sanity_v3_test',

  projectId: '4h61cr0t',
  dataset: 'production',

  plugins: [structureTool(), visionTool(), cincopaUploader({
    token: process.env.SANITY_STUDIO_CINCOPA_API_TOKEN,
    token_viewer: process.env.SANITY_STUDIO_CINCOPA_API_TOKEN_EDITOR,

})],

  schema: {
    types: schemaTypes,
  },
})
Extending the Asset Schema
You can extend the Cincopa Asset (cincopa.asset) document schema with your own custom fields (e.g., tags, categories, or internal notes).
Step 1: Create a file at:
/schemaTypes/cincopaAssetCustomFields.ts
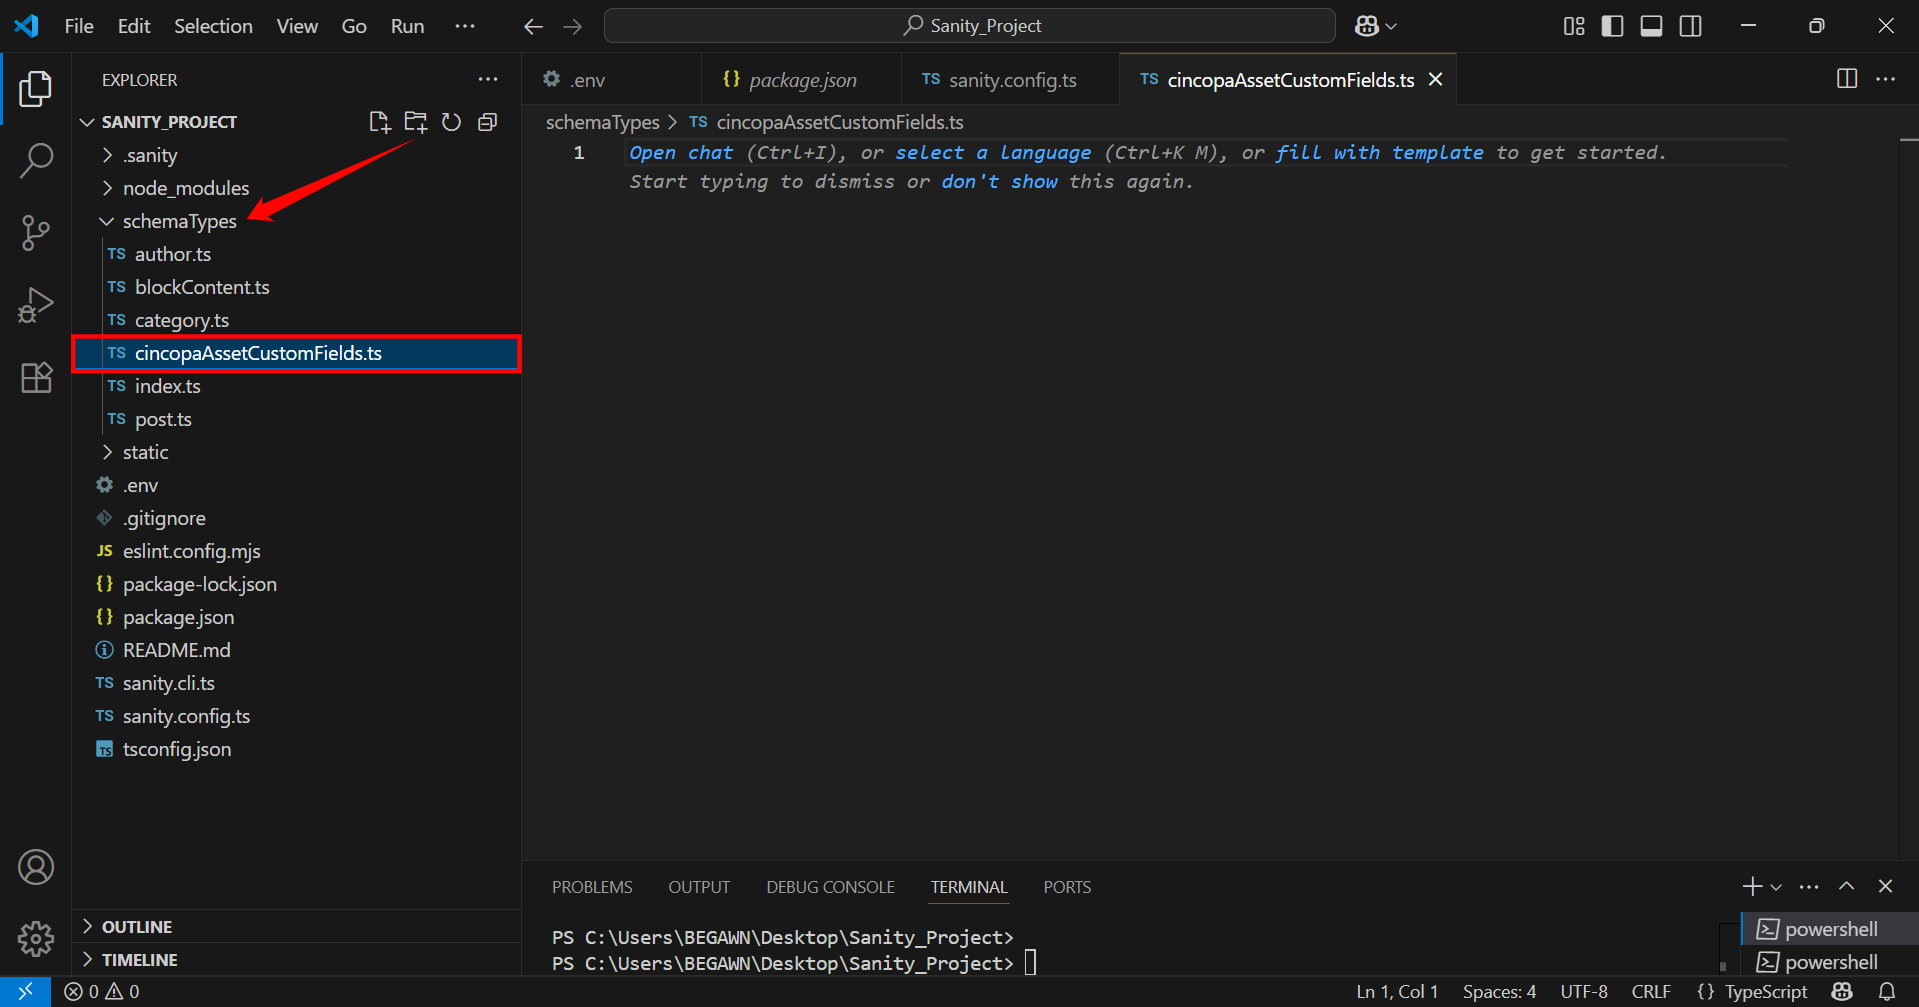
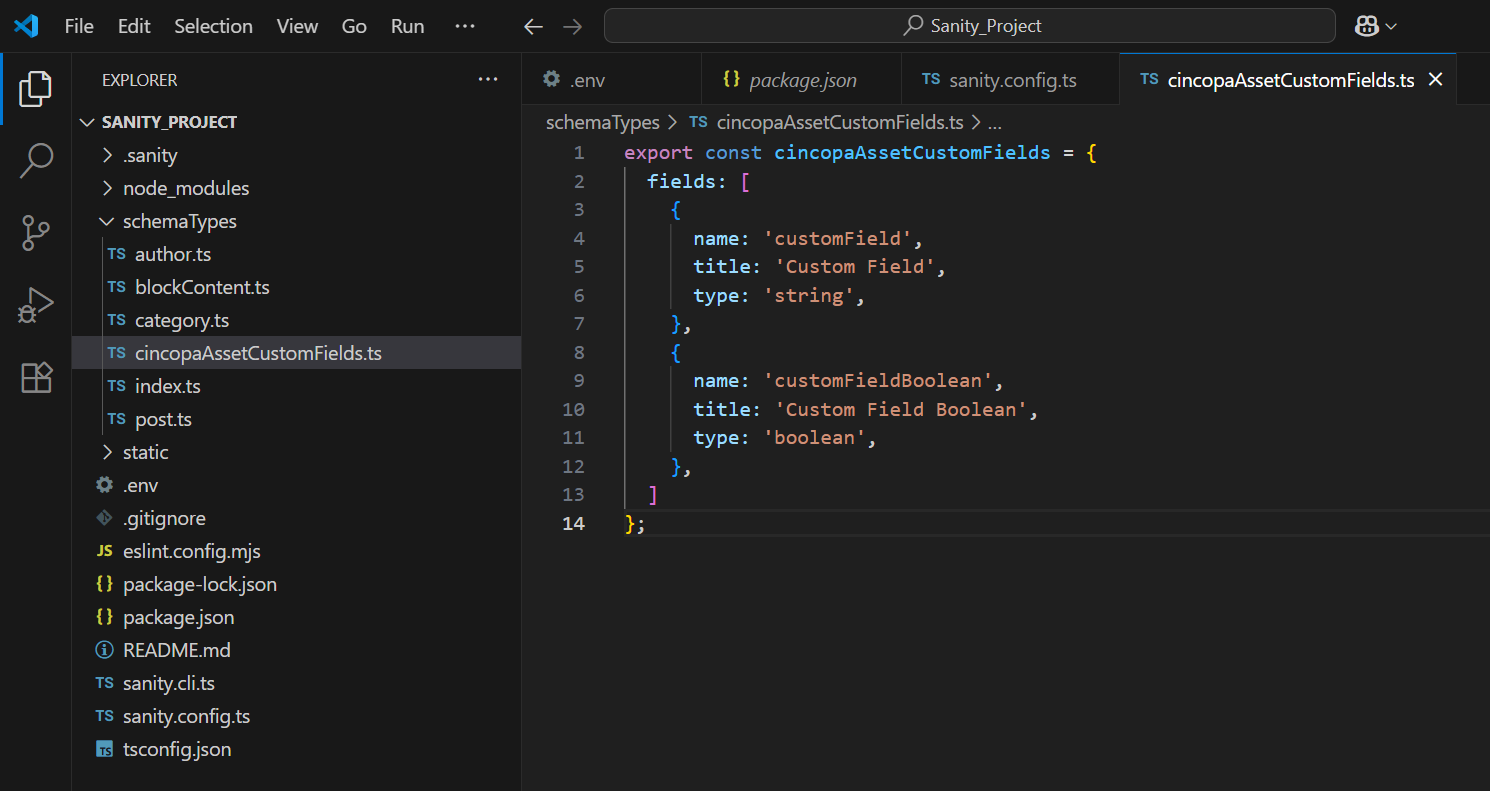
Step 2: After adding the cincopaAssetCustomFields.ts file to your schemaTypes folder, configure it by adding the following code:
export const cincopaAssetCustomFields = {
  fields: [
    {
      name: 'customField',
      title: 'Custom Field',
      type: 'string',
    },
    {
      name: 'customFieldBoolean',
      title: 'Custom Field Boolean',
      type: 'boolean',
    },
  ]
};
Step 3: Now update the sanity.config.ts to include the Cincopa plugin with custom fields
import {defineConfig} from 'sanity'
import {structureTool} from 'sanity/structure'
import {visionTool} from '@sanity/vision'
import {schemaTypes} from './schemaTypes'
import { cincopaUploader } from 'sanity-plugin-cincopa-uploader'
import { cincopaAssetCustomFields } from './schemaTypes/cincopaAssetCustomFields'

export default defineConfig({
  name: 'default',
  title: 'sanity_v3_test',

  projectId: '4281tx', // Replace with your actual project ID

  dataset: 'production',

  plugins: [structureTool(), visionTool(), cincopaUploader({
    token: process.env.SANITY_STUDIO_CINCOPA_API_TOKEN,
    cincopaAssetCustomFields,

})],

  schema: {
    types: schemaTypes,
  },
})
Step 4: Save all your files, then restart the Sanity development server to apply the changes.
npm run dev
Once the server starts, access Sanity by the provided link in your terminal. For example: http://localhost:3333/
Optional: Use Cincopa Assets in the Portable Text Editor
You can enable editors to insert and manage Cincopa assets inline within the Portable Text editor by configuring the schema. This allows Cincopa assets, such as images or videos, to be embedded directly within the content.
To set this up, add the following code to your Sanity schema:
import { defineField } from 'sanity'

  defineField({
    name: 'body',
    type: 'array',
    of: [
      { type: 'block' },
      { type: 'cincopa_asset' }
    ]
  })
Optional: Use Sanity Cincopa Assets in the Portable Text Editor
Similarly, you can configure the schema to allow the use of Sanity Cincopa assets within the Portable Text editor. This gives editors the ability to work with assets stored in Sanity.
Add this configuration to your schema:
import { defineField } from 'sanity'
defineField({
name: 'body',
type: 'array',
of: [
{ type: 'block' },
{ type: 'sanity_cincopa_asset' }
]
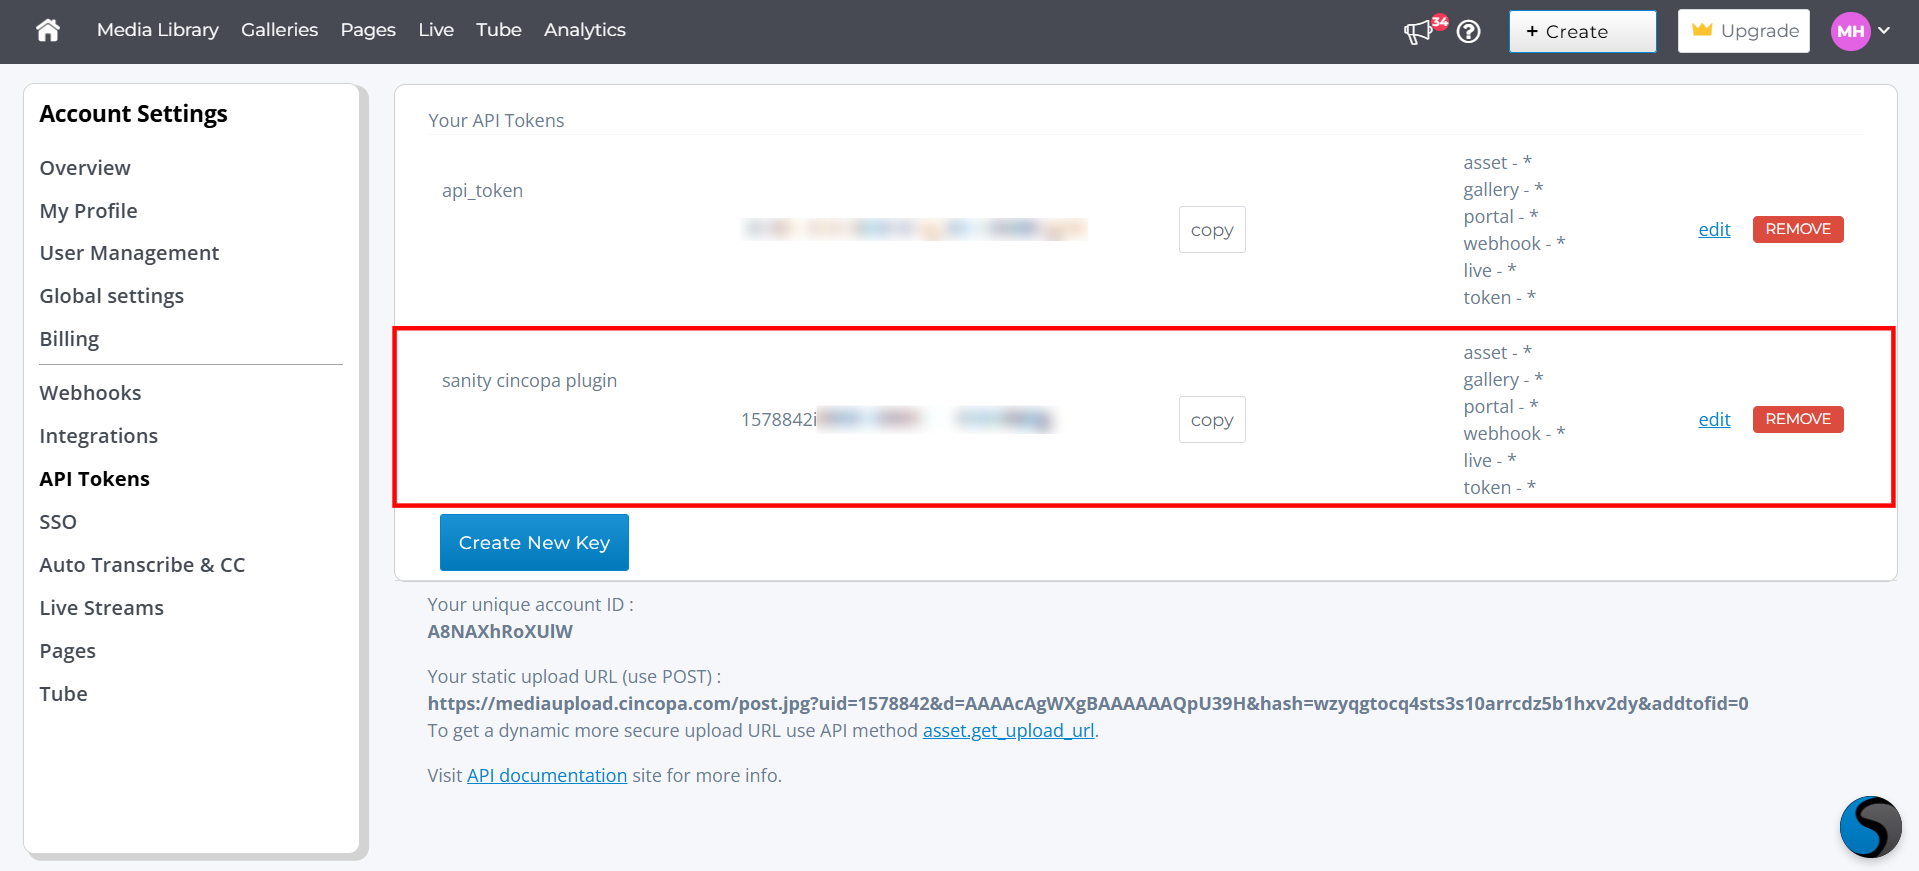
})Create an API Token
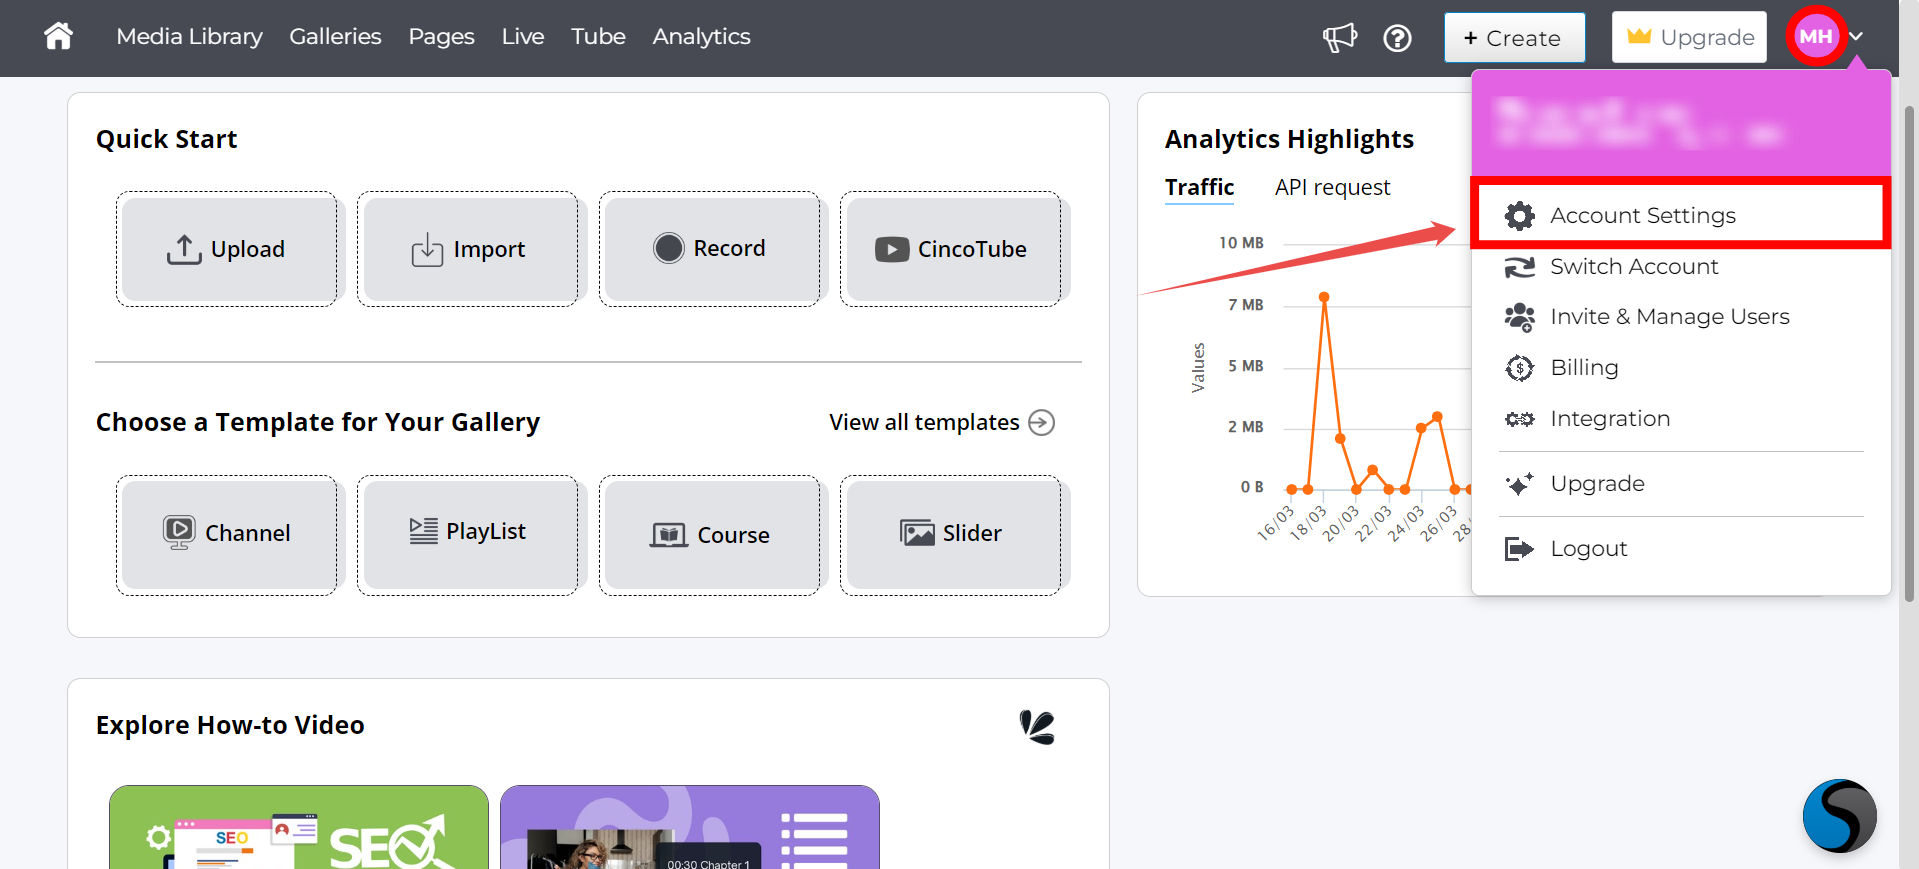
To use the Cincopa Uploader Plugin effectively, you need to create an API Token in the Cincopa Dashboard:
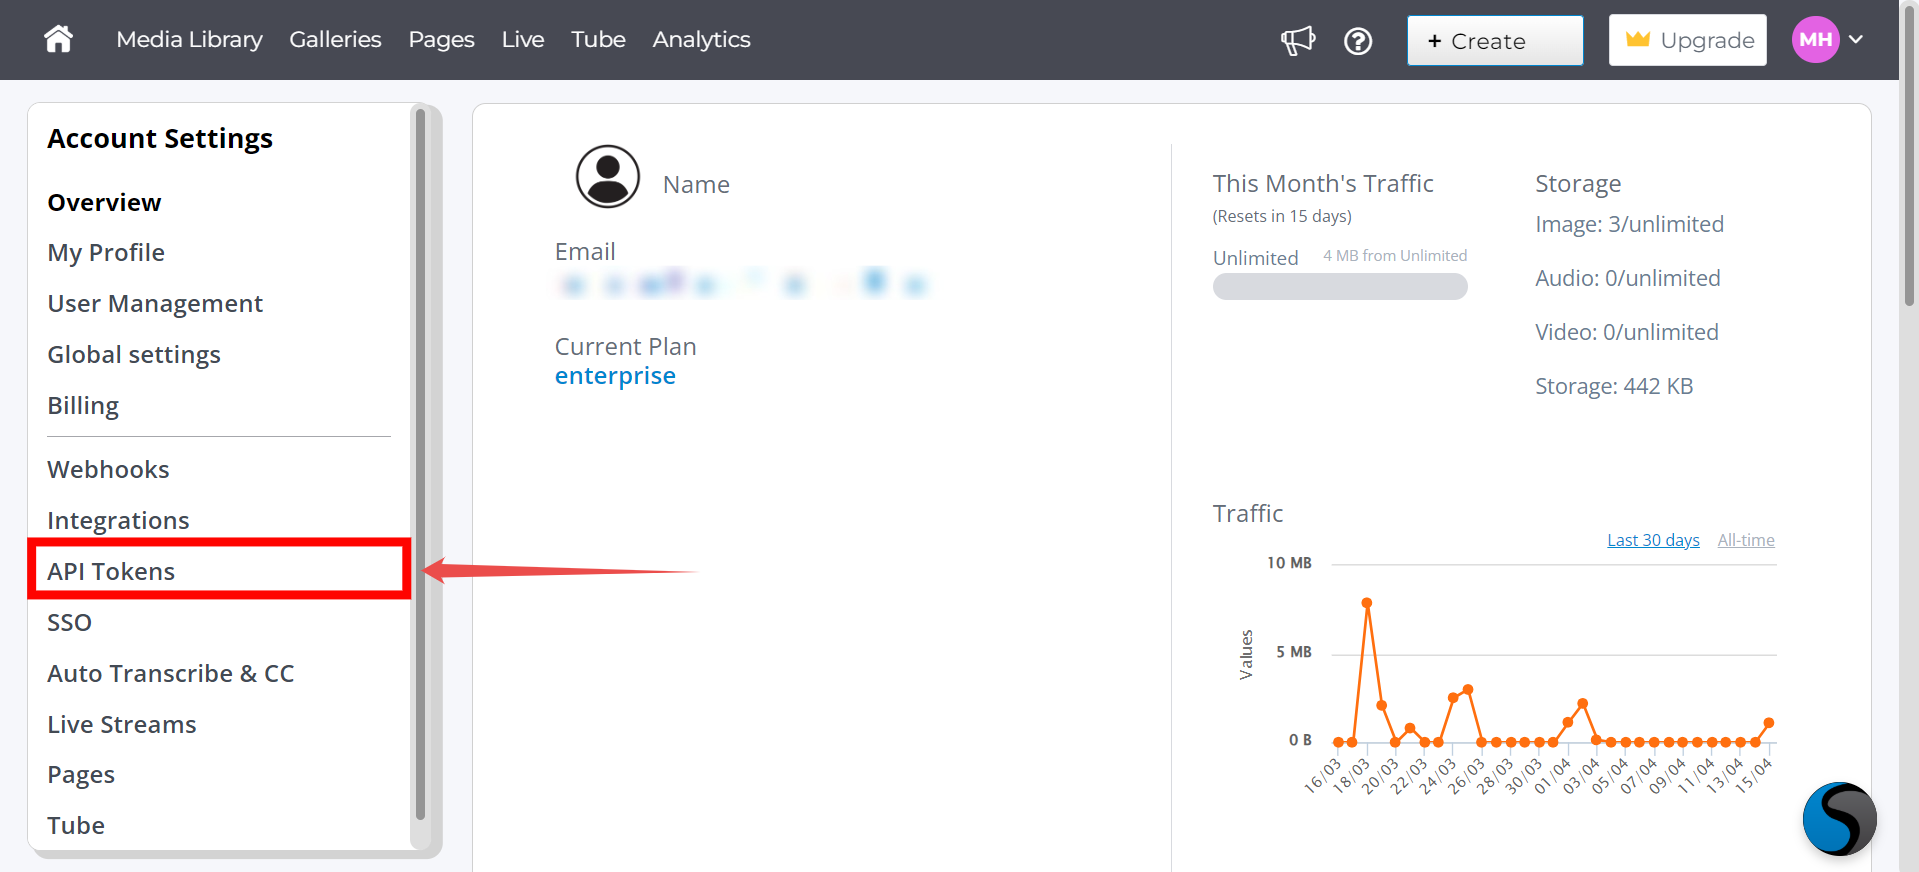
Step 1. Log in to your Cincopa account. Then, click on your profile menu and select “Account Settings” from the dropdown.
Step 2. Select “API Token” from the left-hand sidebar menu.
Step 3: Click the "Create New Key" button to generate a new key

Step 4: Name the token and grant it all necessary permissions (full access).
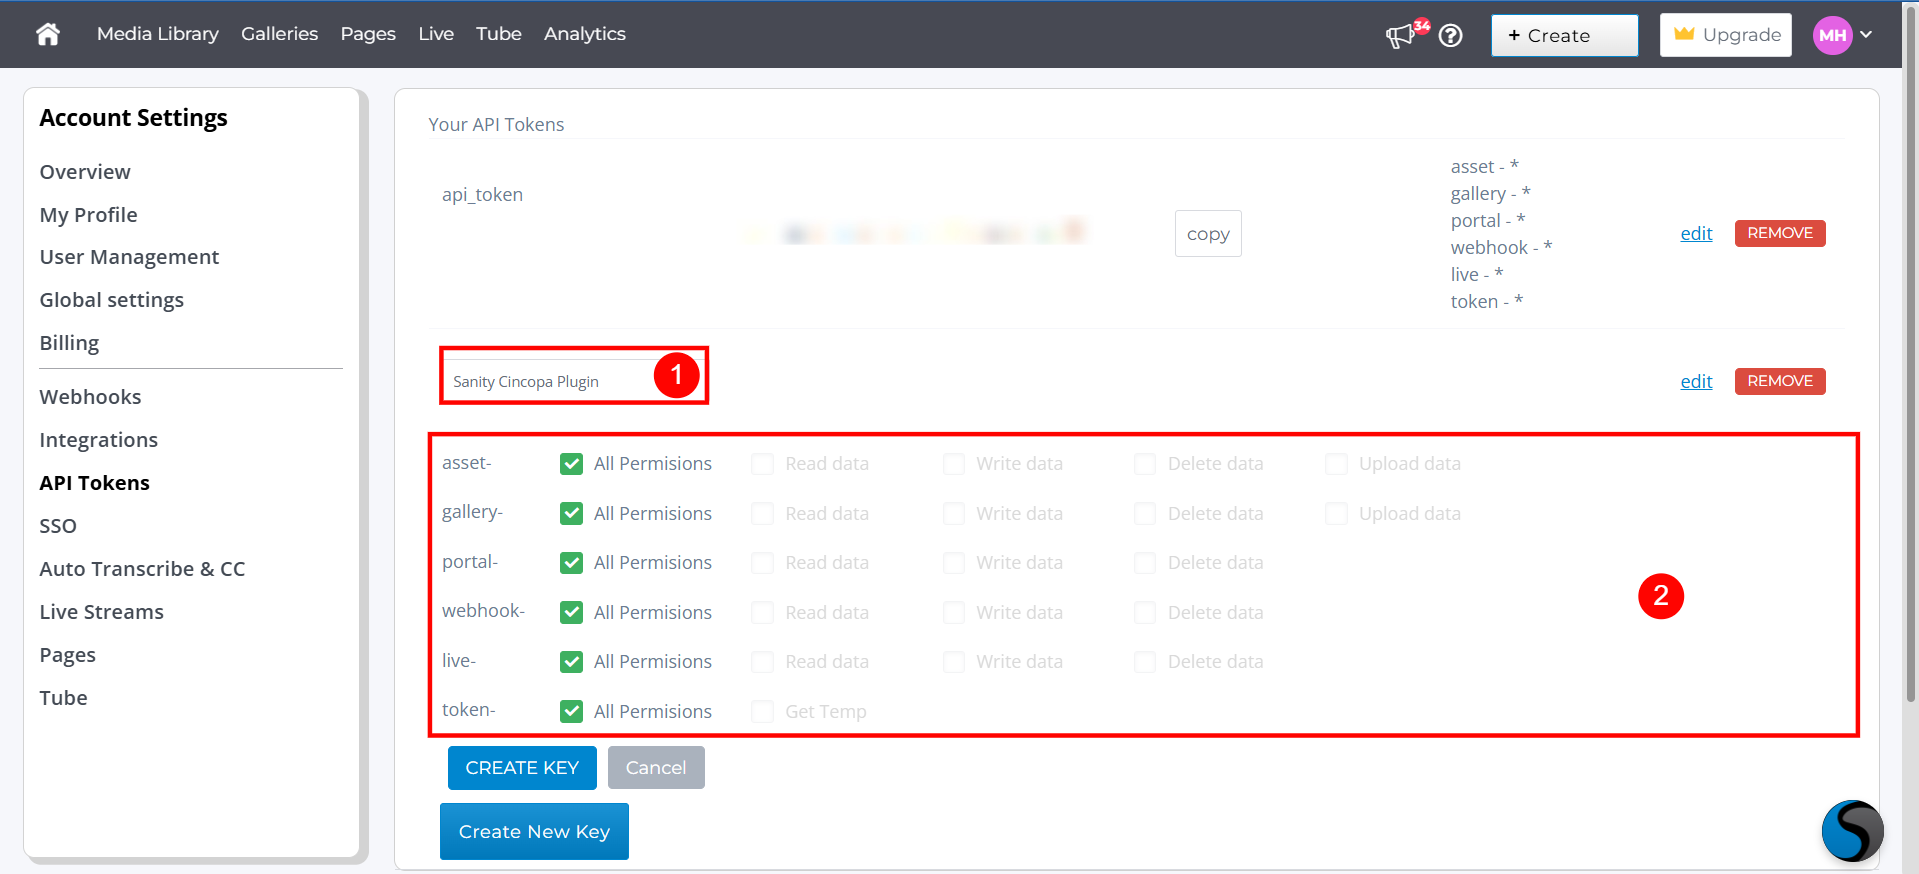
Step 4. After granting the necessary permissions, click the "Create Key" button.
Step 5. Copy these credentials for use in the Sanity configuration.